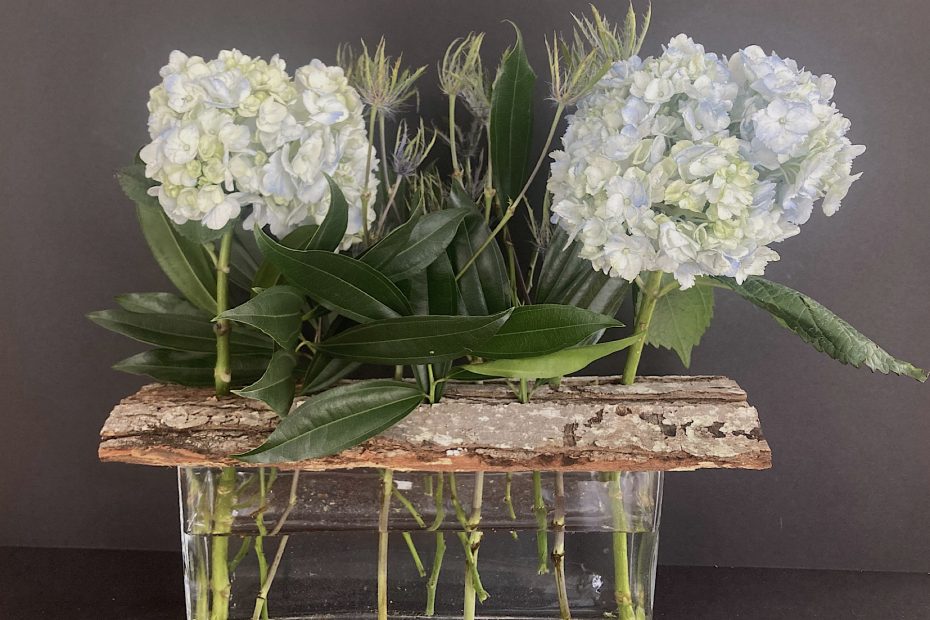
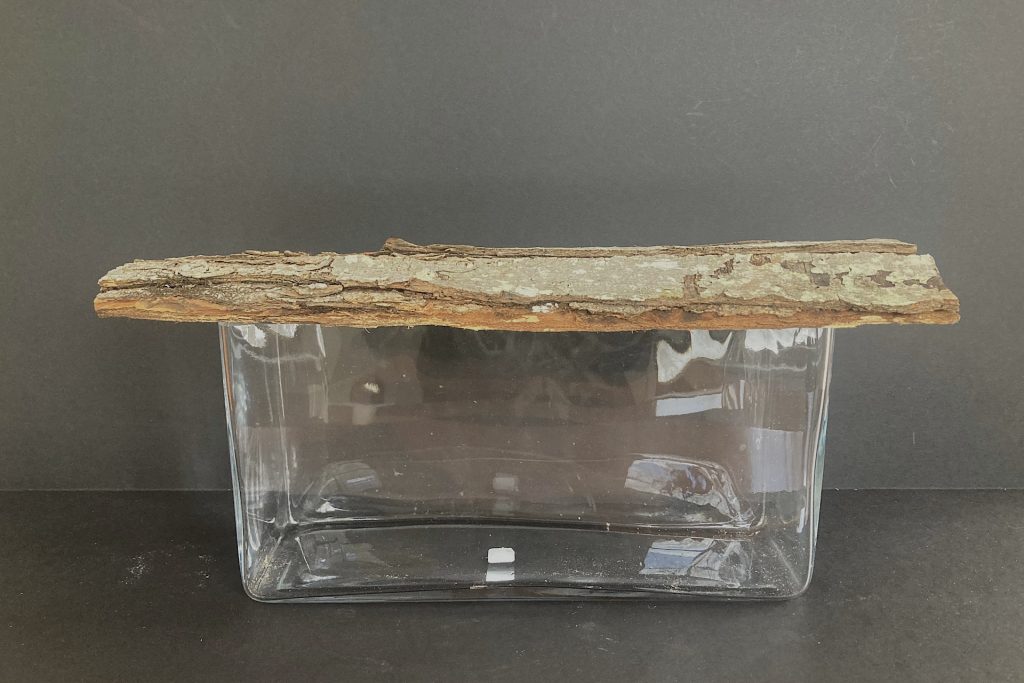
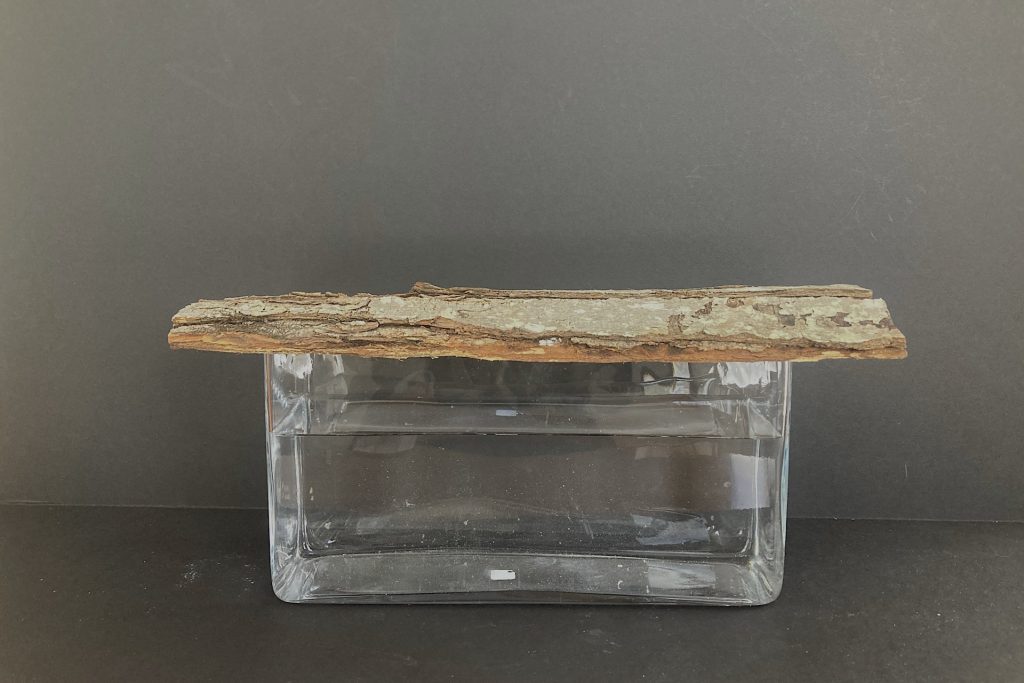
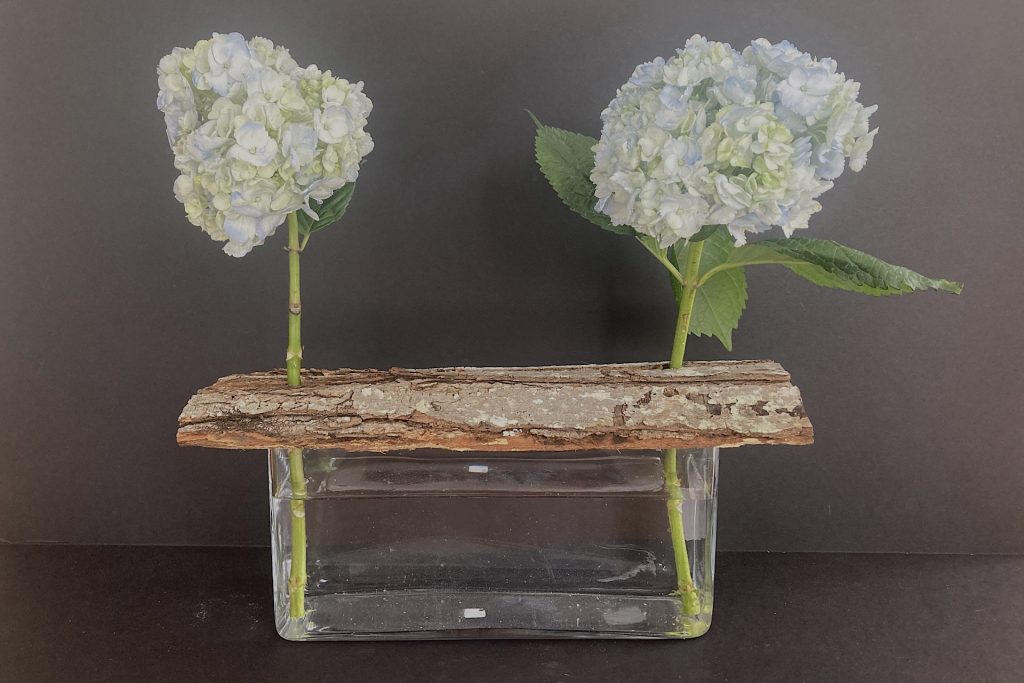
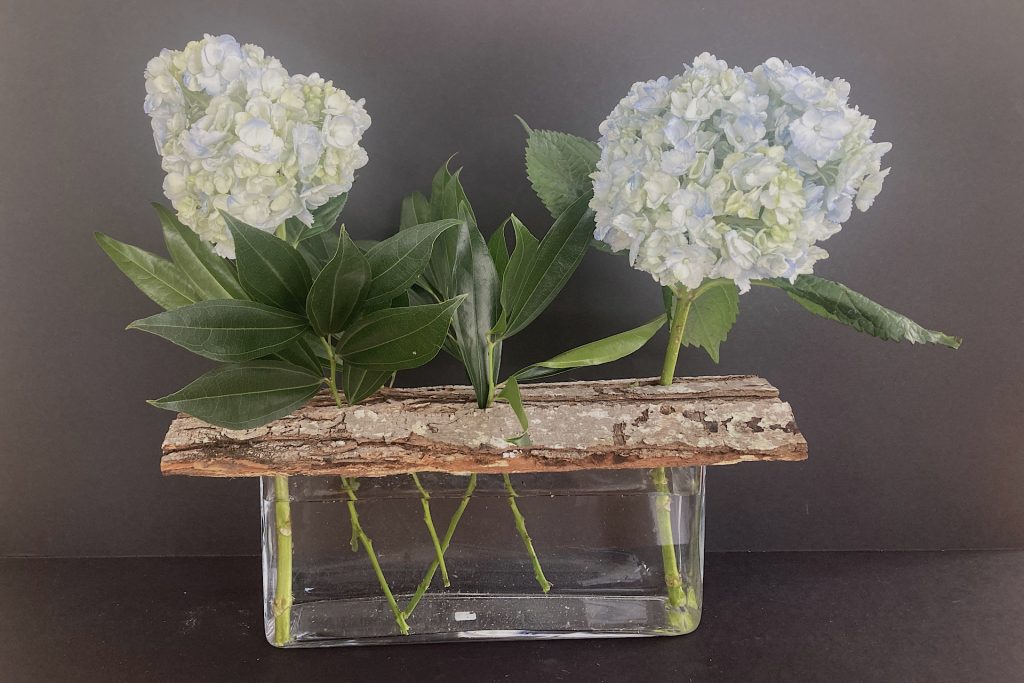
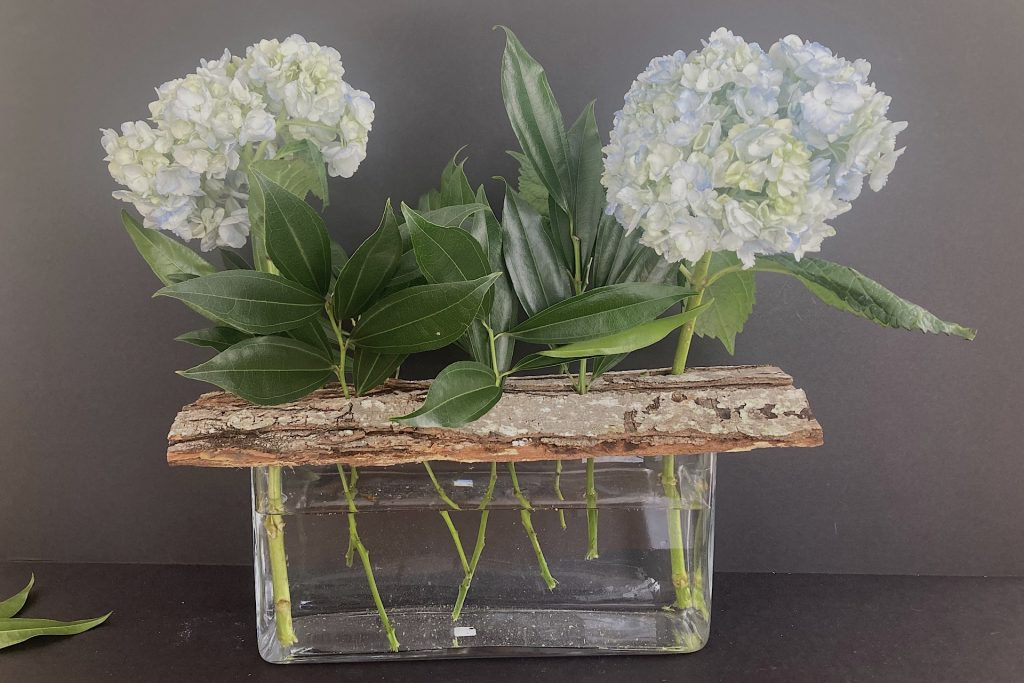
There’s something magical about bringing natural textures indoors, and this week’s flora project is a woodland floral arrangement inspired by organic materials and soft color harmony. I used a glass rectangular vase I’ve loved for years — its clean shape always lends itself to creative home decor accents. This time, I filled the vase with water and topped it with a large piece of bark from one of our fireplace logs. After drilling various sized holes into the bark, I placed fresh flower stems through the openings so they could draw water from below while their leaves and blooms rise gently above the surface. Using blue and lavender flowers with deep greenery, the finished design feels unique, organic, and quietly reminiscent of the forest floor.
What You’ll Need to Create This Woodland Design
Here are the supplies I used for this woodland floral arrangement:
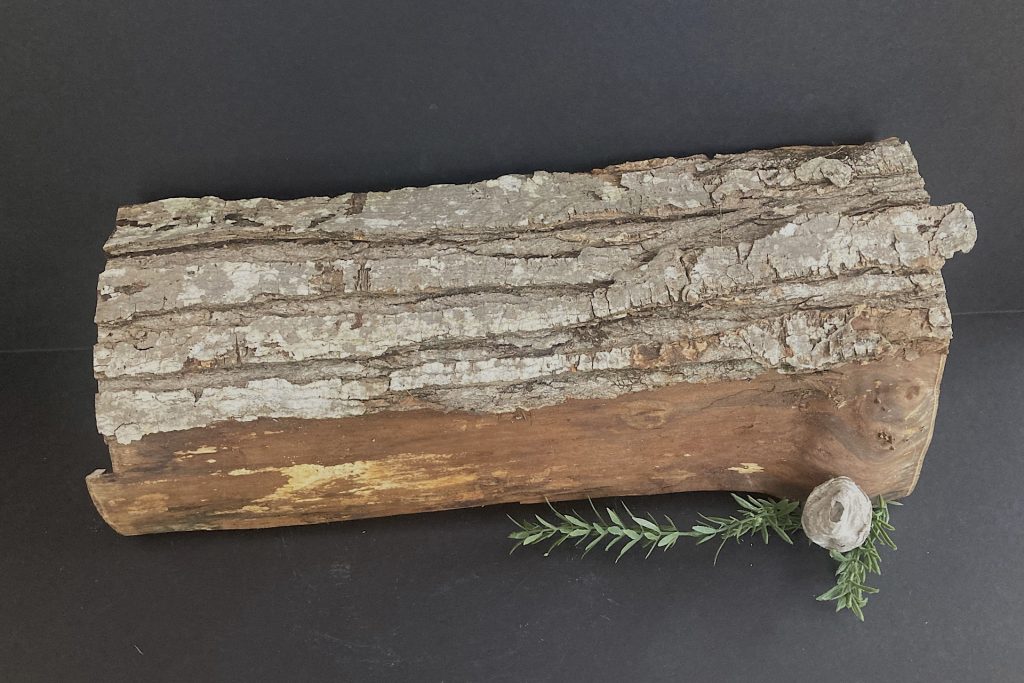
A fireplace log with a removable sheet of bark
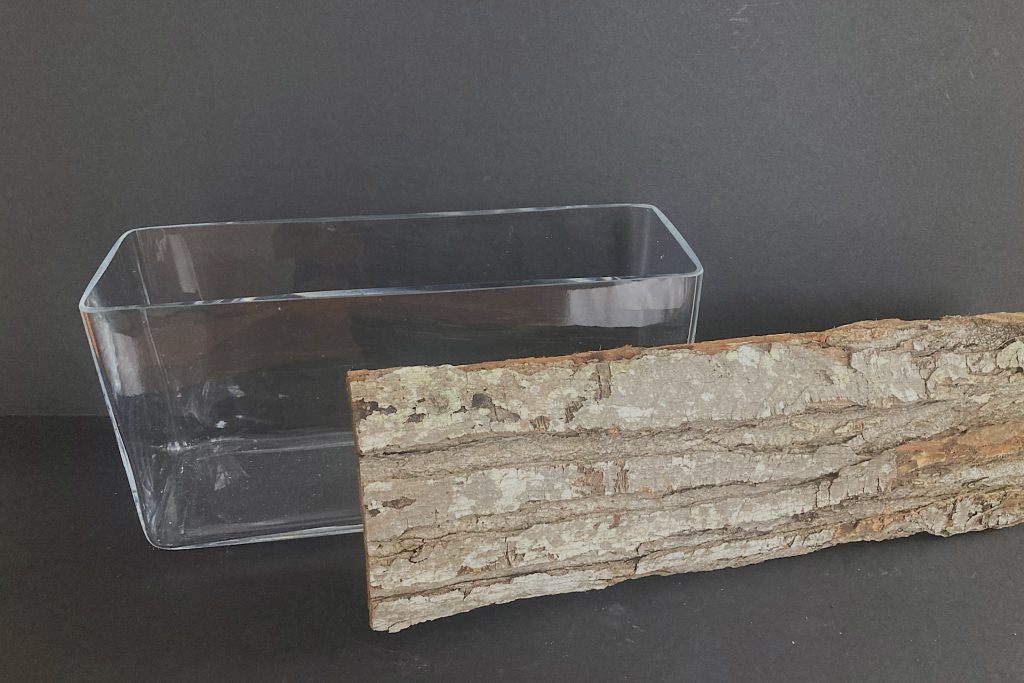
A rectangular glass vase
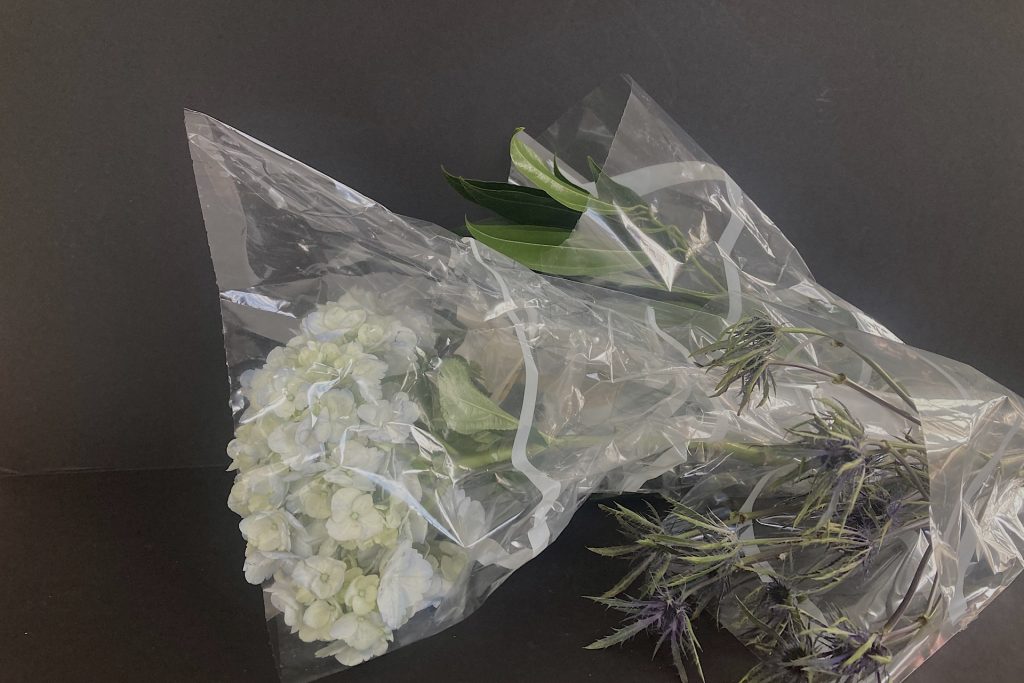
Fresh flowers and greenery from a local grocer
Putty knife and hammer to remove the bark
Hand-held drill
Drill bits in various sizes
Scissors or garden shears
Water for the vase
A few helpful notes:
I chose flowers in blue and lavender tones for a soft woodland feel, but this design welcomes creativity. Different colors and textures will completely change the mood. While shopping, I even noticed beautiful berries that would look stunning in a woodland floral arrangement. Enjoy making your own composition.
Once you select your flowers, match the stem thickness to the drill bit size. This will help the stems sit securely in the bark.
When choosing a log, be sure the bark piece will fully cover the opening of your vase.
Preparing the Bark for Your Woodland Floral Arrangement
Select a log that has bark cover wide enough and long enough to cover the opening of your glass container. Allow a small amount of overlap on each side for stability.
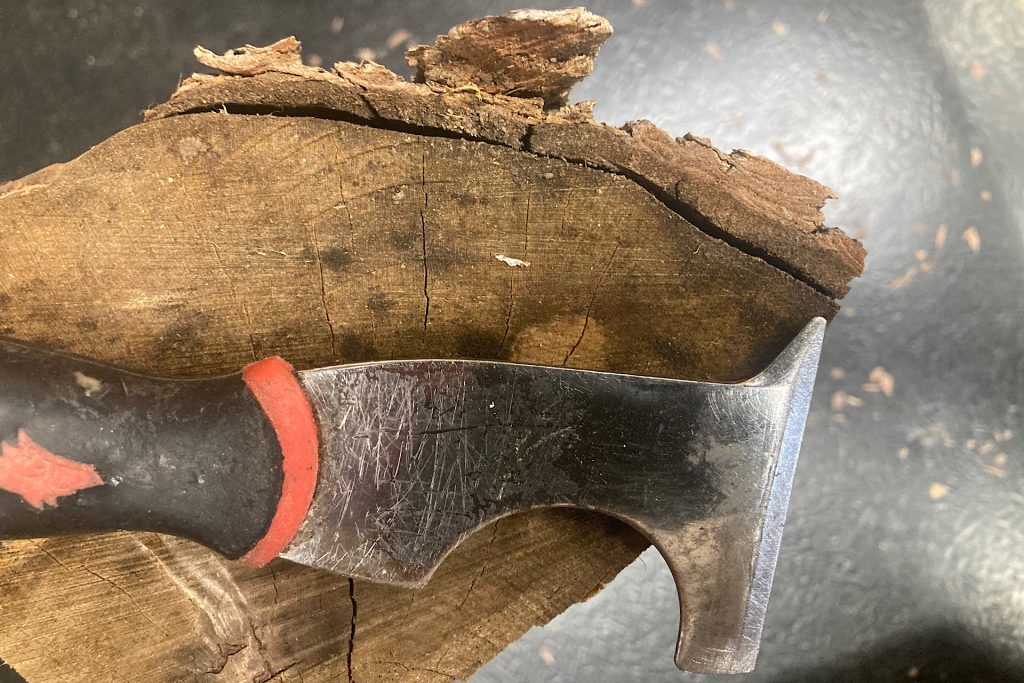
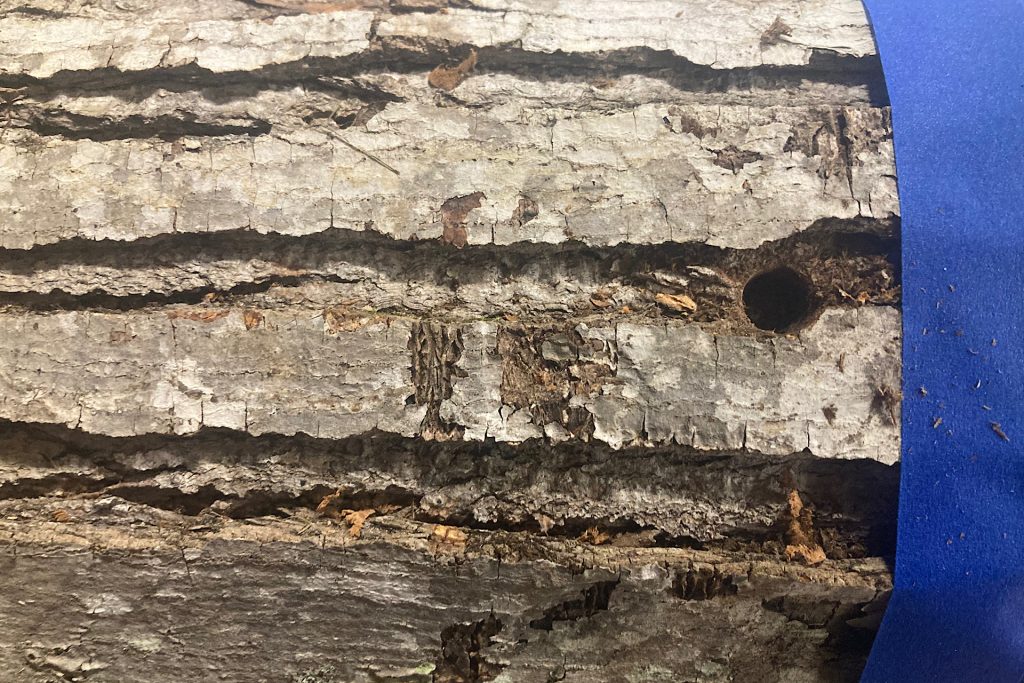
Choose a dry fireplace log. Look for a visible crevice where the bark begins to separate from the wood at each end. This natural separation makes removal easier.
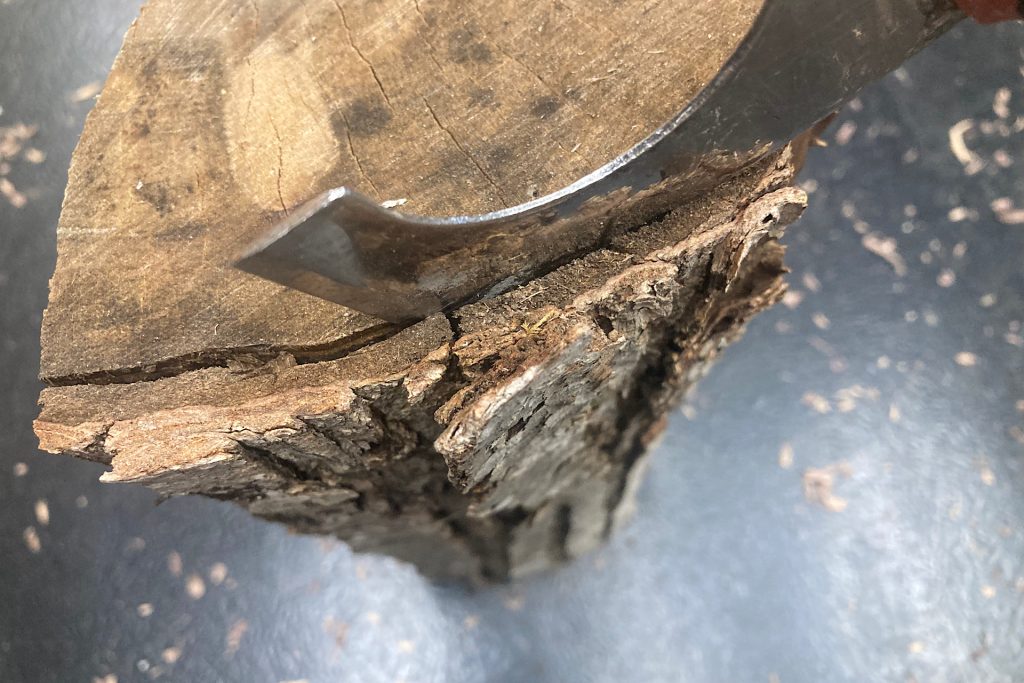
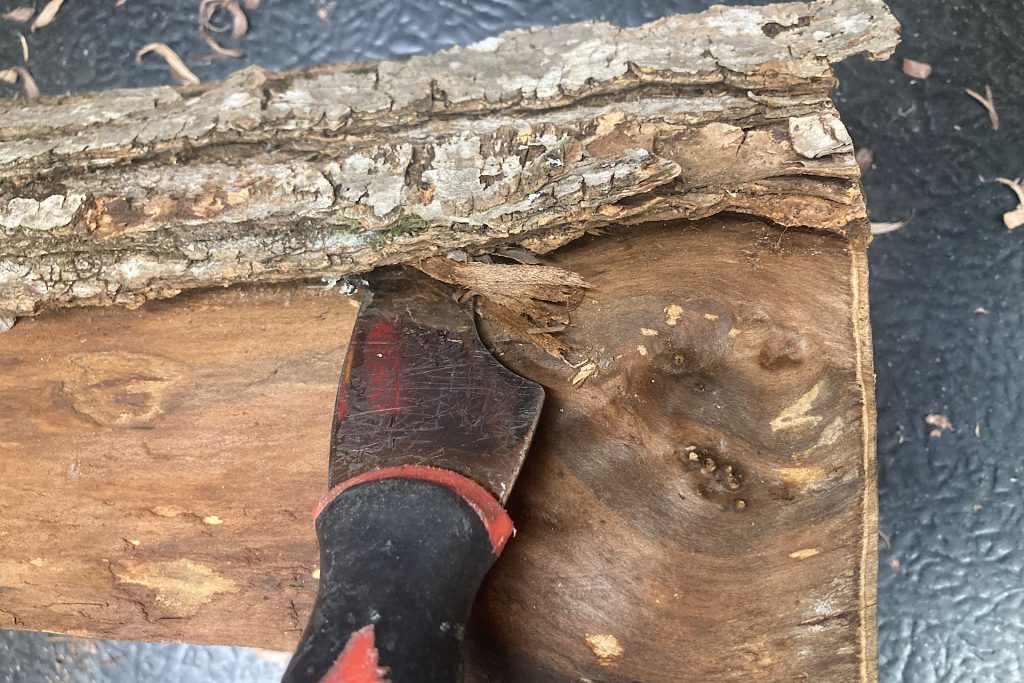
Place a flat chisel into this crevice. Tap it gently with a hammer. Work slowly so the bark lifts without cracking.
Continue along the length of the log. Slide the chisel underneath the bark and tap lightly as you go. The bark usually releases with little effort.
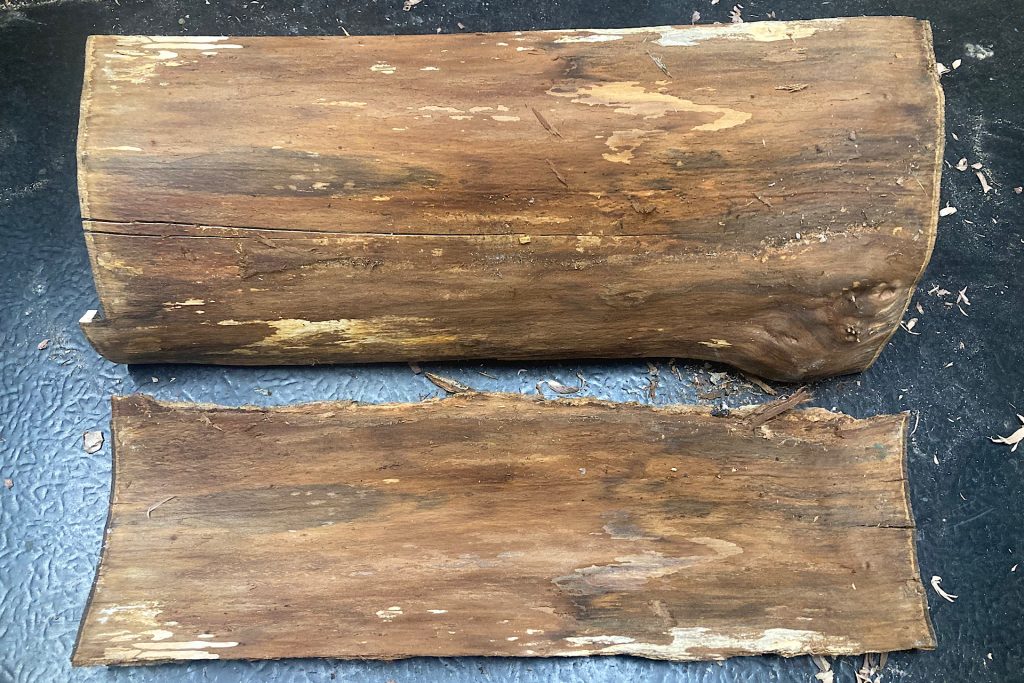
Set the bark aside for your arrangement.
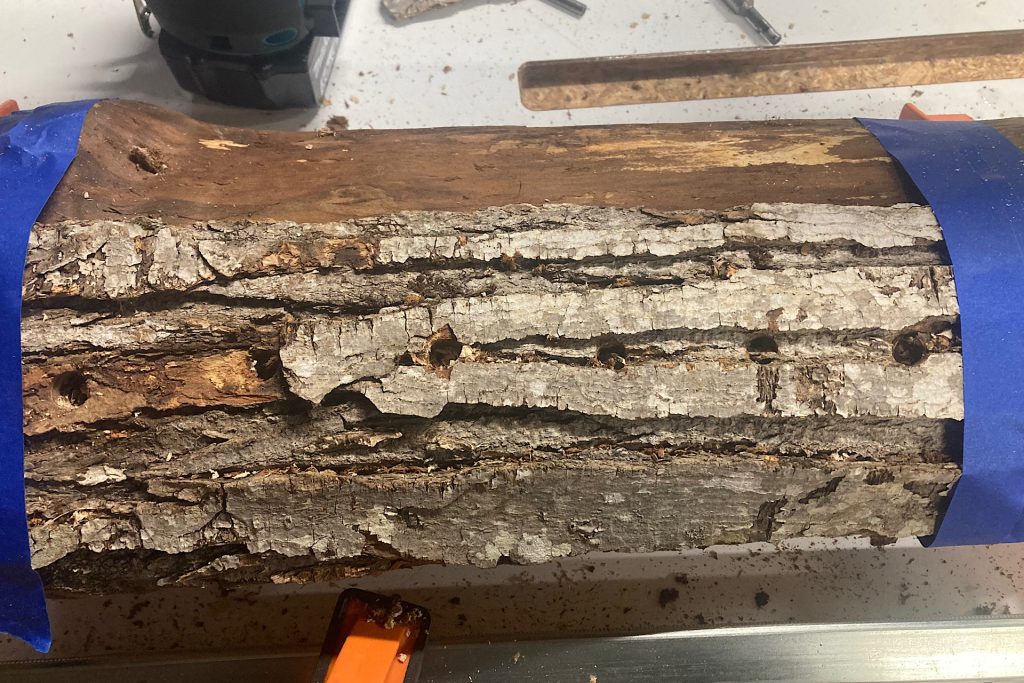
Positioning and Marking the Bark
Place the bark across the top of your glass vase. Check for a slight overlap on each edge. This overlap helps keep the bark stable and balanced.
Do not worry about the natural curve of the bark. With proper overlap, the arc will rest securely on the rim of the vase.
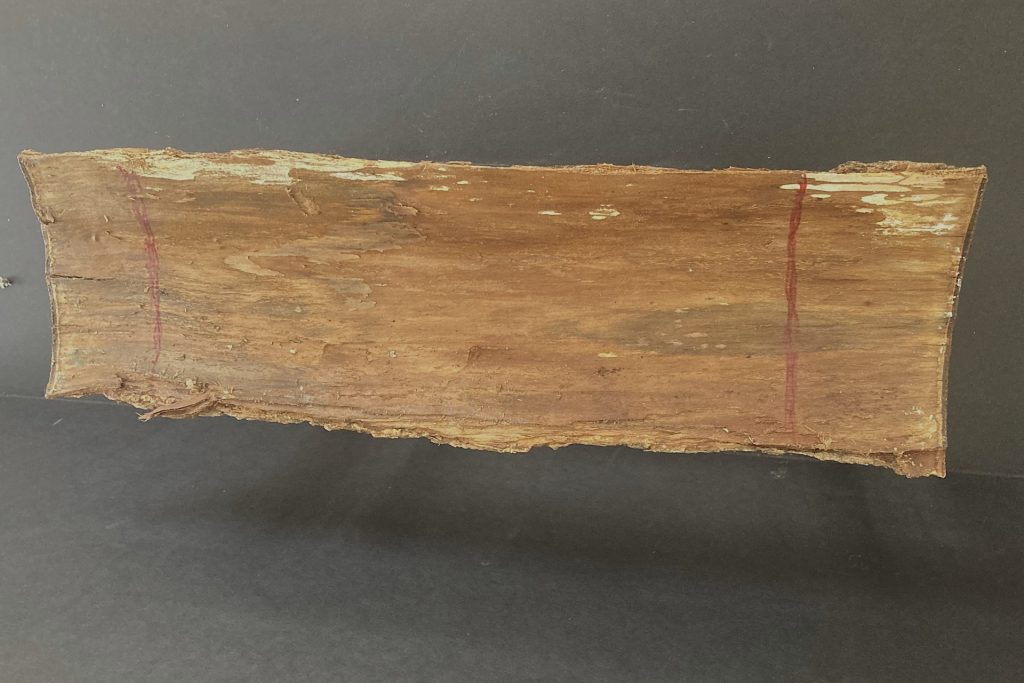
Once the fit looks right, mark your work area. Draw a line on the underside of the bark at each end of the vase opening. These lines show where the inside of the vase ends. They help ensure your flower stems sit directly over the water.
I used a red marker, but any tool will work. A crayon, chalk, or pencil is fine. The markings will not be visible once the arrangement is complete.
Setting Up a Stable Drilling Surface
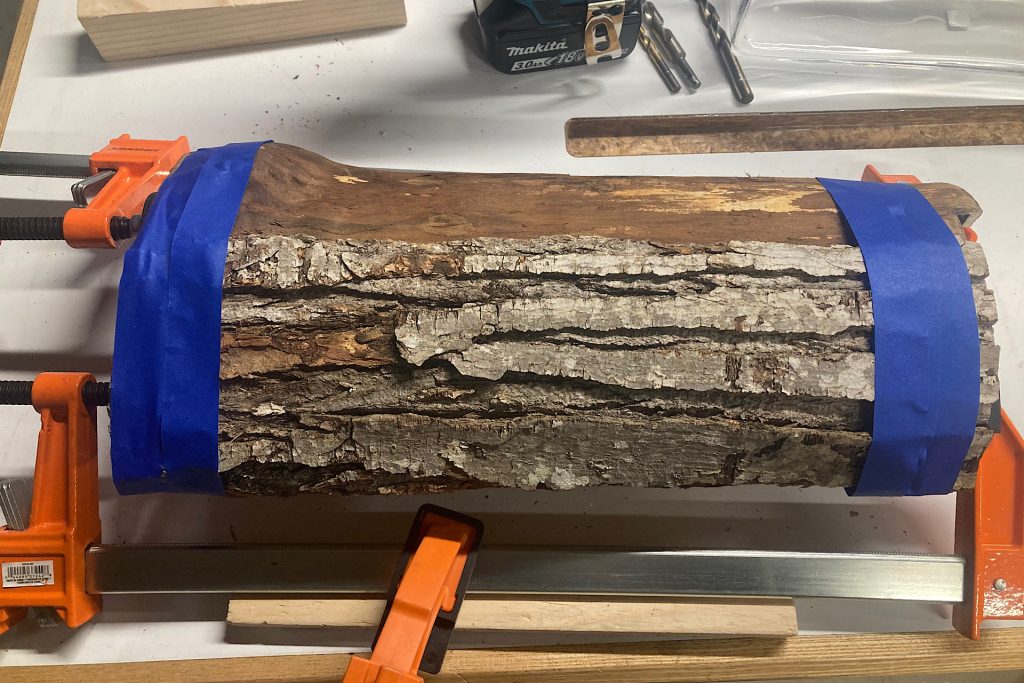
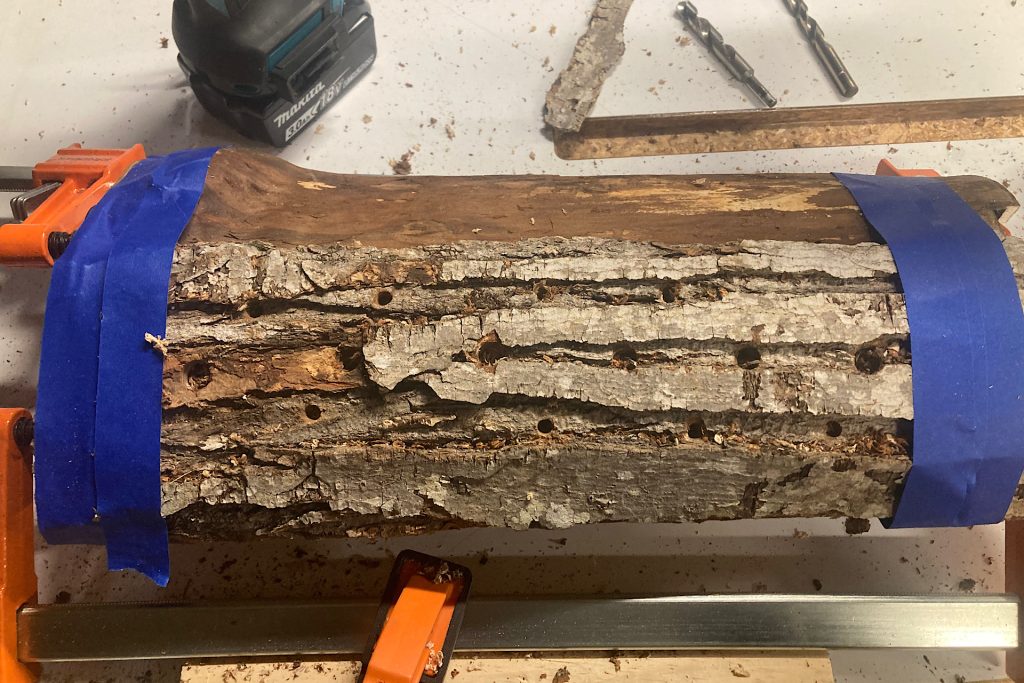
Now it is time to prepare the bark for drilling your flower stems. Apply blue painter’s tape across the top surface of the bark. Position the tape to align with the guide lines you marked on the underside. This step clearly defines your work area. It also removes cleanly when finished.
Support is essential at this stage. Lay the bark back onto the fireplace log so the full length rests evenly on the wood beneath it. This support helps prevent splitting.
Secure the log so it cannot roll or shift. Clamps or adjustable vices work well for this step. I fastened mine to a work table in the basement for stability and control.
With the bark supported and your work area marked, you are ready to begin drilling for your woodland floral arrangement.
Drilling Holes for Your Flower Stems
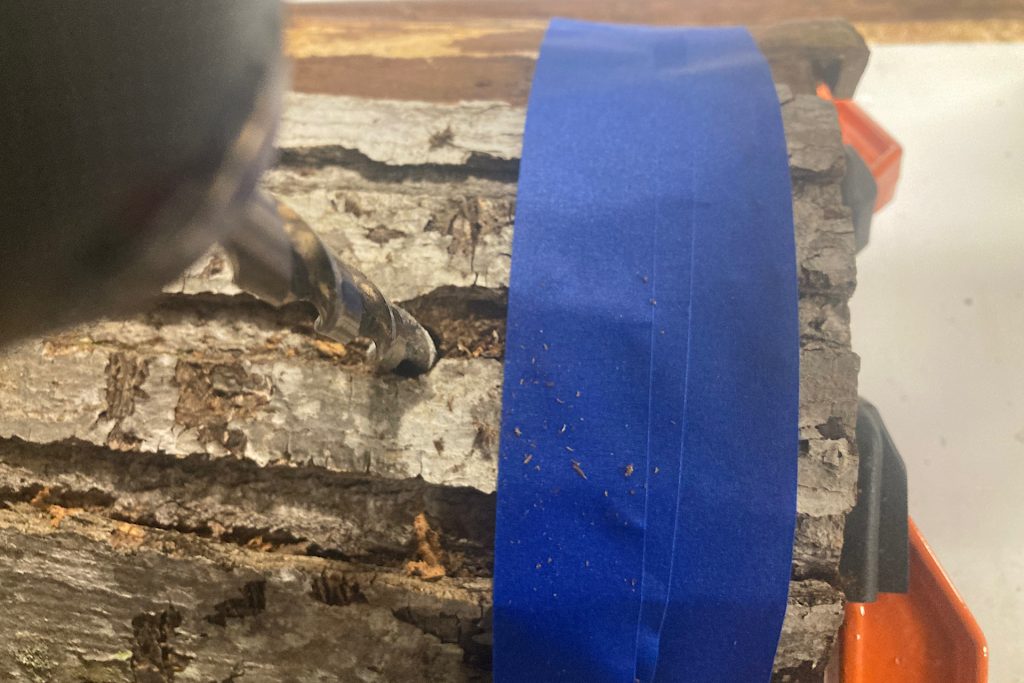
Before drilling, compare your drill bits to the flower stems you selected. Choose bits that are slightly larger than the stem width. Holes that are too tight can damage stems. Holes that are too large may cause drooping blooms.
I worked with three different stem sizes and selected three matching drill bits. If you are unsure, test a hole on a scrap piece of wood first. This helps you find the right fit before drilling the bark.
Now comes the design stage. Consider how many flowers you plan to use and where you want them placed. I positioned holes for my two largest blooms at each end of the bark.
Next, I drilled 3 holes between my large bloom spaces to accommodate my lavender flower stems. Lastly, to add texture and flow, I created a soft zig-zag pattern for greenery across the length of the bark. You can follow a pattern or create your own arrangement. Just remain within your marked area and avoid drilling too close to the edges.
Once all the holes are drilled, carefully remove the clamps and lift the bark from the log. Peel away the painter’s tape to reveal your new work surface. The bark is now ready for arranging. The log can be returned to the fireplace pile.
This is where your design truly takes shape, so enjoy the process and make it your own.
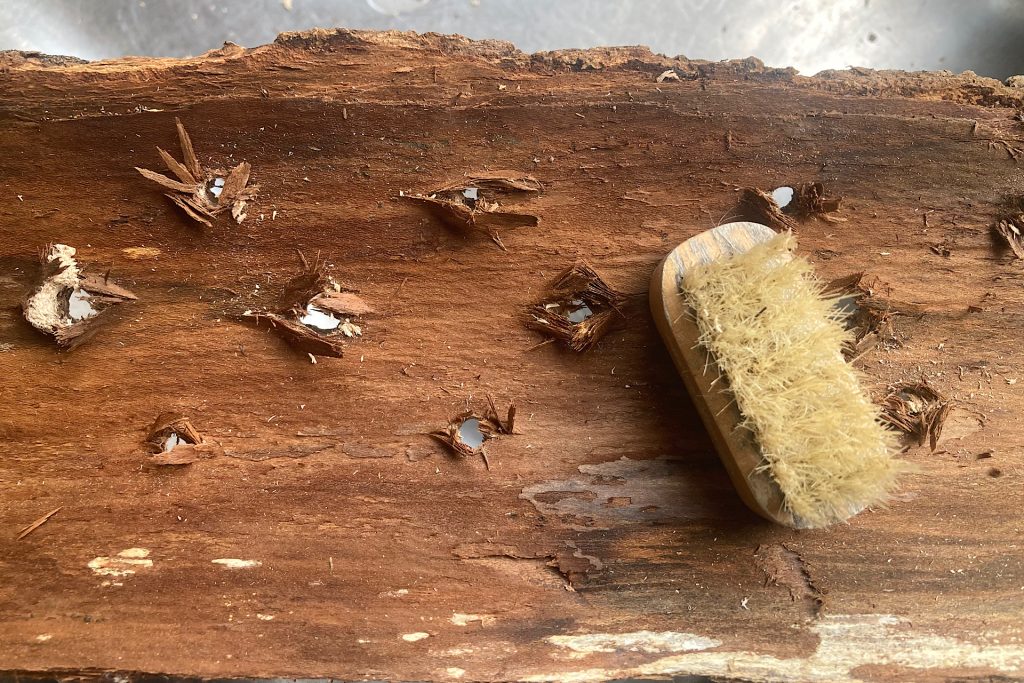
Cleaning the Bark Before Arranging
After drilling, you may notice more sawdust than expected. Fine particles will collect on the surface and inside each hole. If left in place, this debris can fall into the vase and cloud the water in your woodland floral arrangement.
Take a few minutes to clean the bark thoroughly. Blow gently through each drilled hole to loosen trapped dust. Then use a soft brush to whisk away any remaining particles from the surface.
This simple step keeps your water clear and your finished arrangement looking fresh and polished.
Bringing Your Woodland Floral Arrangement to Life
This is the moment when your design begins to take shape. Begin by filling your glass vase with water to a level that looks balanced and pleasing to the eye. Place the cleaned bark securely on top.
Decide on your desired flower height. I wanted my blooms to sit at a uniform level for a structured look. Start by cutting one stem slightly longer than you think you need. Hold it in front of the vase to check the height. Trim gradually until you are satisfied.
When trimming, if you cut two stems at a time, you’ll always have one left to measure against as you place one into the vase. Working one step ahead helps maintain even proportions across the design.
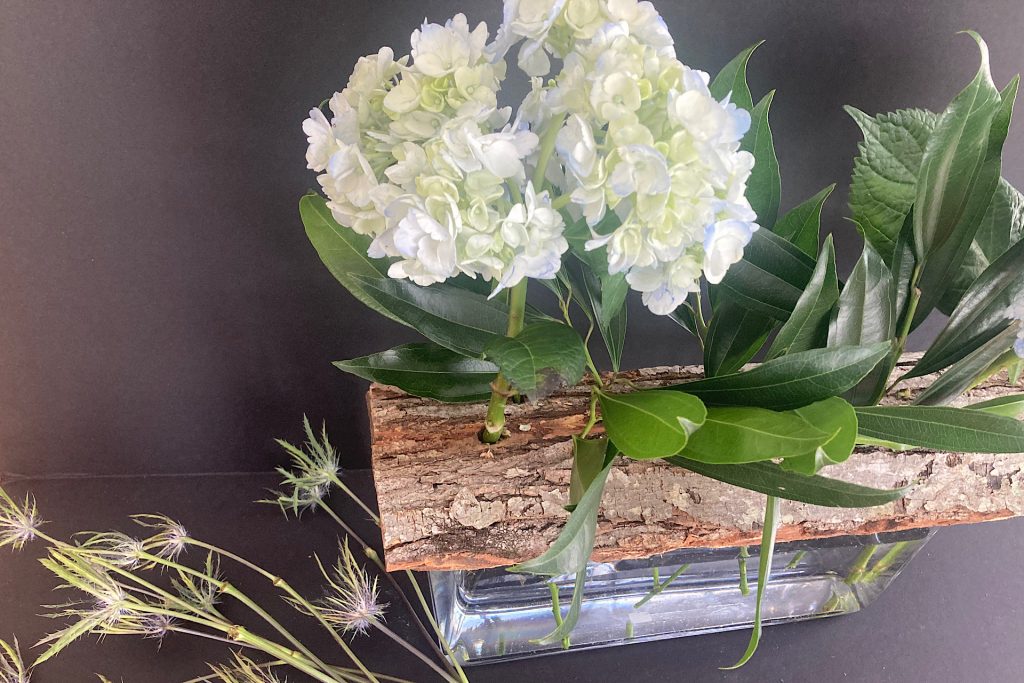
I began with my largest hydrangea blooms. I positioned one at each end of the bark for balance.
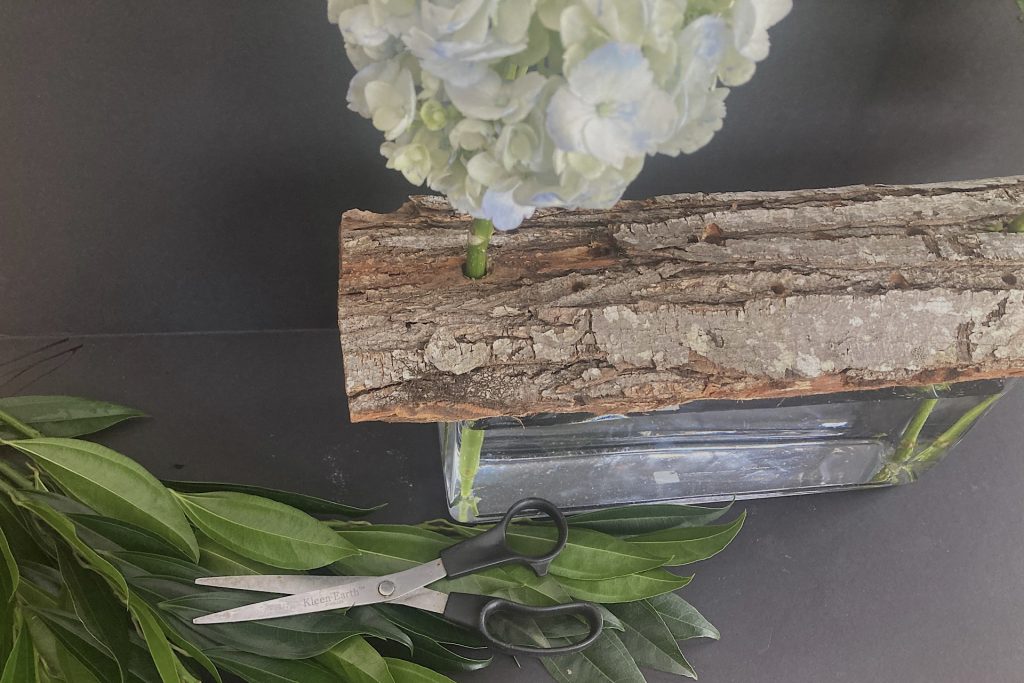
Now it’s time to add the greenery. At this early stage, the flower stems and foliage may shift slightly within the drilled holes. Do not worry. As more flowers and greens are added, the arrangement will begin to support itself.
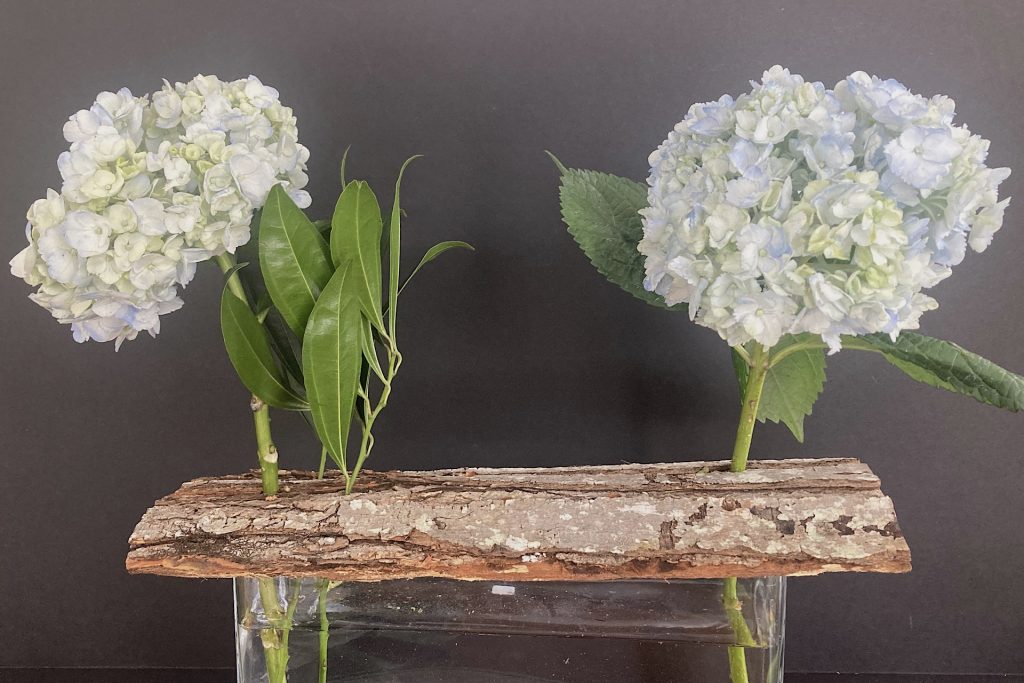
Trim away the lower leaves before inserting each stem. This will help the greenery pass smoothly through the bark and keeps the area beneath it clean and uncluttered. I kept all foliage above the bark to enhance that “forest floor” feel.
The greenery is what gives the design its fullness. It softens the structure and adds depth, creating a lush and layered appearance.
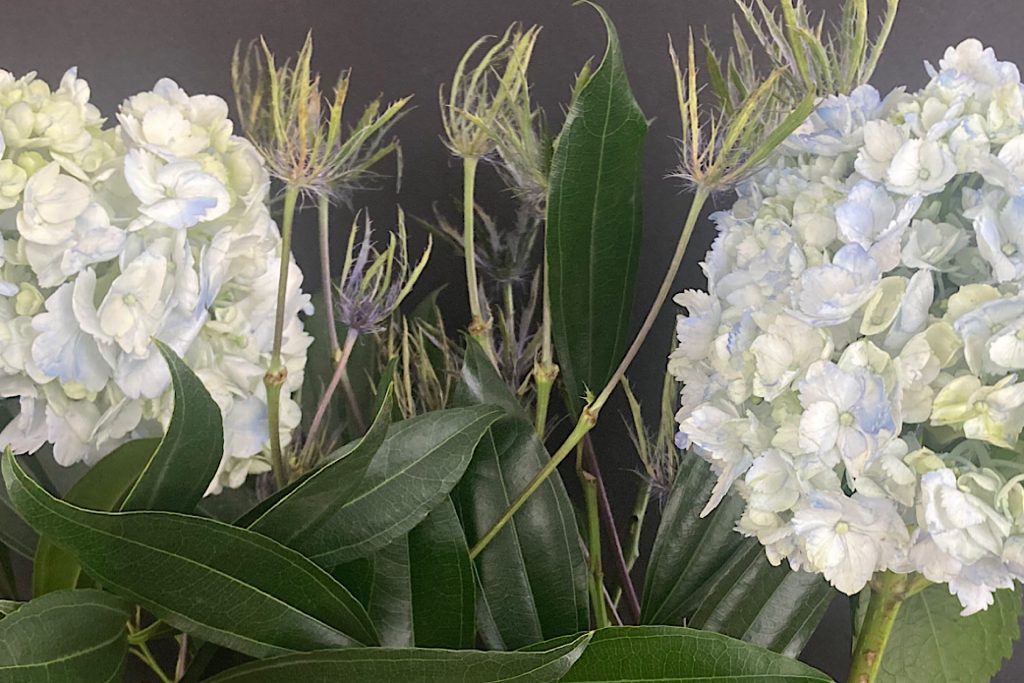
For the finishing touch, I inserted my accent flowers. My plant ID app identified them as Queen of the Alps, and their light lavender, spiky blossoms felt perfect for this woodland floral arrangement.
I had three stems in total. I placed them into the remaining drilled holes, allowing their texture to rise just above the greenery. They added height, variation, and a touch of wild character.
With those final stems in place, the arrangement felt balanced and complete.
Introducing the Woodland Feel Into Your Home
There is something special about a woodland floral arrangement. The layers of bark, blooms, and greenery bring a quiet forest presence indoors. Texture adds richness. Color adds personality. Together, they create a centerpiece that feels meaningful rather than manufactured.
Your interpretation may look entirely different from mine. You might choose softer neutrals, deeper jewel tones, or unexpected seasonal accents. That freedom is what makes this DIY floral arrangement so personal and rewarding.
If you decide to create your own version, I would be delighted to see it. Tag, share, or leave a note so we can celebrate your woodland-inspired design together.
More Flora Inspiration to Explore
If you enjoyed creating this woodland floral arrangement, you may also find inspiration in these other Flora projects. Each one celebrates seasonal beauty, creativity, and the simple joy of working with plants at home. Whether you are arranging fresh blooms, planning your garden, or brightening a winter day, there is always something new to grow.
I hope these ideas spark new inspiration for your home and garden. There is always room for another bloom, another project, and another moment to celebrate Flora.