This simple horse hair keepsake art project is proof that meaningful art doesn’t have to be complicated. Using a very minimal line drawing and a small piece of your horse’s tail hair, you can create a heartfelt equine keepsake — no formal art training required. The process is intentionally uncomplicated and perfect for a single afternoon or evening, making it accessible to anyone who loves horses and quiet, thoughtful projects. This piece can serve as a gentle memorial for an equine partner who has passed or as a tribute to one still sharing your days. In fact, gathering hair clippings during happy, healthy moments allows the keepsake to carry positive associations, even when it later becomes a reminder of a bond that endures.
Supplies for This Simple Horse Hair Keepsake Art
This minimalist horse hair keepsake art project uses just a handful of simple supplies. You don’t need specialty tools or art training — just a few thoughtful materials and a quiet afternoon.
Drawing pencil
Quality paper suitable for framing (a medium-texture mixed media paper works beautifully)
Horse tail or mane hair (a small clipping is all that’s required)
Sharp scissors
Super glue
Box-style frame (a box-style frame works best to allow room for the small tail knot at the top; I used a 6″ x 8″ frame)
Before you begin, take a moment to handle the horse hair with care — it’s a small but meaningful part of the process. You may need to give it a gentle wash and let it dry.
Creating the Simple Horse Line Drawing
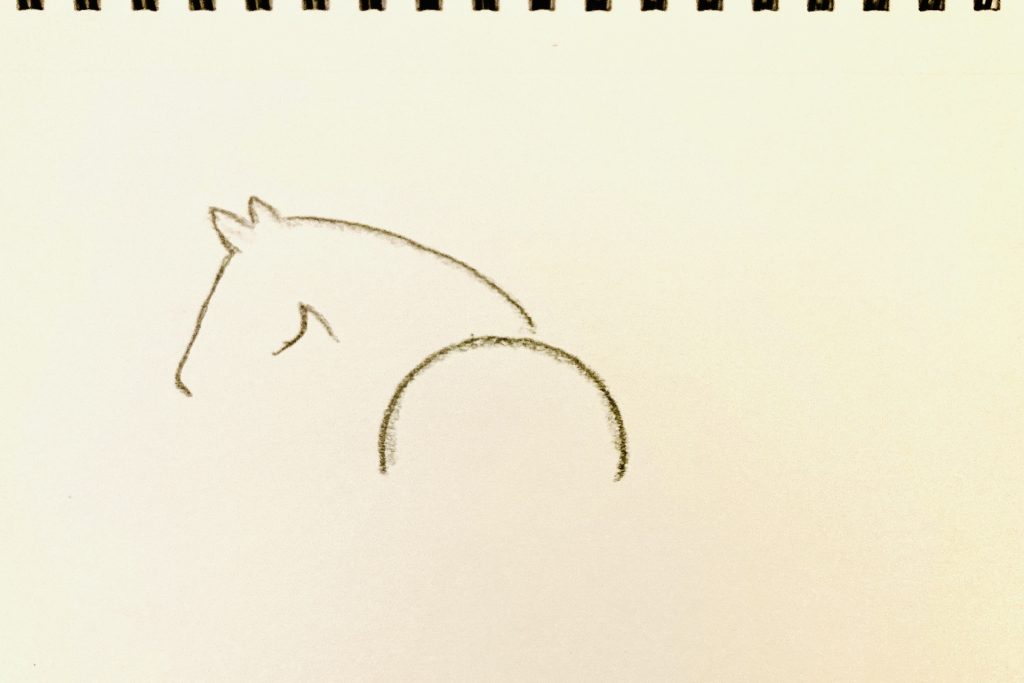
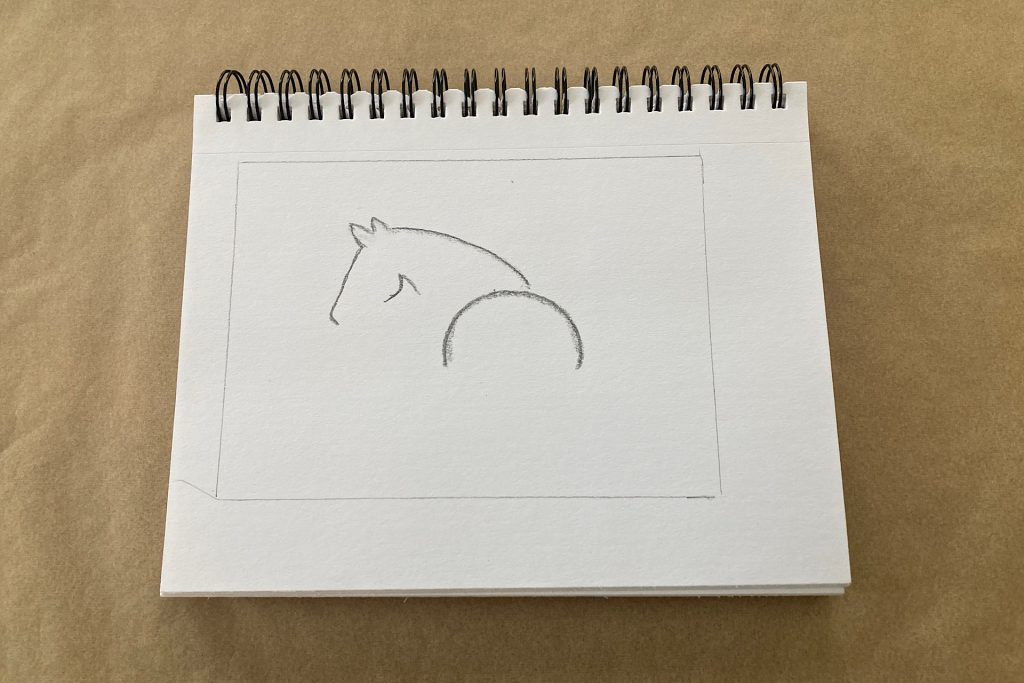
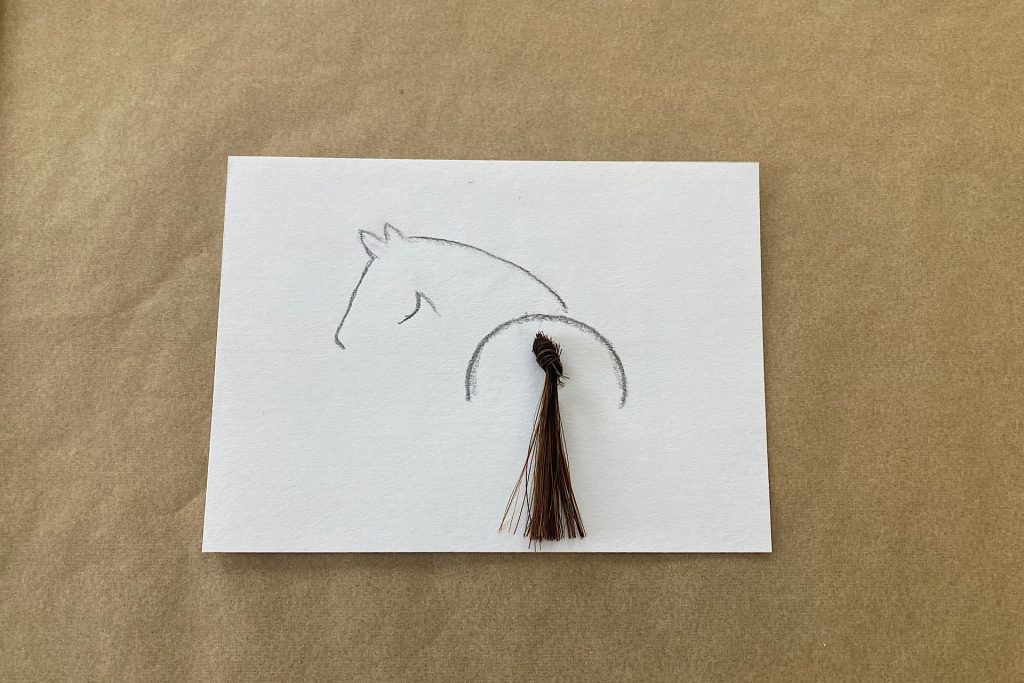
Before settling on the final drawing, I spent a little time practicing on scrap paper until the lines felt right. There’s no need to overcomplicate this step — in fact, the beauty of this horse hair keepsake art comes from its restraint. For the hind end of the horse, a simple arc is truly all you need to suggest shape and movement. I chose a softer pencil and held it at a slight angle, allowing the line to fall with a soft, slightly blurred edge rather than a sharp outline.
For the neck and face, feel free to experiment. You can sketch freely, or place paper over a drawing you admire and trace it for your own personal use. Since this piece is purely personal and not intended for sale, tracing is perfectly fine — you’re welcome to trace my drawing if it helps you feel more confident. I left the face unfinished and unfussy, relying on suggestion rather than detail. Just be mindful that soft pencil lines can smudge; a light touch with an eraser will tidy things up before moving on.
Prepping the Tail Hair for Your Horse Hair Keepsake Art
Now that your horse tail hair is clean and dry, it’s time to prep this meaningful element of your artwork. I reached out to my artist friend Jen Wyzykowski for tips on prepping as well as securing the tail to my paper — if you’d also like to get other art inspiration from Jen, you can visit her site at https://jenwyz.com/.
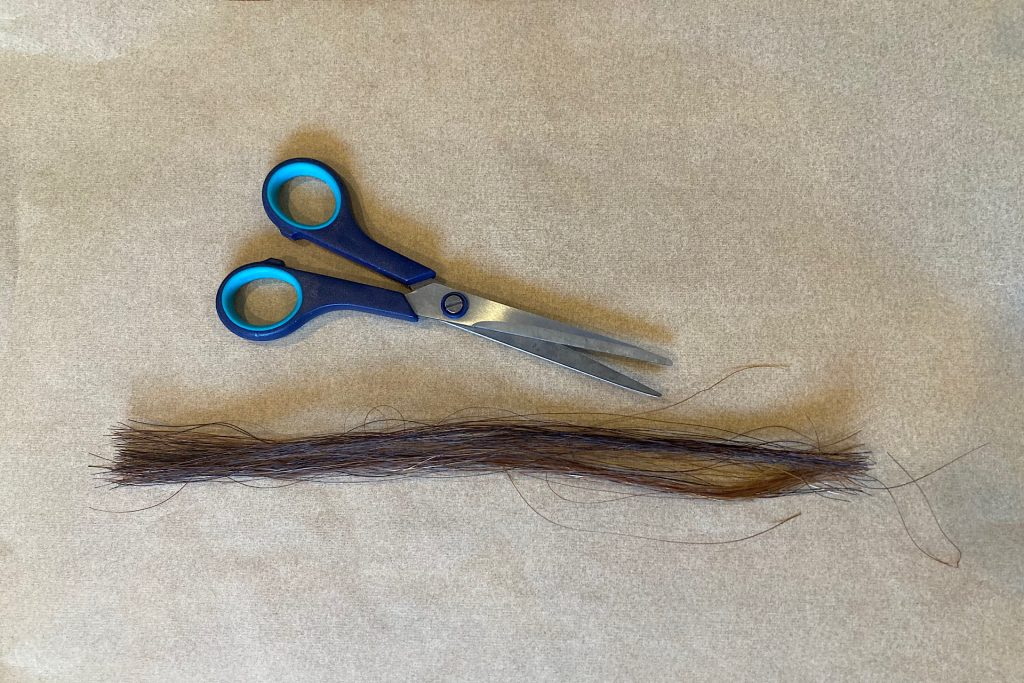
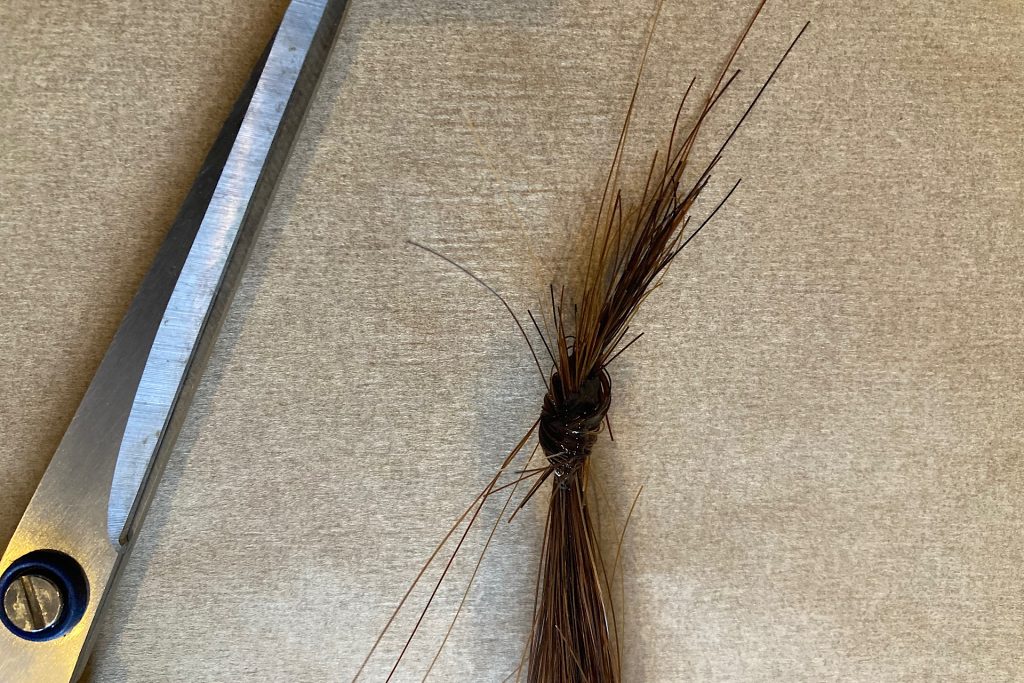
Begin by selecting a small bunch of tail hair with enough volume to look natural on my drawn horse. I cut it longer than I needed so I could tie a knot at the top and trim it to fit the frame later. Because horse tail hair is stiff, a single knot is often all that’s possible, so I looped it once and my husband added a couple of drops of super glue to secure it for me while I held it tight.
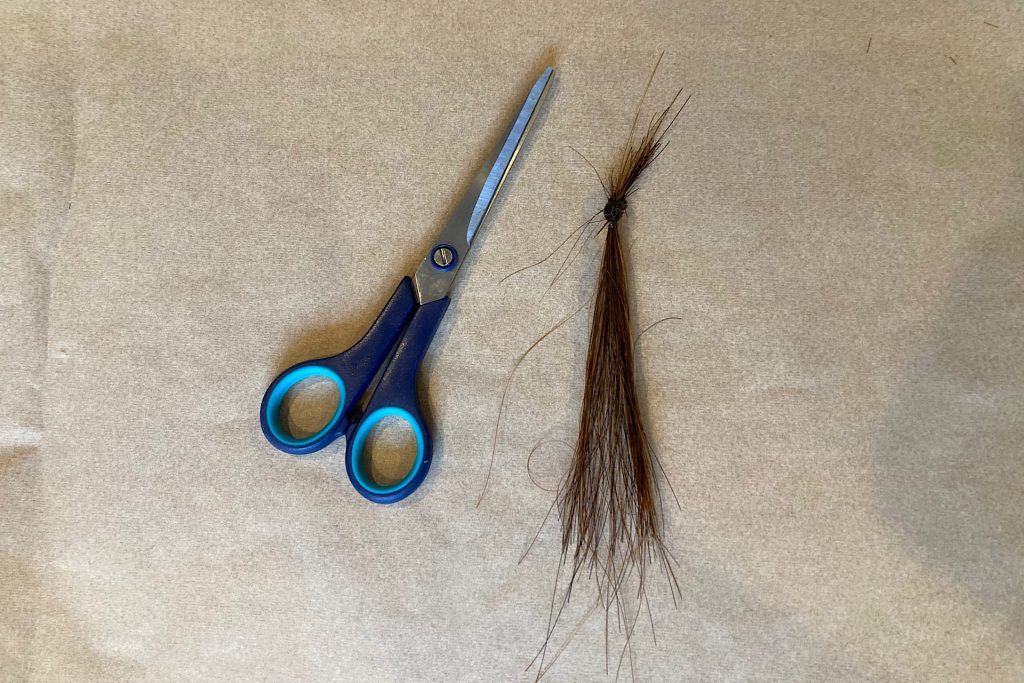
Let the glue dry before you handle it further. At this stage, the tail may look a little messy, with uneven ends or stray hairs — and that’s perfectly fine. You can set it aside while you prep the framework for the project
Fitting the Artwork to the Frame
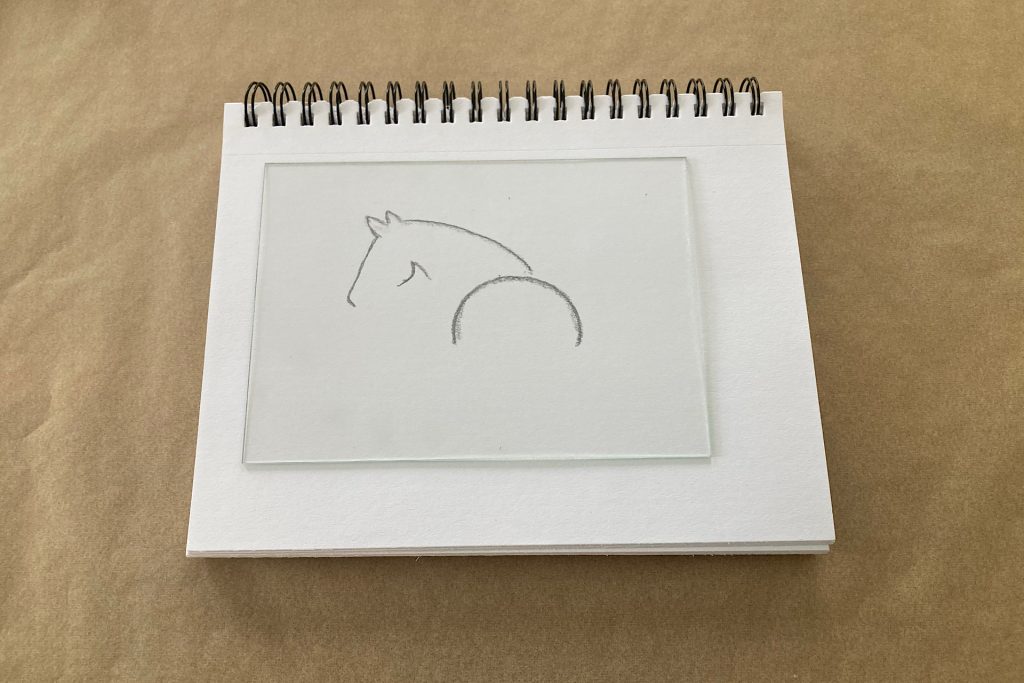
Before attaching the tail to the paper, it helps to size your artwork to the frame. I began by removing the glass from the frame and laying it directly on top of my horse line drawing. This allowed me to see the artwork within the frame’s dimensions and adjust it until it felt balanced. Once I was happy with the placement, I lightly traced around the edge of the glass with a pencil so I would be able to trim the paper to fit the frame nicely.
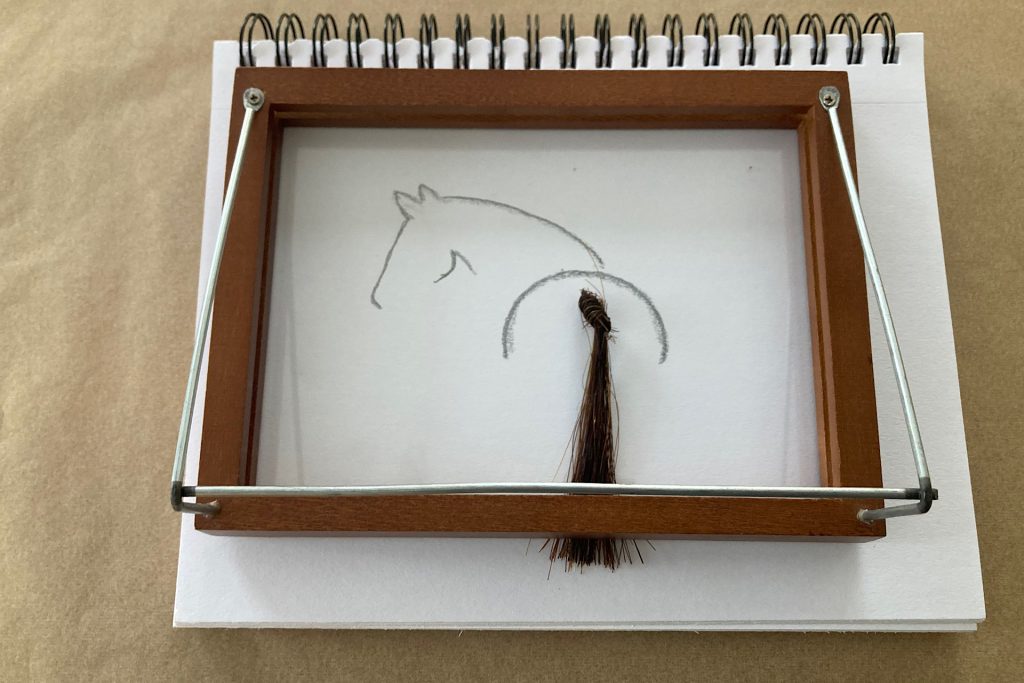
Next, I laid the empty frame upside down on top of the drawing to get a sense of tail placement and overall length. This step makes it easier to visualize how the horse hair will sit once framed. I trimmed the tail down to a more manageable length, but intentionally left a little extra so I could fine-tune it during the final framing. Taking a few moments here helps ensure the finished horse hair keepsake art feels thoughtful and well-proportioned once everything is assembled.
Attaching the Horse Tail Hair to the Drawing
Now that the glue is dry, and you have cut the line drawing for framing, it’s time to trim the top knot and tidy up any strays. Still keep the tail a little long for now so you can still adjust it to fit beautifully in your frame.
Begin by placing the tail onto your paper and gently move it until the placement feels right for your horse drawing. This step is intuitive, so trust your eye and take your time.
Once you’ve decided where the knot should land, use a small amount of super glue on the back of the knot and carefully press it onto the line drawing of your horse. Hold it in place for a moment to allow the glue to set. This simple act of attaching the tail transforms the minimalist drawing into a tactile equine keepsake, combining art and memory in a quiet, meaningful way.
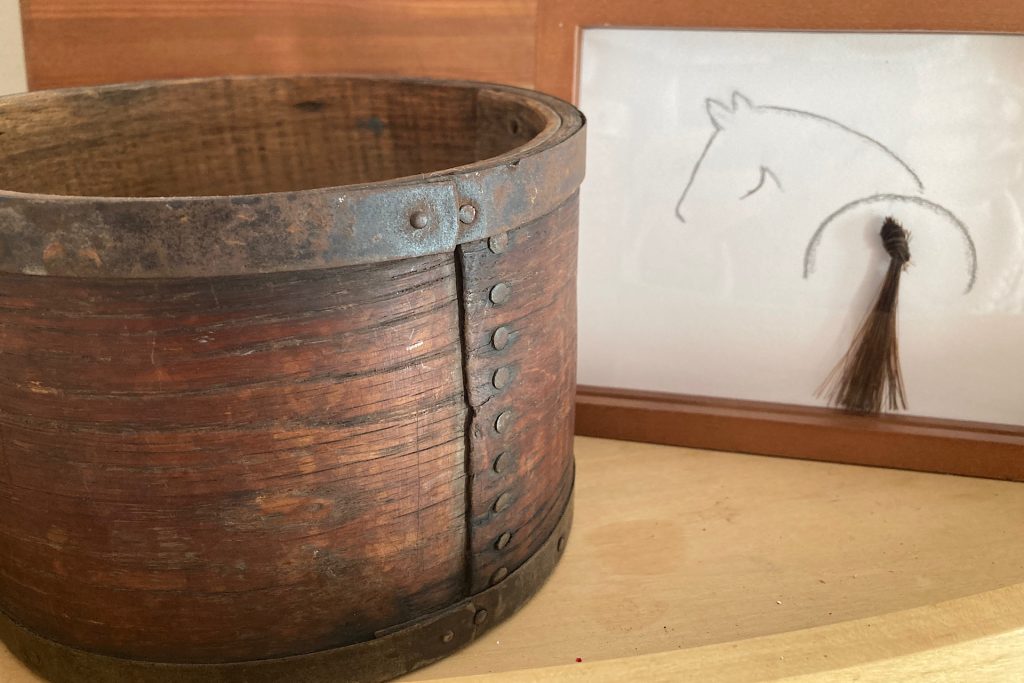
Framing Your Horse Hair Keepsake Art
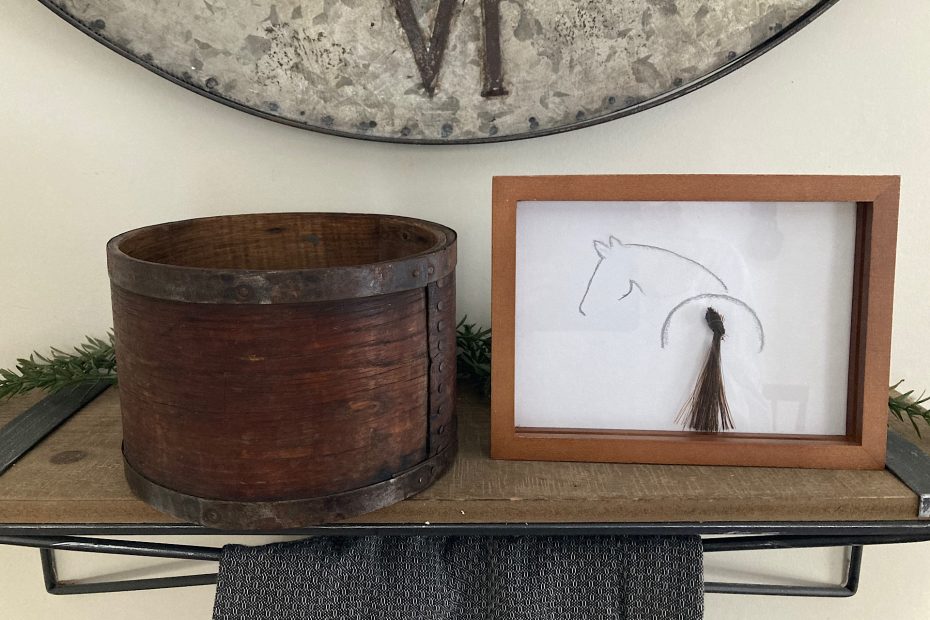
With the tail now attached, gently place the frame over your artwork once more and make any final adjustments to the tail length. This is where using a shallow box-style frame truly shines — it provides enough depth for the small tail knot to sit comfortably, while allowing the tail itself to hang naturally rather than being pressed flat.
Before closing up the frame, you may wish to pencil in your horse’s name or a meaningful date on the artwork. This quiet addition is entirely optional, but it can add a deeply personal touch. Once everything feels settled, frame the piece and step back to enjoy the finished horse hair keepsake art — a simple, thoughtful tribute that carries both memory and presence.
Share Your Horse Hair Keepsake & Explore More Favorites
If you decide to create your own horse hair keepsake art, I would truly love to see it. Each piece carries its own story, and it’s a beautiful way to honor the bond we share with our equine companions. Feel free to share your finished tribute — whether it commemorates a horse you’ve lost or celebrates one still by your side.
If you enjoyed this project, you may also like these other Fauna-focused posts here on Late Bloomer in Bakerville: