This is a relatively easy and fun DIY Coffee-Stained Terra Cotta project that transforms a newly purchased terra cotta pot into an earthy, organic vessel with an aged patina.
Choosing the Right Terra Cotta Pot For A Coffee-Stained Finish
In looking for intentional storage ideas for displaying firewood and cozy blankets, I decided I wanted to incorporate a couple of large vessels to contain our cold weather comfort gear. In seeking something substantial and large in stature, I browsed home stores, craft stores and garden centers. A modern pair of outdoor planters caught my eye at the garden center; but they were massive and overwhelming for the space I had in mind. Additionally, they could not be budged from where they sat (and I am used to hauling 50 lb. grain bags in the horse barn!) I felt even if they fit into my space, they’d drop through my family room floor and end up in the basement!
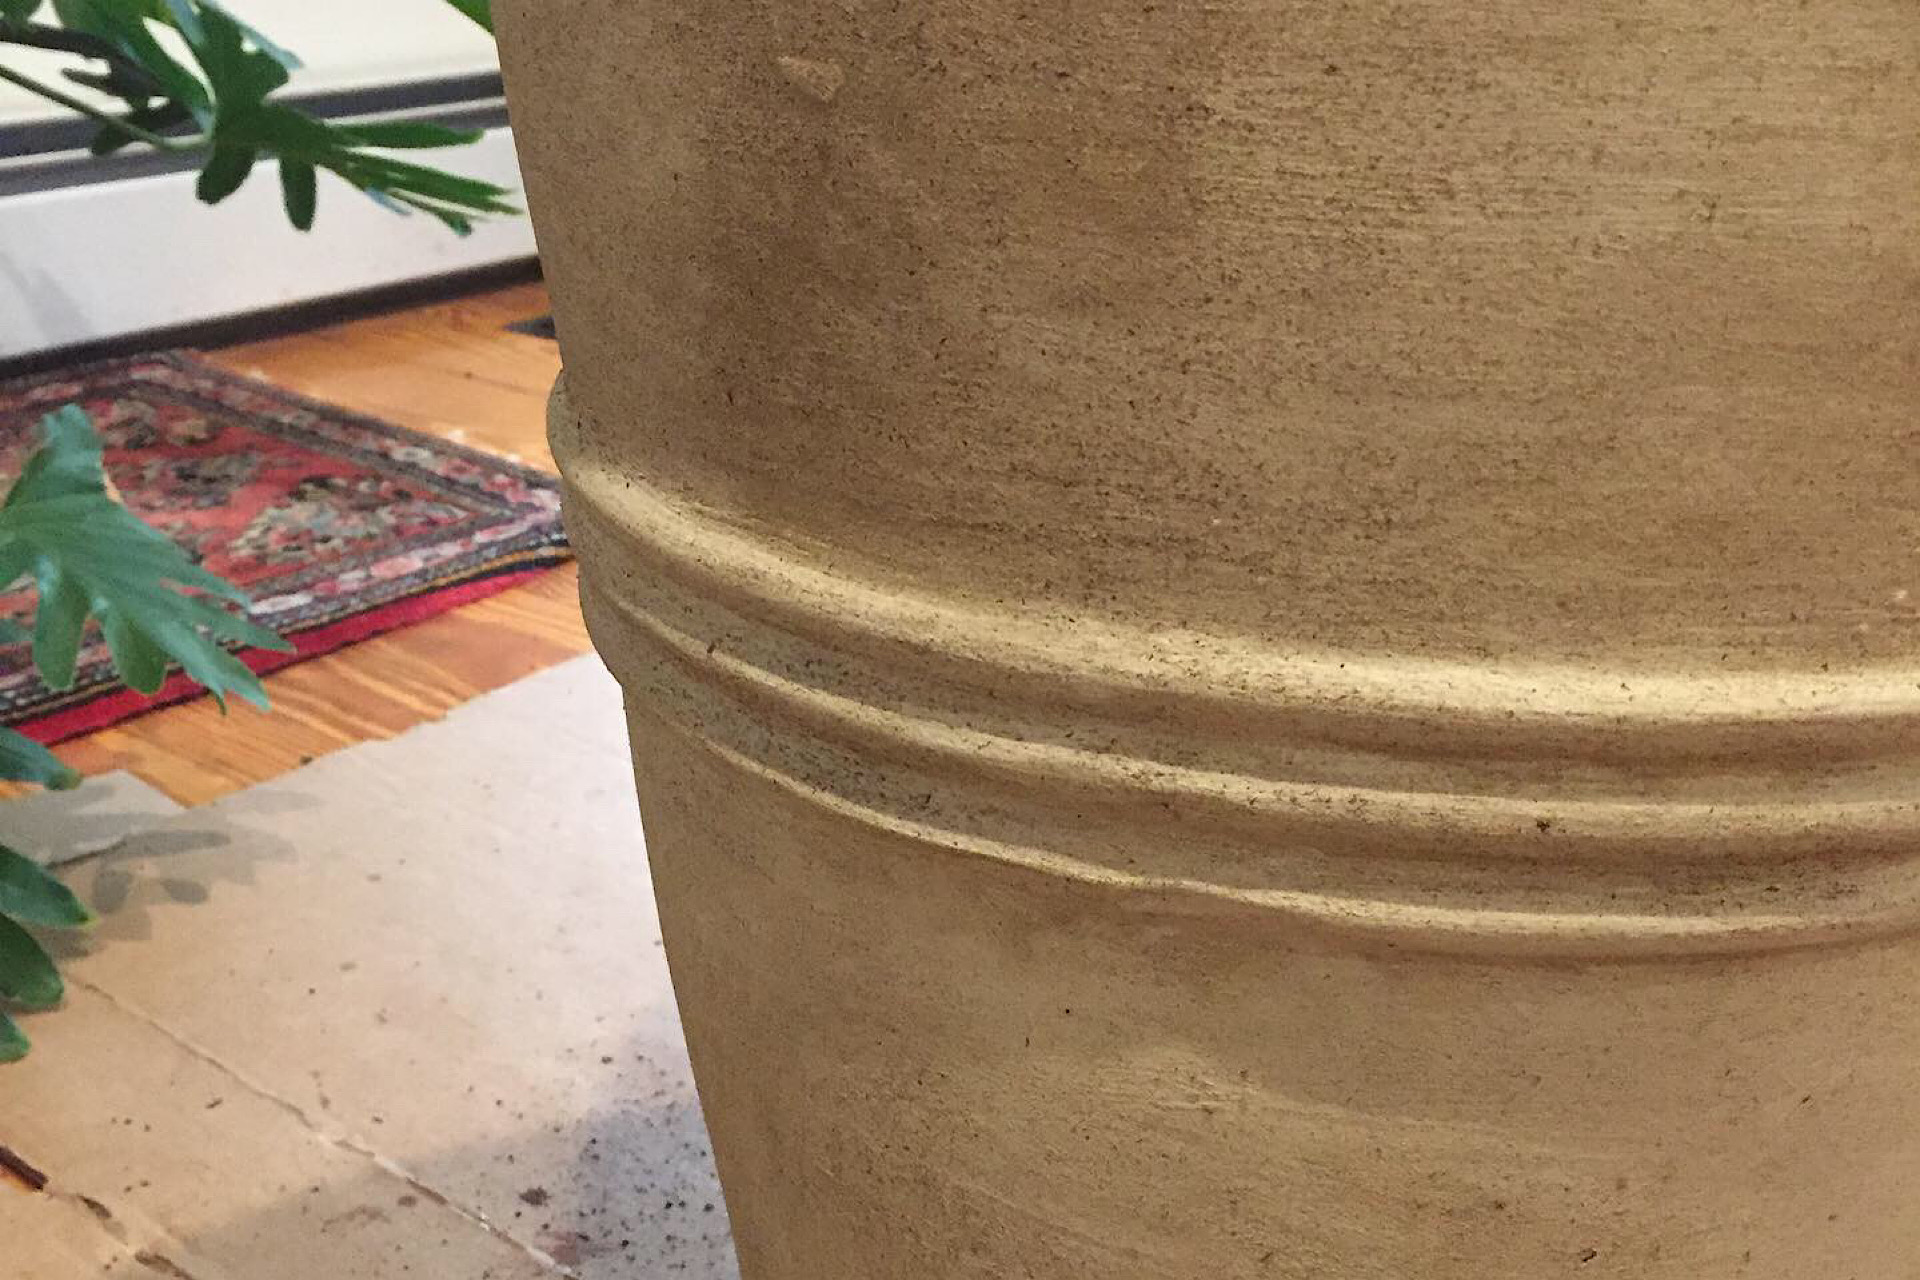
I ended up searching the outdoor section of a local discount store and selected two large, terracotta patio pots. They were substantial enough for planting a tree or an enormous dome of blooming flowers. Equally important, they were a manageable weight for me to carry and utilize in my home. Although a large-scale version of garden-variety flowerpots, they also had enough visual detailing that lend interest. Lastly, I compared their $25 price tags to the $150 tags on the two-ton variety in the garden center: and, well….decision made!
I could transport them easily, yet visually they had the heft I was seeking. Unfortunately, I wasn’t in love with the finish on them. They had a peachy kind of whitewash that felt a little 1980’s-ish. I preferred an earthy, organic vibe in anticipation of chilly autumn weather. In the end, if the size, weight and price were right, I could correct the finish on my own. This is where the idea for Coffee-Stained Terra Cotta was birthed.
Clean Up and Surface Prep
Even though newly-purchased, these pots required a clean-up before priming. While transporting them, I realized their peachy-whitewash finish was actually a powdery coating. It’s residue covered my palms, jeans and anything else it happened to rub against. The powder coat had to be removed or the finish I wanted to apply wouldn’t stick. I had no information on the product used to coat them, but refrained from imagining a giant, neon Proposition 65 Label screaming at me. I wet them down thoroughly and gave them a good scrubbing with a long-handled brush.
Terra cotta soaks up a lot of water, so I let them dry overnight and catch some sun the next day to ensure I had a clean, dry surface to work on. As an aside, if you are interested in ensuring you are handling safe objects, you may want to look for terra cotta pots for growing vegetables. Many gardening sites, such as the New York Botanical Garden recommend terracotta for patio vegetable gardening.
Paint Prep for a Coffee-Stained Terra Cotta Finish
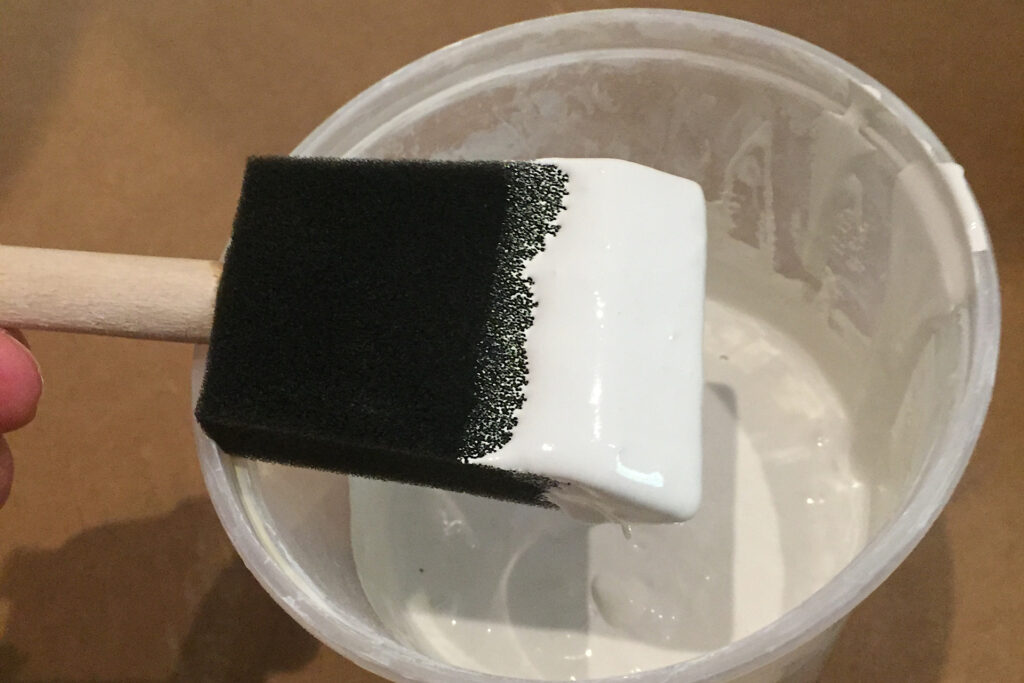
Next came the painting process. This is where I veered off course. Many how-to videos on painting terra cotta pots use artist’s paints for applying color and texture. But, they are applying finish to small surfaces like flowerpots. Tapping into my husband’s home reno experience, I picked up a cheap paint brush and a small sample can of acrylic house paint. I have to say, in the end, It was a good choice. I wanted my final finish to appear aged and worn, so I intentionally avoided a heavy, even coat. Acrylic paint is water based, so I thinned it with additional water and brushed it on, letting the terra-cotta soak it in. This resulted in an uneven primer coat with some of the underlying pottery color showing through. This was exactly what I hoped for.
I contemplated where to go next with the styling process. In home décor, I changed my vocabulary to adopt words like pared-down, simple and intentional. This is the direction I wanted to go with this project. I did not want to draw attention, but rather quietly add to the story of the room with subtle color and texture. With that in mind, I strayed off the path again. I watched and admired dozens of tutorials on applying understated layers of color. An array of moss green, cerulean blue, sandstone beige, gray and black stippled on with course, round brushes or smudged and blended with sponges and rags. I abandoned those ideas, however, in favor of a less-is-more approach. I chose to place faith in a natural texturing/aging technique, rather than honing an ability to paint on the layers of time.
Texturing the Base Coat
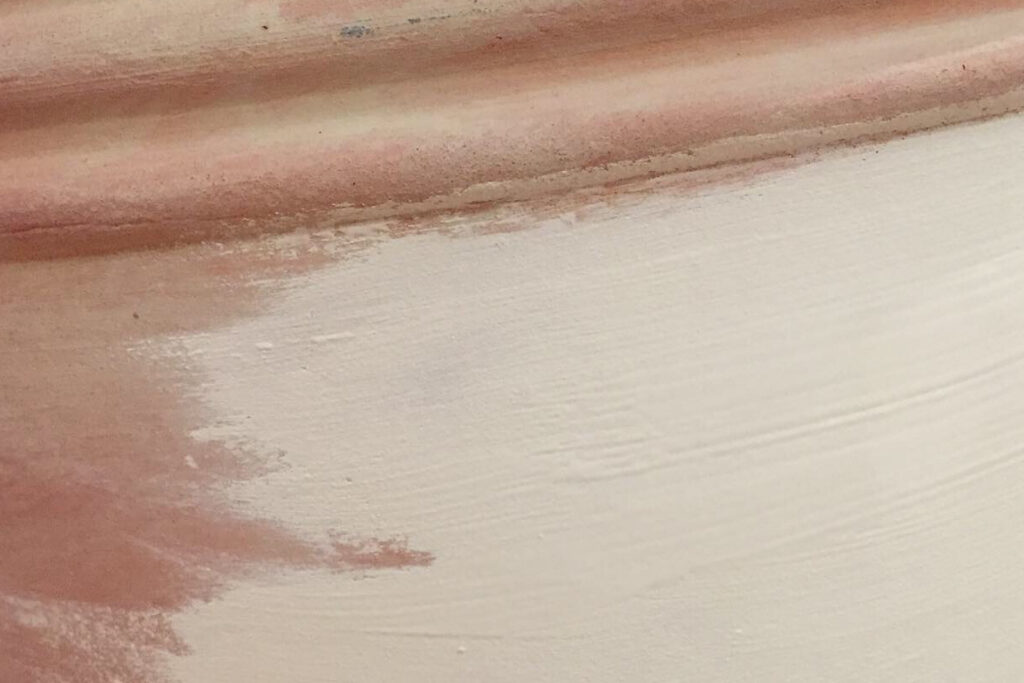
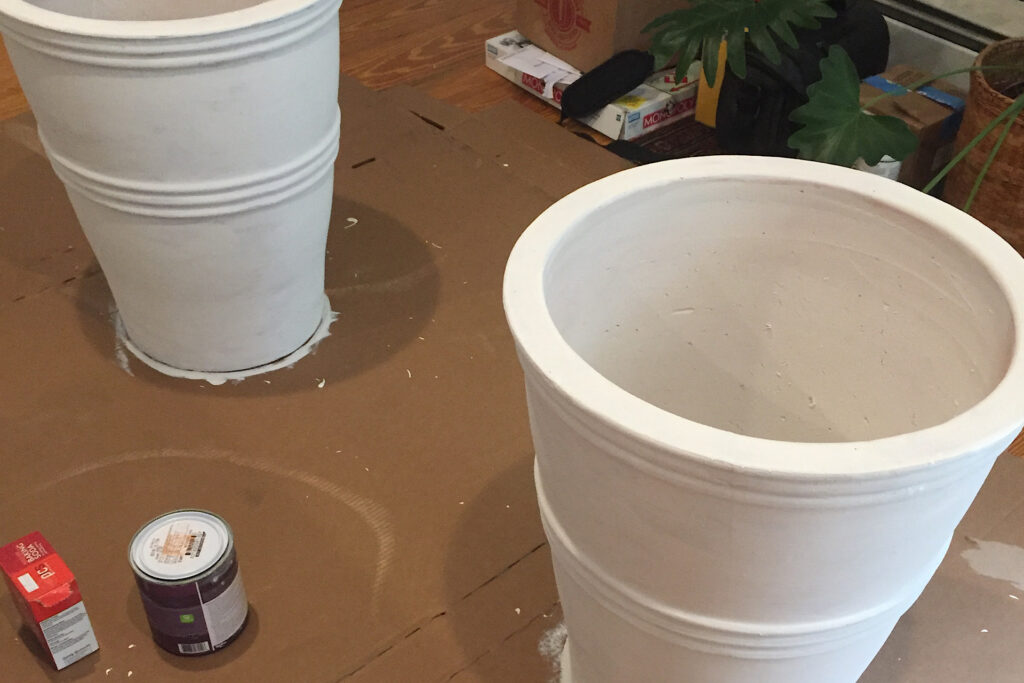
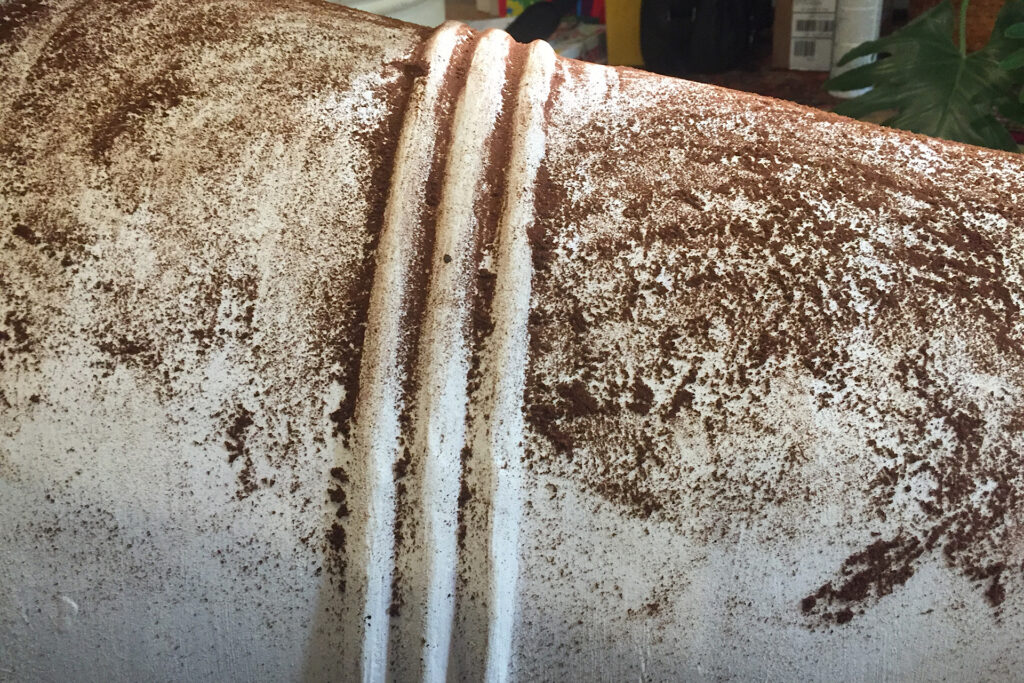
For texturing, I used the same small can of house paint, but this time added baking soda instead of water. There are lots of recipes online for mixing ratios, but I did a straight 1:1. For example, on this project, I used ¾ cup of paint blended with ¾ cup of baking soda. I had enough to cover both vessels. I used my paint brush and was not fussy or critical with application; and it was liberating! The brush marks and baking soda particles provided a subtle, organic feel. The coloration was pleasingly uneven with some of that pottery color continuing to show through. It was the imperfection of it that made it more natural.

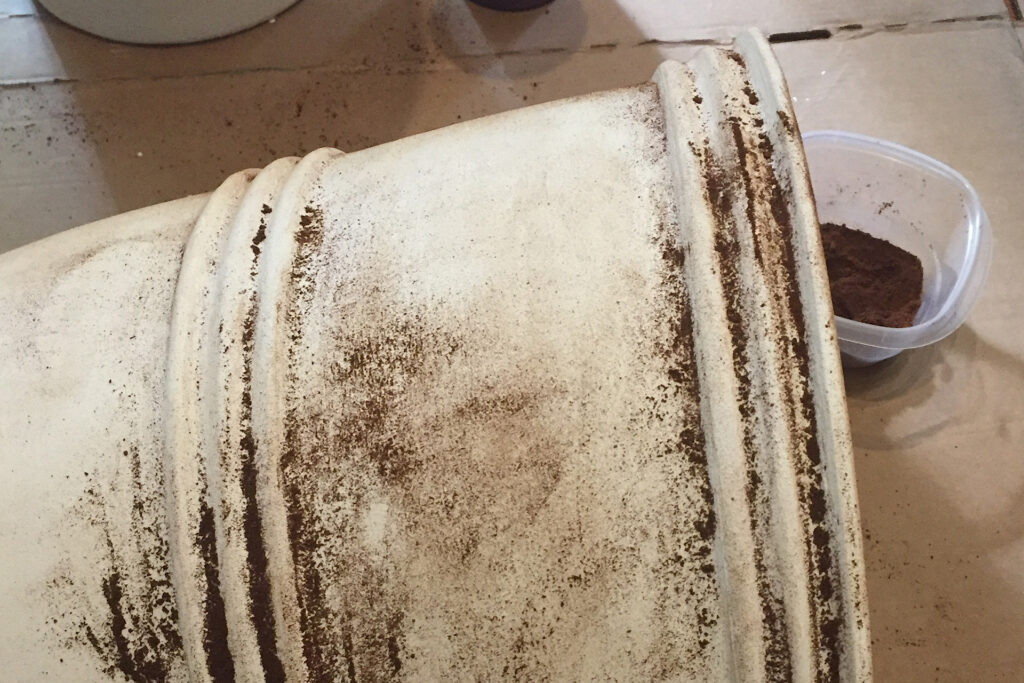
Applying The Coffee Stain
My favorite part was the aging step. Many how-to guides suggest handfuls of dirt, rubbed in, then polished with a soft cloth until the cloth is no longer showing stain discoloration. This allows the soil to build up in crevices and adhere to the nubby texture of the baking soda paint. Again, I took the path less traveled and devised a new plan over my morning cup of coffee. I had a tiny jar of espresso powder in my baking pantry, and I emptied it into my coffee grinder with a ½ cup of whole beans. I chose a fine grind to make the beans as powdery as possible, rubbing palmfuls on each pot. My first attempt resulted in a light stain.
I chose to apply a second coat for a richer hue. This time, I went further off grid and mixed water into the grounds to form a drippy paste. I swabbed it on with bare hands and then wiped off the excess with paper towels. I continued to play with this until I achieved my desired effect. What a great way to connect with your inner child by having a reason to finger paint in broad, sweeping strokes! I did not use the ground coffee on the inside of the vessels, however, as I liked the color contrast.
Protective Coat
In one last effort to side-step the norms of my how-to research, I went back to my husband’s shop and borrowed a can
of wax. Living with a woodworker has made me pause and pay closer attention to finishes and the story you want your
piece to tell. I wanted to have a soft, well-worn patina on the outside. I rubbed on a couple of wax coatings and buffed them to attain the finish I desired. (There is, however, a coating of spray sealer on the inside of my containers to protect blankets and throws from snags.)
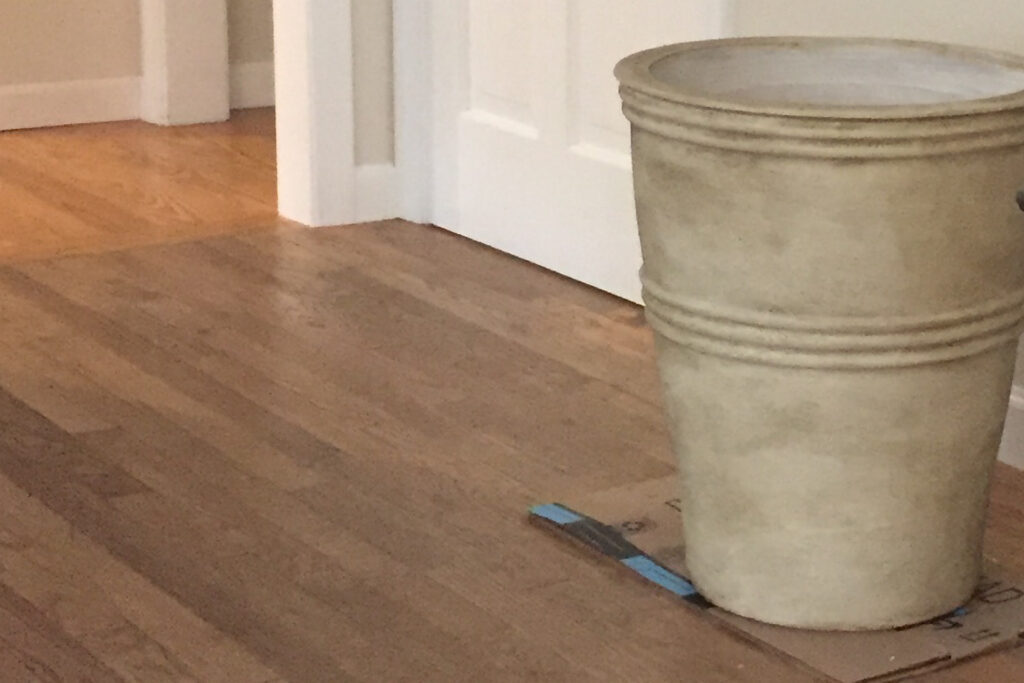
I am pleased that these finished coffee-stained terra cotta pieces are large in stature, yet quiet and understated. It is important to elevate rather than overwhelm a space. I enjoyed adding my own techniques to the process and how they reflect my new less-is-more mindset.
Related Links:
If you are interested in other home DIY projects, you might be interested in these: