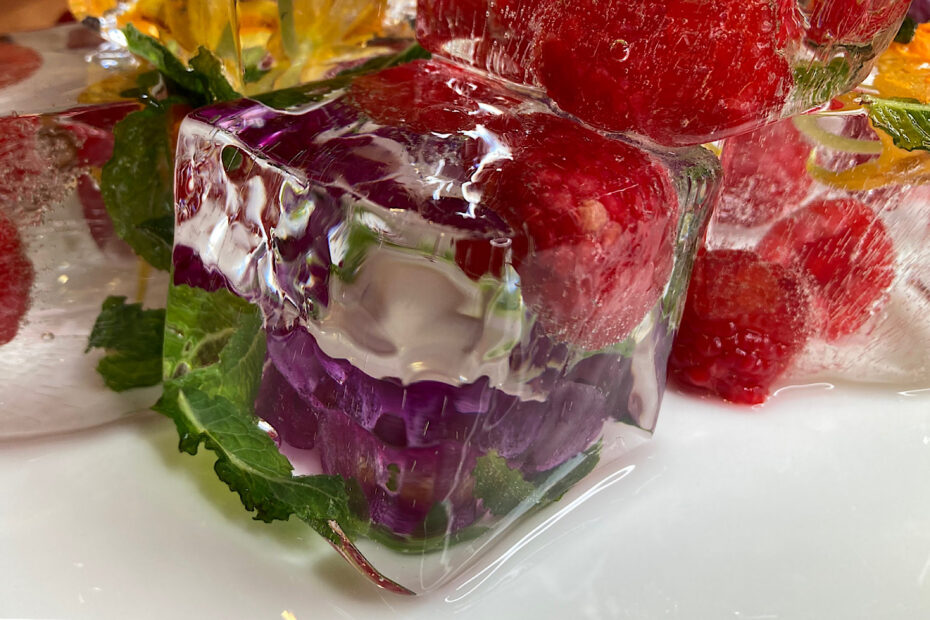
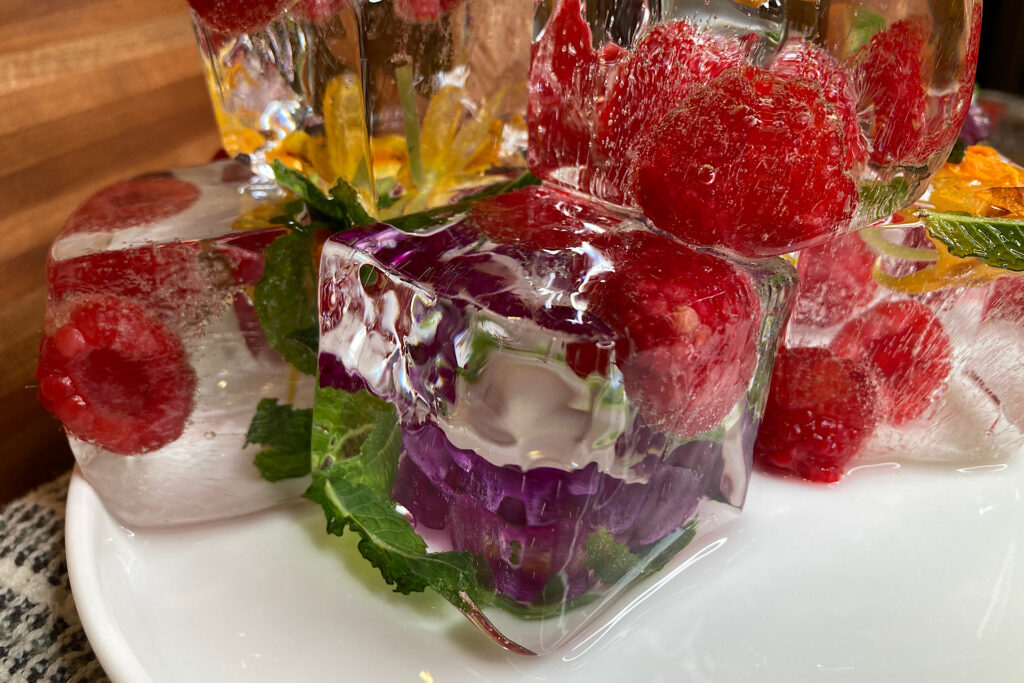
Decorative, floral ice cubes add a unique and elevated whimsy when entertaining; a signature touch your guests will delight in and remember. They are a detail that will personalize and add understated beauty to your tablescape. Freezing edible flowers, fruit and herbs into cubes can subtly reflect the mood and intention of your event.
Importance of Clear Ice for Decorative Cubes
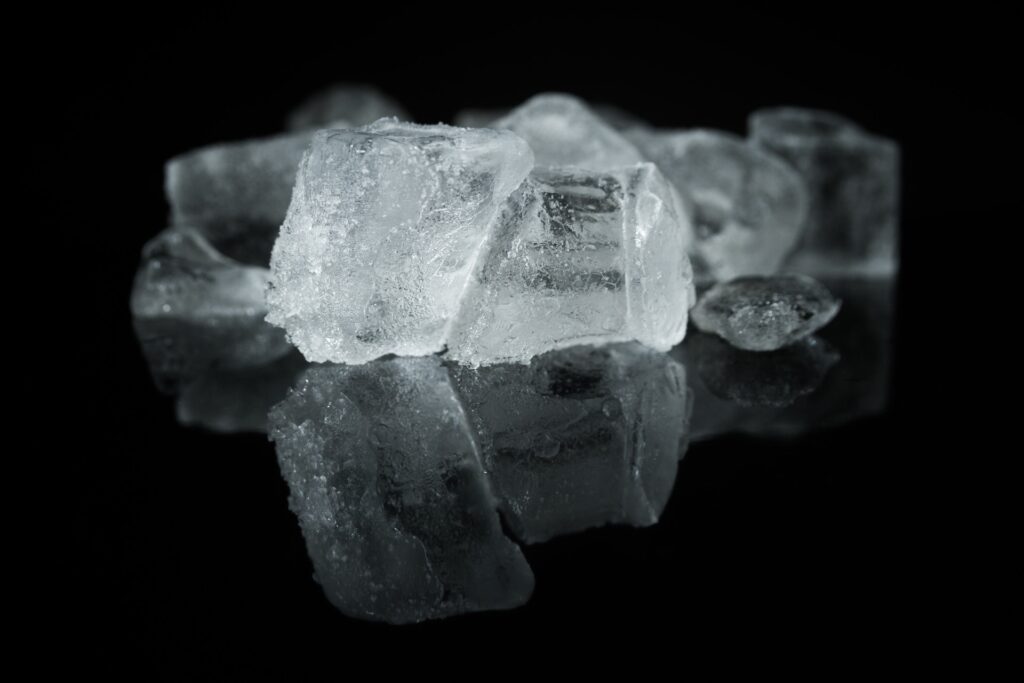
When adding decorative fillers to an ice cube tray, you will want to see the detail in the flower, fruit or herb you have selected. Regular ice cubes pulled from the freezer are cloudy, bubbly and may appear to have fracture lines running through them. They are not optimal for showcasing any edible jewels you have added for visual appeal.
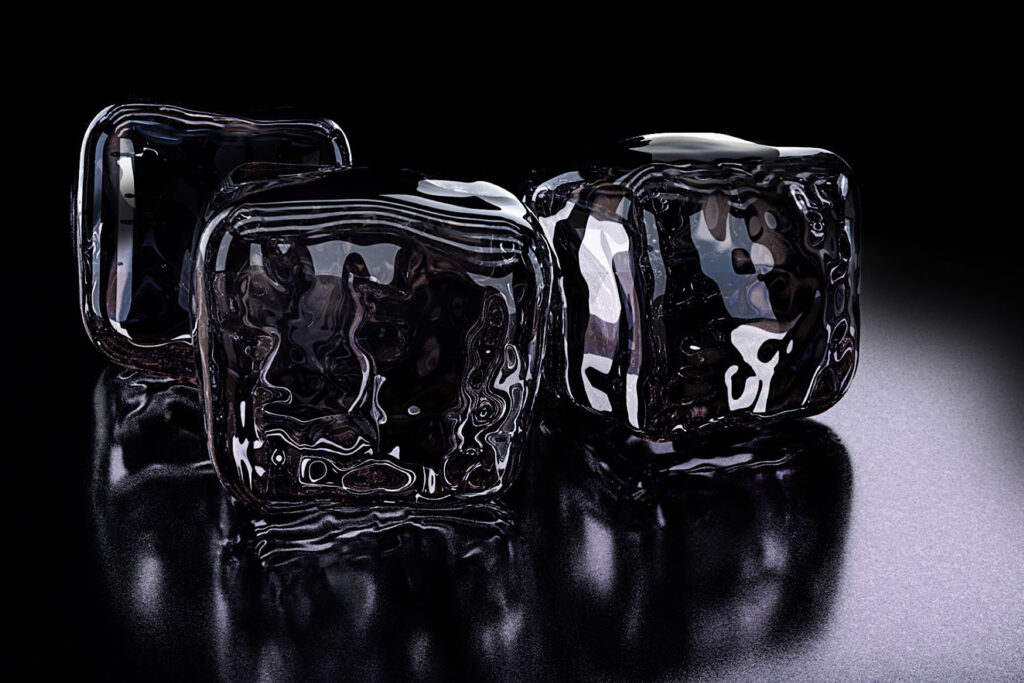
Aside from its glassy, attractive appearance, clear ice contributes to the longevity of your beverage. Clear ice melts slower and thus dilutes liquid refreshments at a slower rate. There are fewer air bubbles, making the ice denser and allowing a slower melt rate than cubes infused with air and impurities. Select large rocks of clear ice for beverages you want to drink slowly. Opt for small, clear cubes when sipping quickly. Clear ice spheres keep liquids at the same flavor and temperature until finished.
Making Clear Ice Cubes in a Home Freezer
If you are going to invest the time and resources into creating decorative floral ice cubes for entertaining, a clear ice base is a must for visual appeal and beverage quality. There is some science behind achieving this, and it was fun to research the best approach for keeping ice clear in a home freezer.
There are several methods suggested for making clear cubes at home. Many sources recommend boiling water to remove air and impurities prior to freezing. Others advise using distilled water, which is stripped of minerals and particles. There are also suggestions for freezing strategies; one being slow freezing and one being directional freezing. I chose a combination of the two.
Slow Freezing
The concept of slow freezing is fairly easy to understand; we’re merely trying to allow a longer freezing time for air bubbles and impurities that cloud up our ice to escape. In order to do this, you’ll need to set your freezer at the highest possible temperature. This is neither optimal nor safe when you have other foods in your freezer to consider. Some articles suggest setting an ice cube tray into an Igloo cooler, then placing it in the freezer to slow down the freezing process. This is impractical when you have limited freezer space.
Directional Freezing
With directional freezing, the aim is to get ice to freeze on one side first, thus pushing all the cloudiness factors in another direction. To best explain directional freezing, think of ice skating on a frozen lake where you can see into the depths as if peering through a clear looking glass. When the surface of the lake froze, it forced impurities down, leaving the ice translucent on top.
When directionally freezing water in a home freezer, you will need a small cooler with the lid removed. This will expose the surface water to the cold air in your freezer, while the bottom remains insulated by the cooler. Don’t allow the water in the cooler to freeze all the way to the bottom. You will be able to pour away impurities with the unfrozen water and chip off the clear pieces for use.
If the entire bottom chamber is allowed to freeze solid, air can be forced back to the top, making the surface appear cloudy. Again, cooler use is problematic if your freezer space is limited like mine. When I chose to create decorative floral ice cubes for entertaining, I sought out a compact container that would insulate at the bottom and freeze directionally.
Container Choice
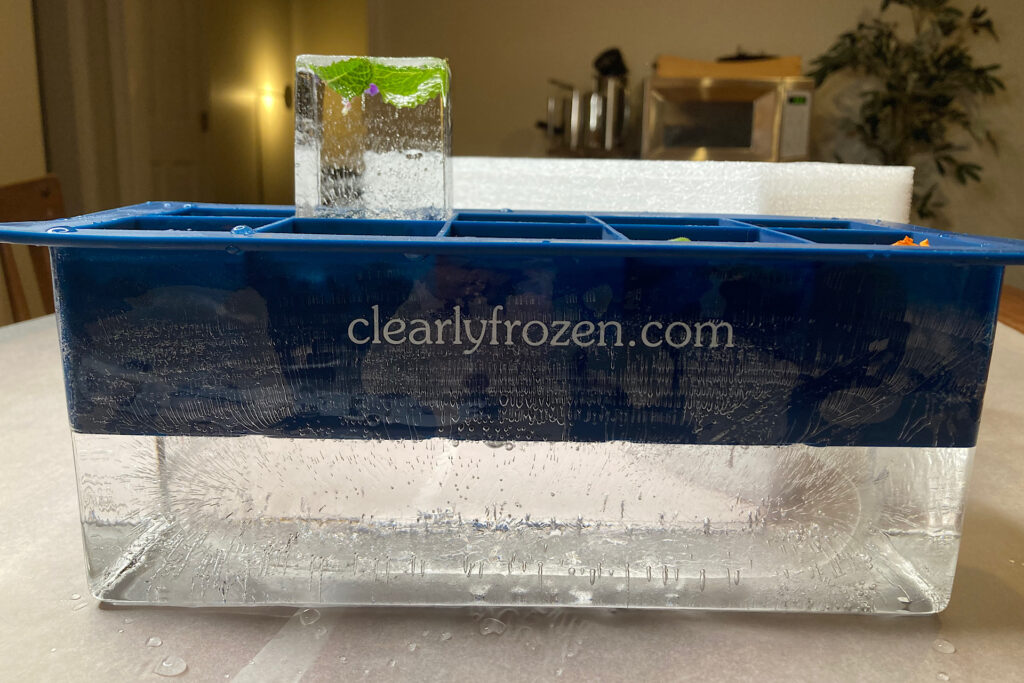
There are a variety of container options for making clear ice. I have seen and reviewed recommendations for cupcake tins, standard ice cube trays, Igloo coolers (mentioned above) and several specialized containers designed specifically for clear ice-making. After researching the science behind clear ice, I chose this container by Clearly Frozen. It is affordable and checked off all the boxes for what I was trying to accomplish. At the time of my purchase, it was $37.99 and it is compact enough to use in my freezer.
The directions are straightforward/easy to follow. There are 3 pieces included in the kit:
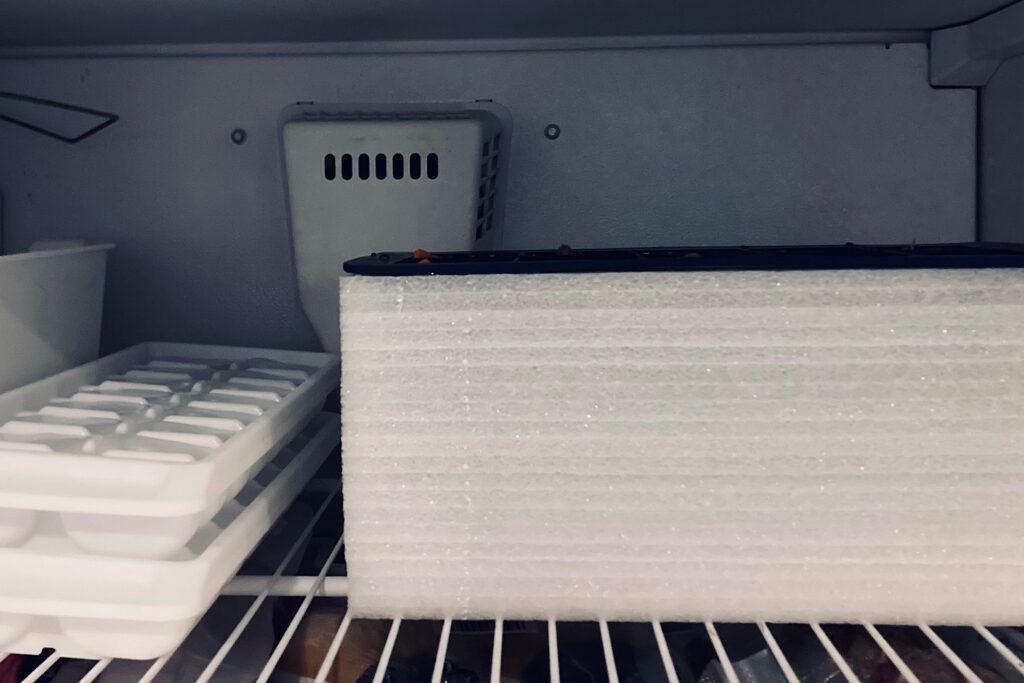
A rectangular foam insulation box (This box is not packing material – Do Not Discard!)
A rectangular liner box that fits snugly in the foam insulation box
A BPA-free silicone ice cube tray (2” King Cubes)
Fillers For Decorative Clear Floral Ice Cubes
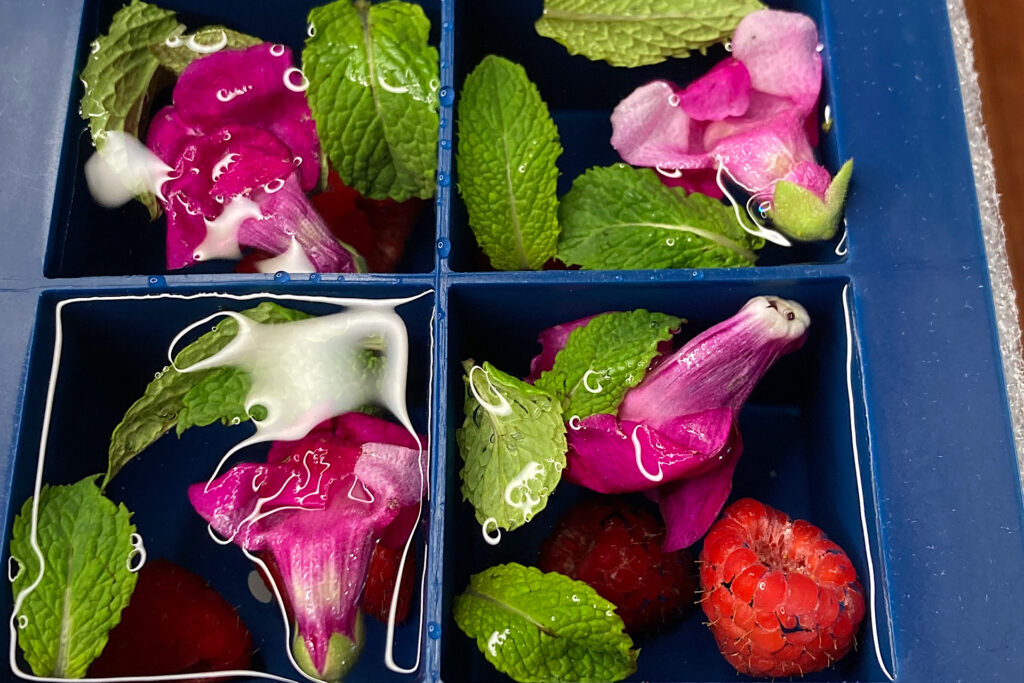
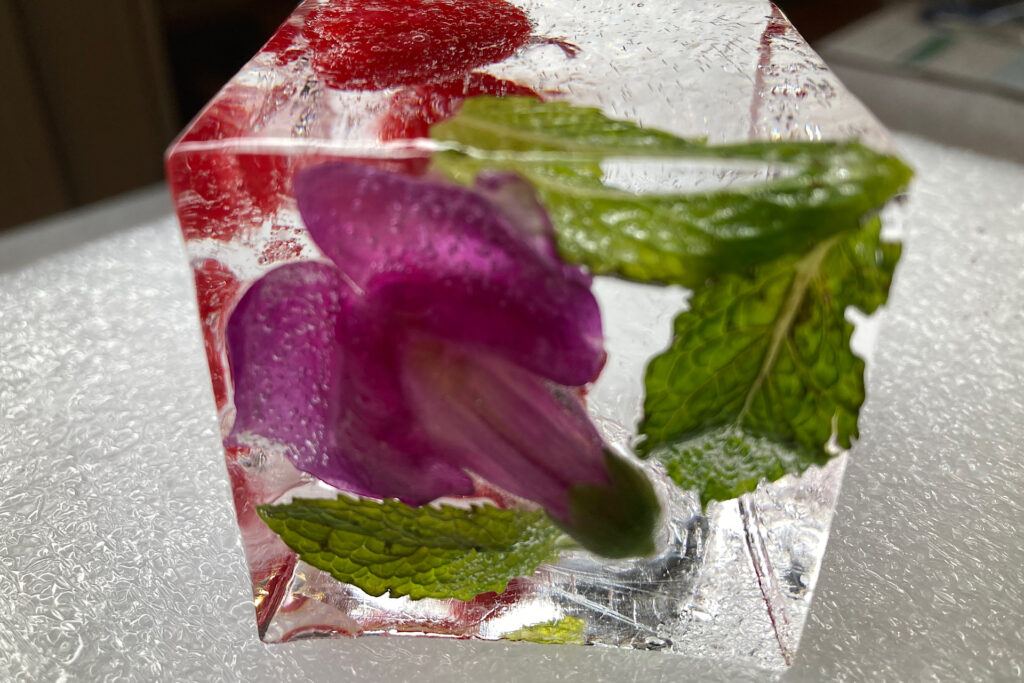
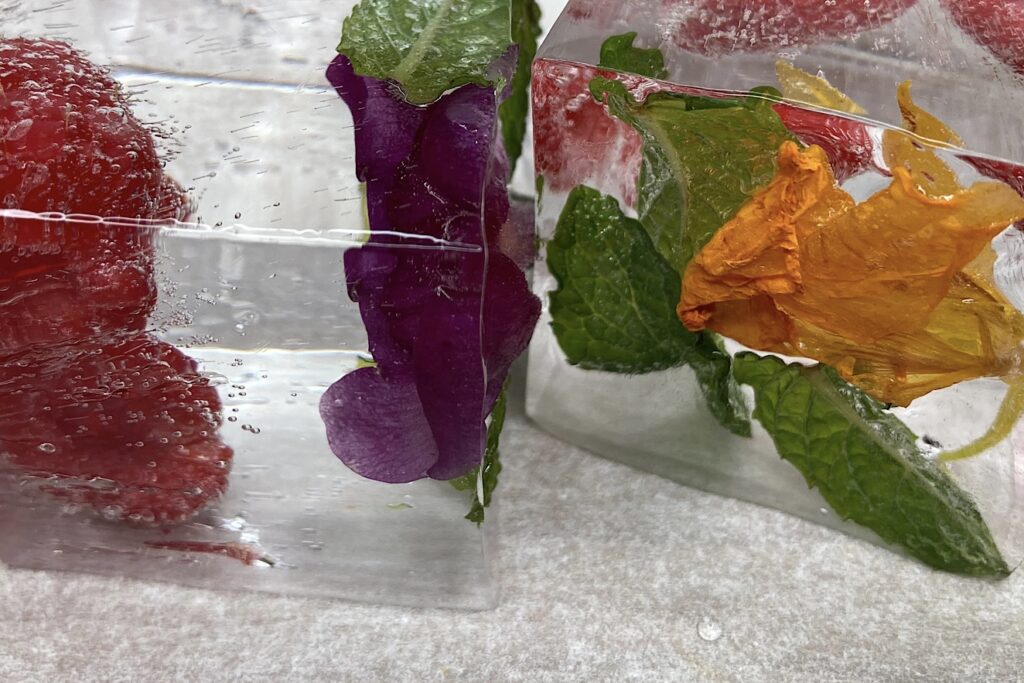
Add edible flowers, petals, fruits, vegetables, and herbs as fillers when making decorative ice cubes for entertaining. There are so many options depending on the beverage you are serving and the mood you want to create. Herbs like chive, chive flowers, parsley or cilantro would be a great addition to a Bloody Mary. Mint is a favorite of mine for iced teas. Elevate lemonade with lavender or rose petals. Nasturtium makes a beautiful statement in a tropical drink. Citrus slices in water or carbonated beverages are signature for summer sipping.
Grocery stores and farmers markets have a variety of seasonal offerings to choose from. Select produce at peak freshness. This is where it is really fun to experiment with flavor, color and texture. Bear in mind that some fillers will sink in your ice cube trays (like berries), others will float, (like mint leaves). Be creative with taste and visual appeal.
Making Safe Filler Choices
Make sure the items you choose as fillers are edible, pesticide-free and clean. Do your research especially when consuming flowers. Check a reliable university or medical source and be sure you know what is safe to add to the ice in your beverages. If you have not yet tried a particular flower or herb, introduce it slowly. Be aware of allergies you or your guests may have to flower pollen.
If you are selecting a flower from your garden, you should know its genus and species for identification. You should also know which parts of a particular flower are safe to eat. Some flowers are eaten whole, while others need to have their pistils and stamens removed. Some edible florals also have bitterness. For example, the white or non-colored portion at the base of rose petals is often bitter. Pull bitter stems from lavender flowers or basil florets.
When purchasing edible flowers from the grocery store, they come in sealed containers and usually recommend washing. Do not use florals from a nursery or florist. Some are sprayed with or planted in soil containing pesticides. If you use pesticides on flowers in your garden, do not add them to your decorative floral ice for entertaining. Do your homework first and then enjoy!
Making Clear Decorative Floral Ice Cubes:
Thoroughly wash/rinse rectangular mold and silicone ice tray. Set aside.
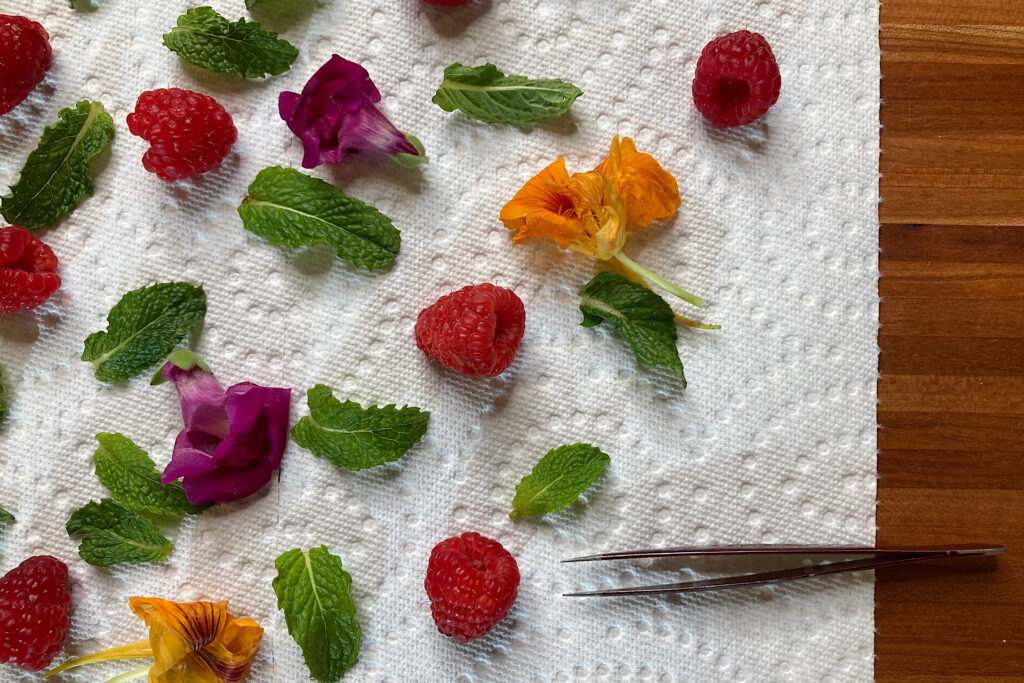
Rinse fruit, herbs and flowers and set on a paper towel. Don’t be concerned about wilting with a rinse. They are going to be immersed anyway.
Insert the rectangular liner box into the foam insulation box.
Fill the liner box with approximately two inches of water.
Insert silicone ice cube tray into the liner box. There are holes at the bottom of each cube section in the tray. Water will pass through them.
Fill the silicone ice cube tray with more water until all the compartments are about half full.
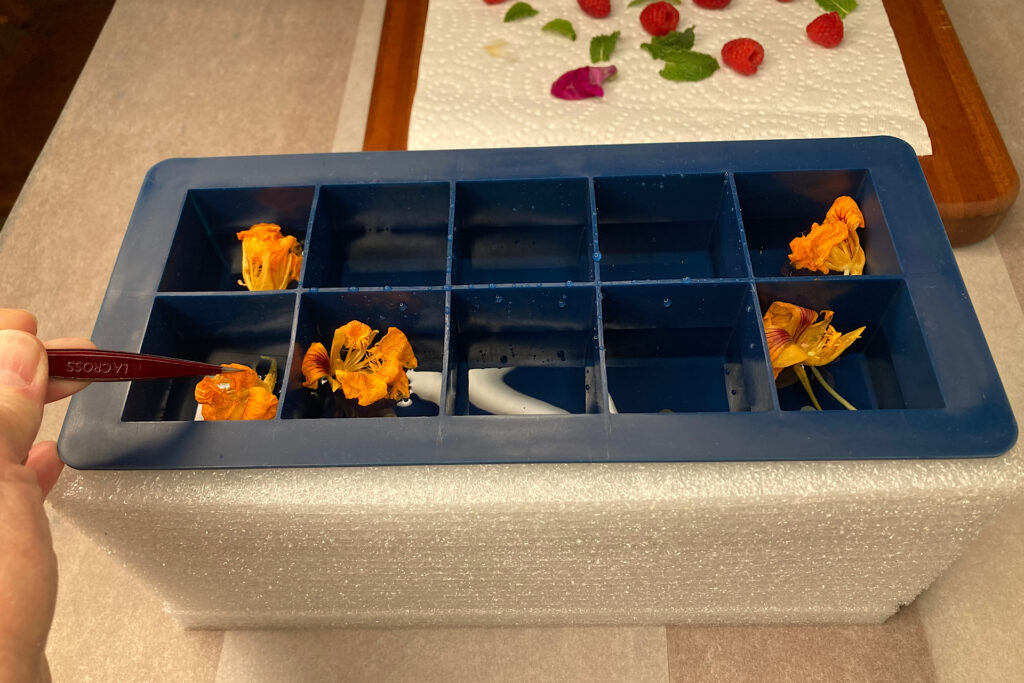
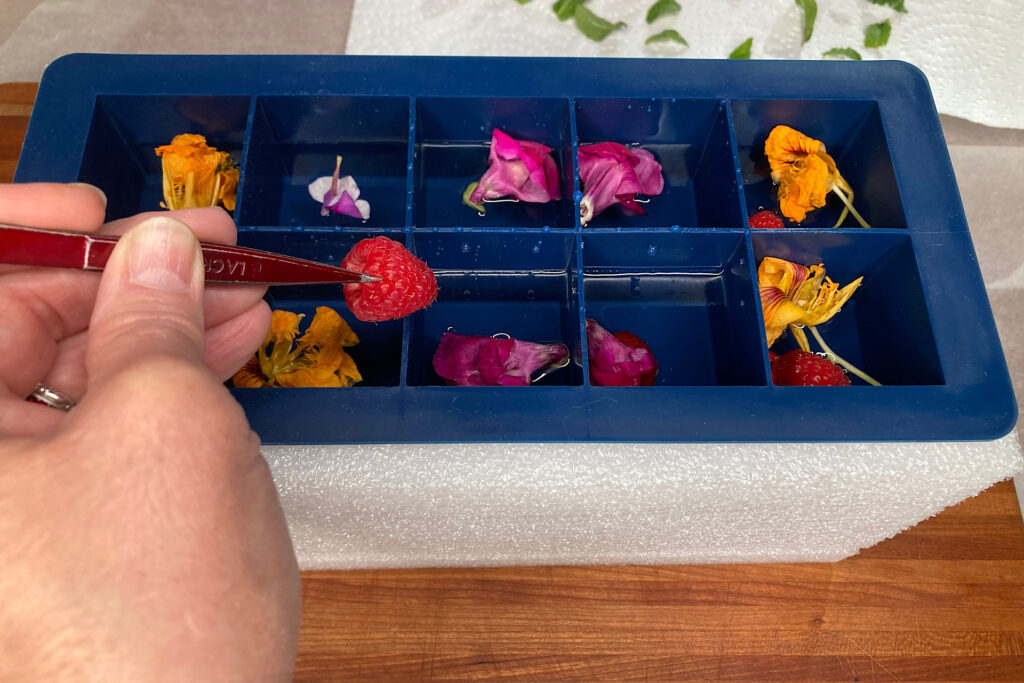
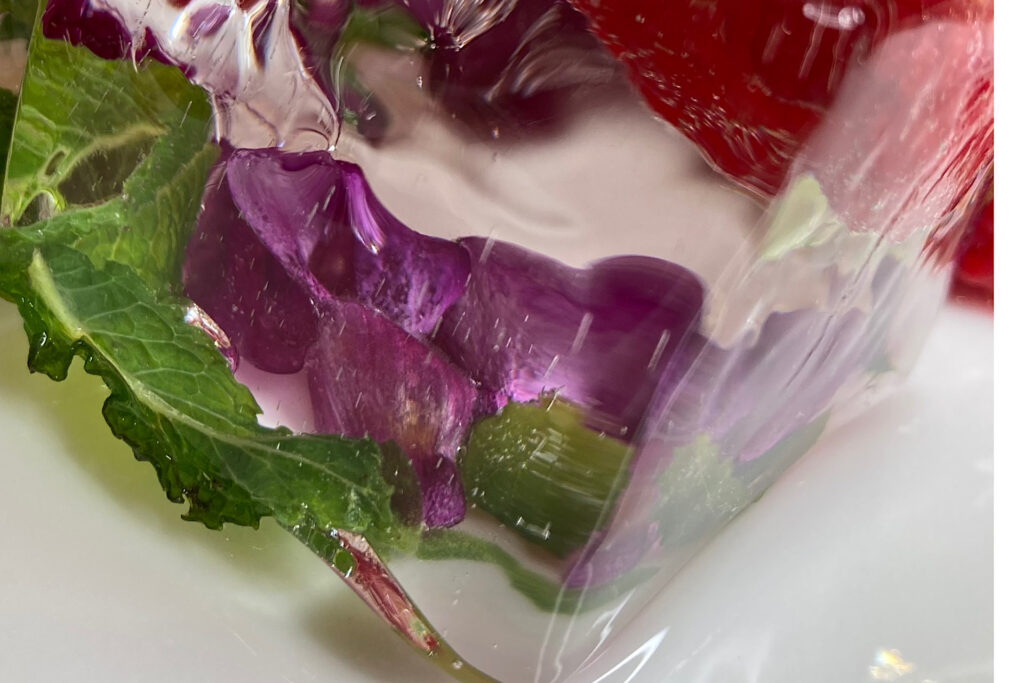
Use tweezers to place fillers. Fillers will float/move around. Aim for abstract beauty!
Once fillers are in place, add droplets of water on top of floating leaves & manipulate flowers/berries with tweezers to jostle out any air pockets.
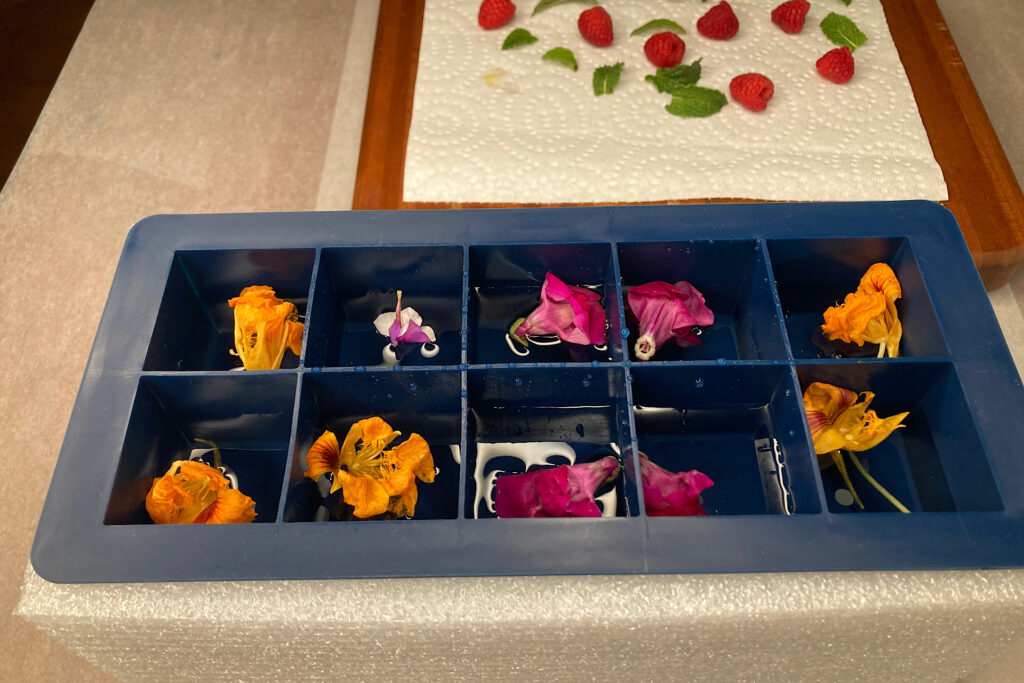
Fill the silicone cube tray to the top with water. Leaves/flowers may still bob to the surface & berries will sink to the bottom. Use enough filler so the ice compartments maintain visual evenness.
Once all the compartments are full, place the entire unit in the freezer to solidify.
Clear Decorative Floral Ice FreezeTime
There are a couple of options for length of time in the freezer. My box directions advise freezing the entire unit fully and then separating the silicone ice tray from the solid block at the bottom.
I have researched other methods recommending freezing to a “sweet spot” (approximately 17 hours). In doing this, the cubes at the top will be frozen, but the bottom will not have solidified fully – making it easier to remove and avoiding pushing any cloudiness back up into the top layer.
My timing /schedule didn’t allow me to be home to remove my unit at the “sweet spot” hour. I removed mine at approximately 24 hours. Your freezer temps may be different than mine, but my bottom base still had unfrozen water in the middle. Interestingly enough, I still had one cube emerge above the others, forced up like a volcano.
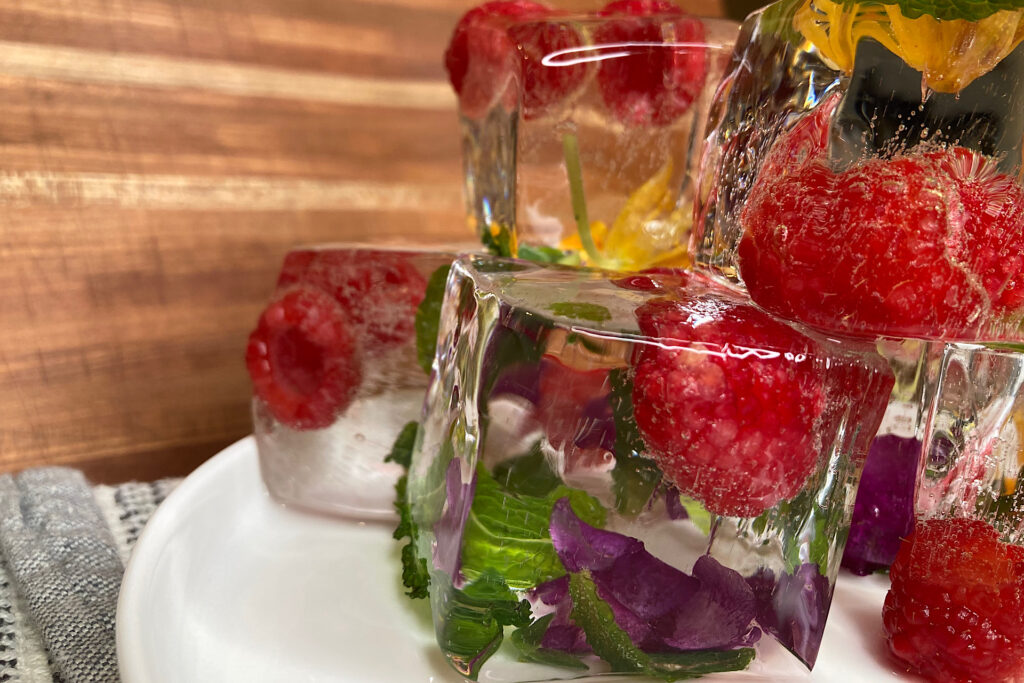
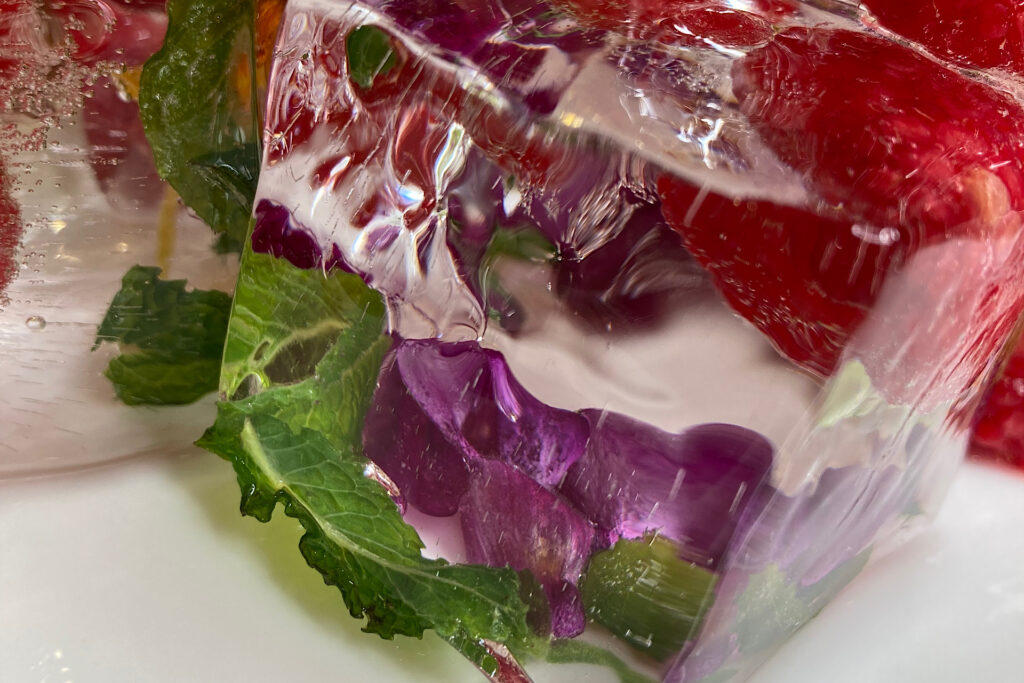
Overall, I was very happy with the result. I truly had the glass-like, crystal-clear artisanal cubes that this vendor promised. There was a bubble here and there, but they were absolutely lovely and the results far exceeded what I had anticipated.
I took mine out right away for photographing. But, next time, I will store them to have lovely decorative floral ice on hand for entertaining. It is recommended to store finished ice in an airtight container in the freezer.
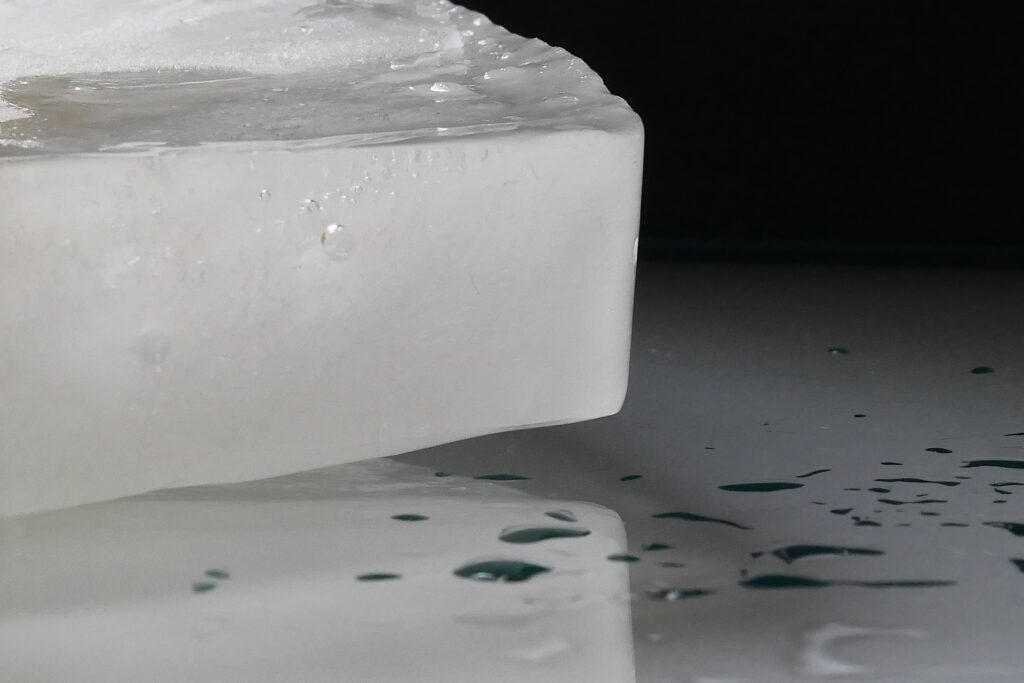
Use of Frozen Base
If you fully freeze the bottom block, there is no need to discard it after you separate if from the ice tray. It will not be clear like the cubes in the tray, but there is nothing wrong with it. It can be chopped as regular ice for drinks or you can use the block in coolers or outdoor tubs to keep beverages cold on the patio.
Seasonal Recommendations
I adore this special little ice cube unit of mine. I love the idea of adding a simple artisanal touch to beverages when entertaining. They are also nice to enjoy “just because” and even elevate drinking a glass of water. Personally, I’m motivated to change out the cube fillers seasonally.
Wildflowers and new garden growth are ideal fillers to welcome in the spring. Or how about pea pod with tender tendrils attached frozen in a tomato cocktail?
Fresh fruits/berries or rose petals and lavender make for sumptuous summer sips. They would look and taste fabulous in lemonades or iced teas.
Simple cranberry cubes and mint are perfect for the Thanksgiving table. Maybe even throw in a few pistachios for color.
I envision pomegranate seeds with earthy rosemary/thyme combos for winter beverages.
Whatever the season or cause to celebrate, consider adding clear decorative floral ice cubes to enhance the moment!


You’re so creative!!! Love this idea! Wish I would have known about it for my Laura’s baby shower! Such a unique visual touch!!
Thank you – Glad you liked it!