Skip to content
Home » Christmas Chocolate Wafer Yule Log

Christmas Chocolate Wafer Yule Log

Finished Chocolate Wafer Yule Log

This season, I find myself immersed in the delightful challenge of recreating my grandmother’s Christmas Chocolate Wafer Yule Log.  Some families serve this frosty treat to take the edge off summer heat, but it was the star of our dessert table at Christmas.  I loved its snowy coating and its rich, velvety chocolate layers; a truly festive, frosty holiday classic!

This simple yet decadent treat boasts a luscious dark chocolate essence.  My grandmother achieved this by using Nabisco’s Famous Chocolate Wafers as the foundation.  They were thin, crispy, semisweet chocolate discs that softened slightly when coated with whipped cream.  (Think elevating ice cream sandwiches to next-level indulgence!) Unfortunately, Nabisco discontinued their chocolate wafers this year and they’ve vanished from my grocer’s shelves.

I decided to roll up my sleeves and craft my own version for this year’s holiday table.  Join me in the kitchen as we revive the magic of this frozen delight, a testament to the resilience of family recipes and the joy found in creating something sweet from scratch.  Come bloom with me as we deck the dessert table with the irresistible charm of our very own Christmas Chocolate Wafer Yule Log.

Ingredients for Homemade Chocolate Wafers

Embarking on the journey of recreating my favorite Christmas Chocolate Wafer Yule Log calls for crafting the perfect homemade chocolate wafers. While the traditional Nabisco Famous Chocolate Wafers may have bid farewell, a homemade version promises to be better. These hand-crafted chocolate wafers, with their rich, dark cocoa essence, are the foundation of my Yule Log.  Making them from scratch adds a personal touch to this nostalgic treat.

Ingredients:
  • 3/4 cup Dark Cocoa
  • 1 1/2 cups Flour
  • 1 1/8 cup Sugar (2 tablespoons = 1/8 cup)
  • 1/4 teaspoon Baking Soda
  • 1/4 teaspoon Salt
  • 1 1/2 sticks Butter
  • 3 tablespoons Half & Half (cream or whole milk can be substituted)
  • 1 1/2 teaspoons Vanilla

With these carefully curated ingredients, we’re set to revive the essence of the classic chocolate wafers, ensuring that each layer of our Christmas Chocolate Wafer Yule Log resonates with the warmth and tradition of family recipes. Let’s bring this delightful creation to life, one delectable step at a time.

Flour, Butter, Sugar and Cocoa next to Food Processor

Selecting the Perfect Cocoa

The secret to success lies in the careful selection of unsweetened “dark” cocoa.  It is often labeled as “dutched” cocoa. The dark cocoa choice is no small matter; it’s the key to creating the rich, velvety essence at the foundation of this Yule Log.

If you’re curious about the nuances of different cocoa varieties, King Arthur Baking’s article, “Types of cocoa, explained,” will offer some insight on the topic. The bottom line is:  dark cocoa boasts a reduced acidity, giving rise to a more pronounced chocolate flavor. It’s akin to the taste of a dark chocolate bar.  It offers a richness characterized by fewer fruity notes and a unique simplicity.

In essence, the cocoa powder you choose is the silent architect of your homemade chocolate wafers. Each bite of your Christmas Chocolate Wafer Yule Log will carry the unmistakable allure of dark chocolate and a delightfully sophisticated sweetness.

Dark Cocoa Powder Sprinkles with Cookie Cutter

Mixing Magic: Chocolate Wafer Dough from Scratch

Pulse the Dry Ingredients:
  • In your food processor, add the dark cocoa, flour, sugar, baking soda, and salt. Pulse until they combine, achieving a harmonious blend of texture and color.  This sets the stage for incorporating the remaining ingredients.
Butter’s Rocky Texture:
  • Now, let’s add in the butter. Scatter slices of butter atop the dry mixture and run the processor until the butter combines with the dry ingredients; creating a slightly sandy and rocky texture. This rockiness is a prelude to the indulgent chocolatey layers of this dessert.
Liquid Elixir:
  • Mix vanilla into the half and half, creating a fragrant little potion of flavor. Restart the food processor and gradually pour this elixir into the feed tube. Watch as the dough starts to come together in heavy clumps.
  • At this juncture, the chocolate wafer dough, though not entirely mixed, is ready to work with. Don’t hesitate to pause the food processor (especially if you feel like the heavy dough is straining it.)  The rest of the process can be completed by hand.
Chocolate Wafer Dry Ingredients in Food Processor
Chocolate Wafer Dough Coming Together in Food Processor
Chocolate Wafer Dough in Ball Stage in Food Processor

Handling & Shaping Chocolate Wafer Dough

Now we can transform the chocolate wafer mixture into a workable dough.  Follow these handling and shaping cues to guide you:

Unveiling the Richness:
  • Gently empty the food processor container onto a clean work surface. Begin kneading the dough until it coalesces into an even color and texture throughout.  You’ll actually see the richness unfold—the dough will turn very dark and glossy. This is the promise of those velvety layers at the foundation of your Christmas Chocolate Wafer Yule Log.
The Art of Formation:
  • When the dough reaches this dark and glossy state, gather and smooth it into a ball.  Divide the chocolatey mass in half with a sharp blade.  You’ll be able to form each half into a cylinder that will create the chocolate wafer discs.
Rough Chocolate Wafer Dough on Rolling Mat
Kneaded Chocolate Wafer Dough
Kneaded Chocolate Wafer Dough Cut in Half

Roll and Refrigerate

Now, let’s shape the heart of your Christmas Chocolate Wafer Yule Log.  We’ll transform the dough into cylinders ready to unfold their deep chocolate magic.

Hand-Rolled Cylinders:
  • Using your hands, roll each half of the chocolate wafer dough into a cylinder.  Aim for a diameter of approximately 1 3/4.” This ensures each bite has a perfect balance of texture and flavor.  Later, when we slice the cylinders, they’ll be the uniform little discs for the foundation of this recipe.
Refrigerate & Anticipate:
  • Wrap each cylinder securely in plastic wrap. This will allow the dough to firm up yet maintain moistness for slicing and baking.
Chill Time:
  • Let the cylinders rest and chill in the refrigerator for at least 2 hours, or overnight if you’d prefer.  This allows the dough to meld flavors and arrive at the perfect slicing firmness.
Rolled Chocolate Wafer Dough on Rolling Mat
Chocolate Wafer Dough Wrapped for Refrigeration

From Roll to Rounds: Baking Chocolate Wafer Disc

This phase is where our holiday creation truly takes shape. We’re now transitioning from cylinders to wafers. 

Slicing:
  • After refrigeration, slice the chocolate wafers into approximately 1/8″ discs. The firm dough yields effortlessly to a sharp blade, creating neat, uniform rounds. Arrange the chocolate wafer discs on a parchment-lined baking sheet. In my kitchen, two cylinders yielded around 48 slices.  I was able to accommodate them all with two lined baking sheets.
Oven Time:
  • Place the chocolate wafer rounds into a preheated 350-degree oven. Bake for approximtely 12 minutes.   If your oven accommodates both baking sheets, rotate the sheets and switch racks half way through the cooking time for an even bake. The signal that they’re ready? Flat discs, and an absence of puffiness are visual cues that you’ve achieved the perfect bake.
Rest and Firmness:
  • Allow the chocolate wafers to rest on the baking sheet atop a cooling rack for 5 minutes. This will firm them up, ensuring they retain their shape. After 5 minutes, use a spatula to transfer the chocolate wafers directly onto a cooling rack. As they cool, they will crisp up nicely.
  • Once cooled, they are ready for whipped cream filling and topping.
Refrigerated Chocolate Wafer Dough with Slicing Knife & Baking Pans
Chocolate Wafer Dough Rounds on Parchment

Layered Bliss: Assembling Chocolate Wafer Delight

It’s now time to assemble the Christmas Chocolate Wafer Yule Log. Follow these steps to create a luscious, layered delight!

Whipped Cream:

This whipped cream is a testament to simplicity and flavor. In the bowl of your mixer—whether it’s a stand mixer like mine, with the trusty wire whisk attachment, or your preferred mixing companion—combine 2 cups of heavy cream, ½ cup of confectioners’ sugar, and 2 teaspoons of vanilla. Let the mixer perform its magic at high speed until stiff peaks form.  Because our wafers are handmade, homemade whipped cream is the crowning touch for this dessert!

Assembly:

Begin the assembly by laying a strip of whipped cream on the surface of the serving tray, creating a foundation for the chocolate wafers to nestle into. Generously spread whipped cream between each chocolate wafer, delicately sandwiching them together in a line across the tray. As the line extends, it will re-form into a zebra-striped cylinder.   Coat the outer surface of the cylinder with the remaining whipped cream.  A gentle swipe with a napkin or paper towel will tidy the edges, leaving a clean line on the serving tray.

Stacked Chocolate Wafers with Whipped Cream Filling
Closeup of Chocolate Wafer Log Covered in Whipped Cream
Finished Chocolate Wafer Log Ready for Freezer

Freeze and Serve:  Deck the Dessert Table

The grand finale is near!  Follow these steps to freeze and serve this lovely Yuletide dessert.

Chill and Cover:
  • Begin by placing the serving tray in the freezer, uncovered. Allow the whipped cream to firm up.  This will protect the snowy whipped cream topping from smudging or sticking. Once firmed up, cover the Yule Log with foil.  Let it freeze solidly until ready to serve.
Thawing and Serving:
  • Approximately half an hour before serving, retrieve the Yule Log from the freezer, allowing it to thaw a bit.  The chocolate wafers will have softened in the whipped cream yielding a delightful bite. This is the moment to enjoy the velvety indulgence that will grace any holiday table!
Artistry Beyond:
  • Elevate your Yule Log’s visual charm by experimenting with lines of chocolate drizzle on the outer surface, reminiscent of birch bark in a winter forest. You can be the creative director!  Consider slicing on the diagonal for a fresh perspective, revealing unique chocolate and whipped cream striations that add an extra layer of visual delight.
Finished Chocolate Wafer Yule Log

Share the Joy:

If this Christmas Chocolate Wafer Yule Log brings as much delight to your table as it does to mine, let me know in the comments. Feel free to explore these related posts and enjoy the holiday season!

Finished Chocolate Wafer Yule Log

Christmas Chocolate Wafer Yule Log

Servings 8

Equipment

  • 1 Food Processor
  • 1 or 2 Baking Sheets
  • Parchment Paper
  • Plastic Wrap and Foil for refrigerating and freezing

Ingredients
  

  • 3/4 cup dark, unsweetened cocoa powder
  • 1 1/2 cups all purpose flour
  • 1 1/8 cup sugar
  • 1/4 tsp baking soda
  • 1/4 tsp salt
  • 1 1/2 sticks butter (slice into 12 tablespoons)
  • 3 tbsp half & half (you can also use cream or whole milk)
  • 1 1/2 tsp vanilla extract

Whipped Cream

  • 2 cups heavy cream
  • 1/2 cup confectioners sugar
  • 2 tsp vanilla extract

Instructions
 

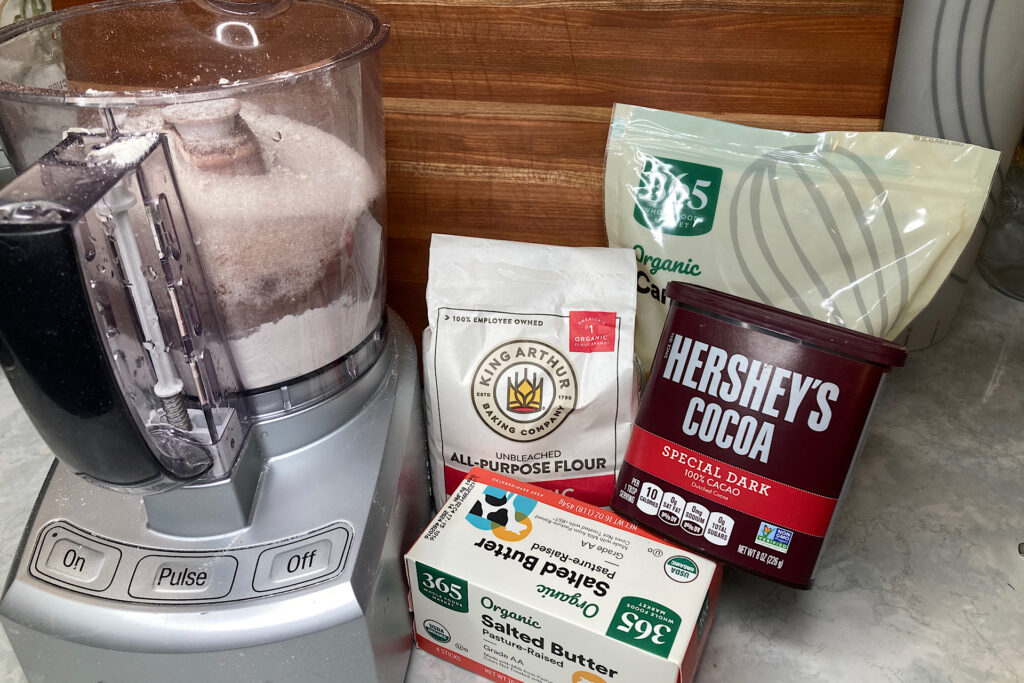
  • Add all the dry ingredients to a food processor (cocoa powder, flour, sugar, baking soda and salt). Pulse until they are blended thoroughly and are an even texture and color.
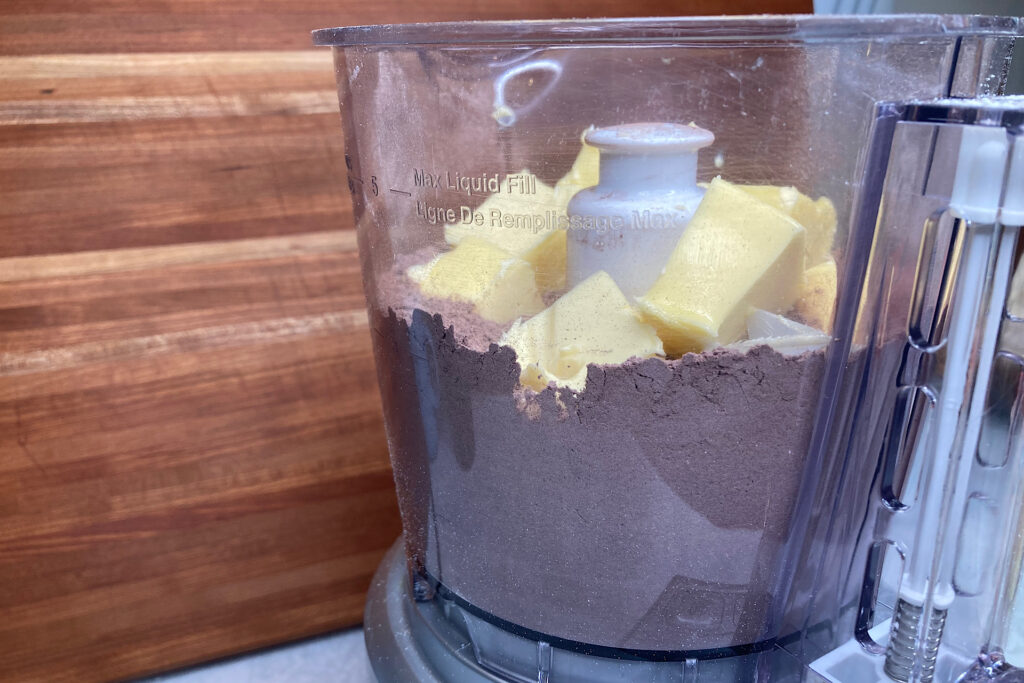
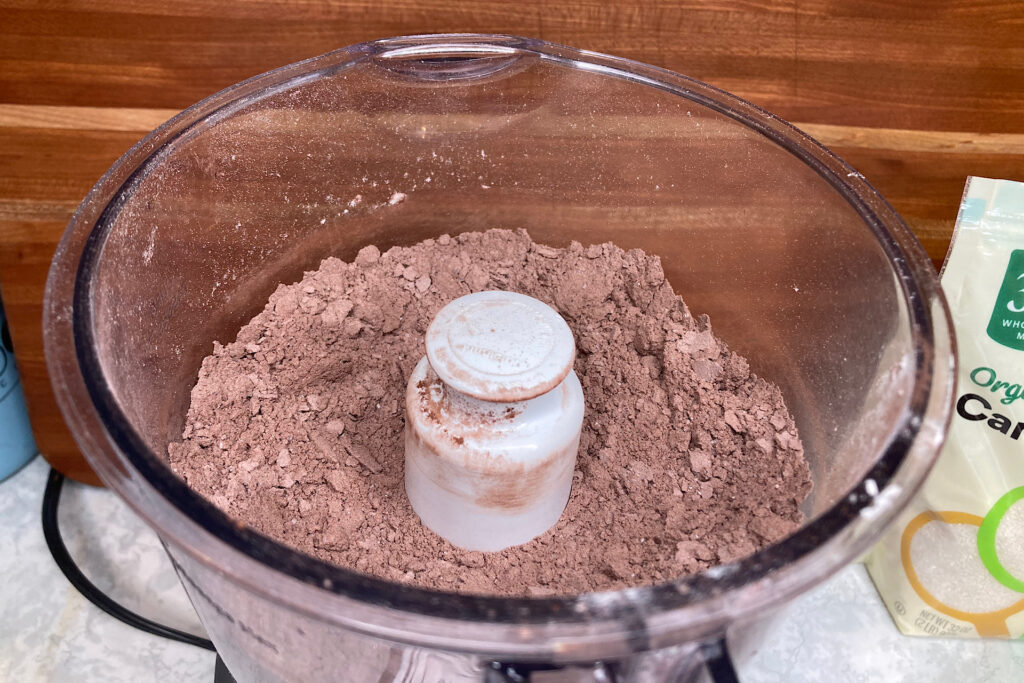
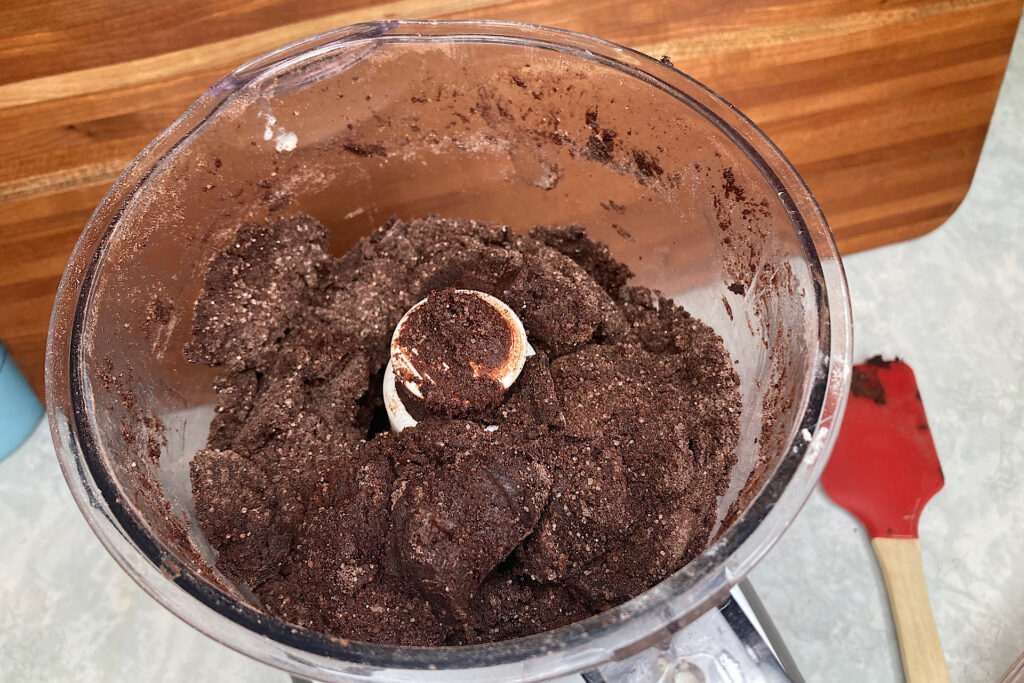
  • Scatter the butter slices on top of the dry ingredients. Run the processor until the butter is incorporated and forms an even texture. It will appear a bit sandy and rocky.
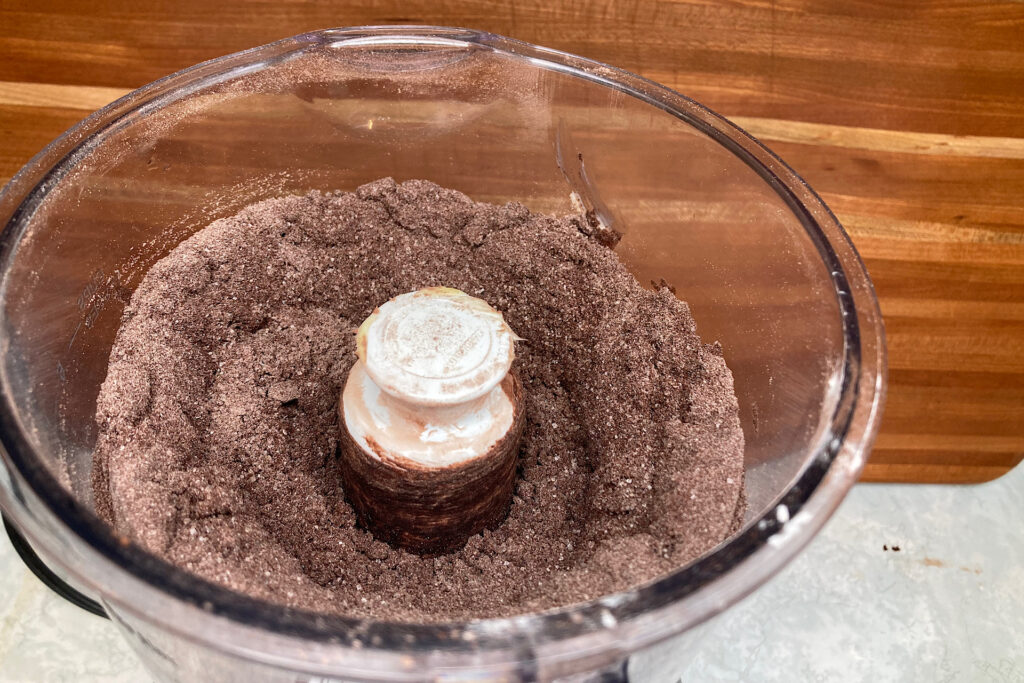
  • Mix the vanilla into the half and half. Re-start the food processor and slowly pour the liquid into the feed tube. At this point, the dough will come together and begin to form heavy clumps. It will not mix entirely. It is ok to shut off the food processor at this point, especially if it sounds like it is straining.
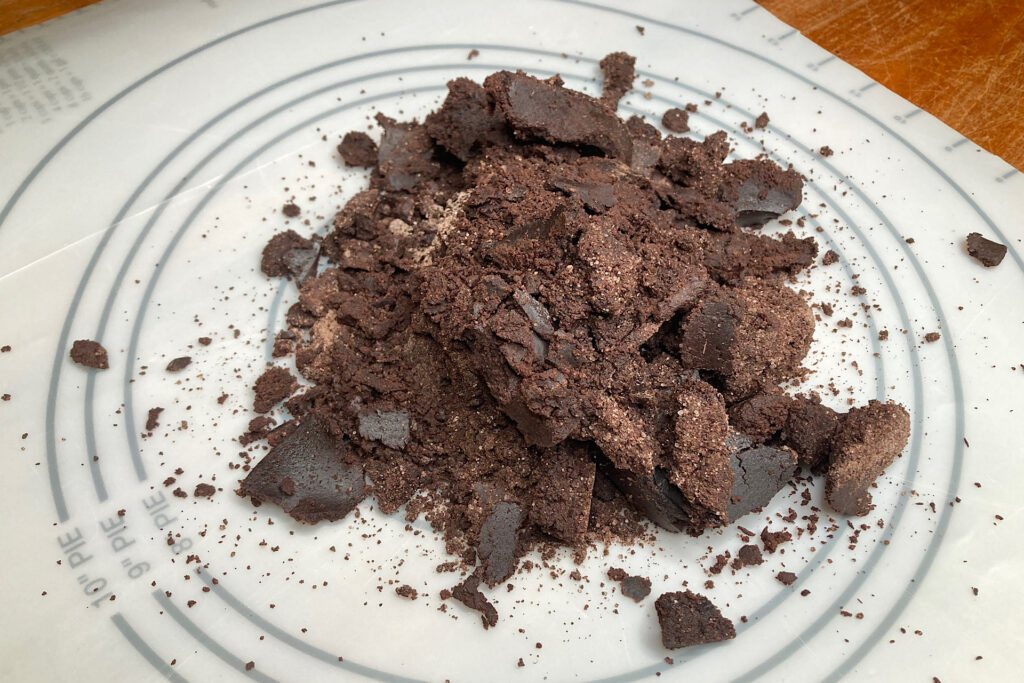
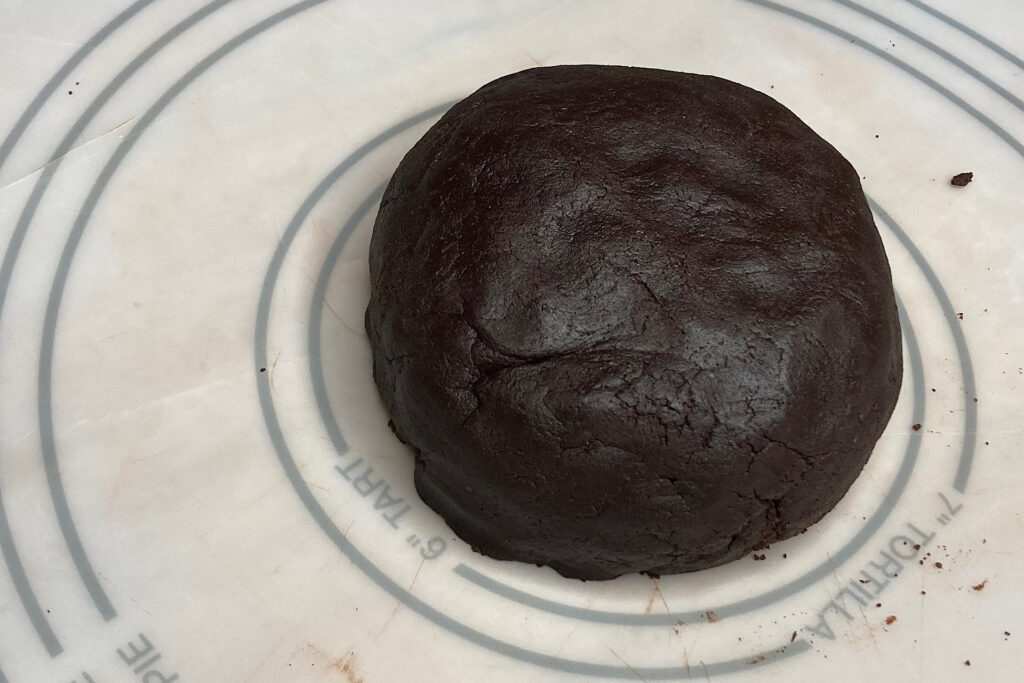
  • Dump the cookie dough onto a clean work surface. Knead it until it comes together nicely and is an even color and texture. It will be dark and glossy.
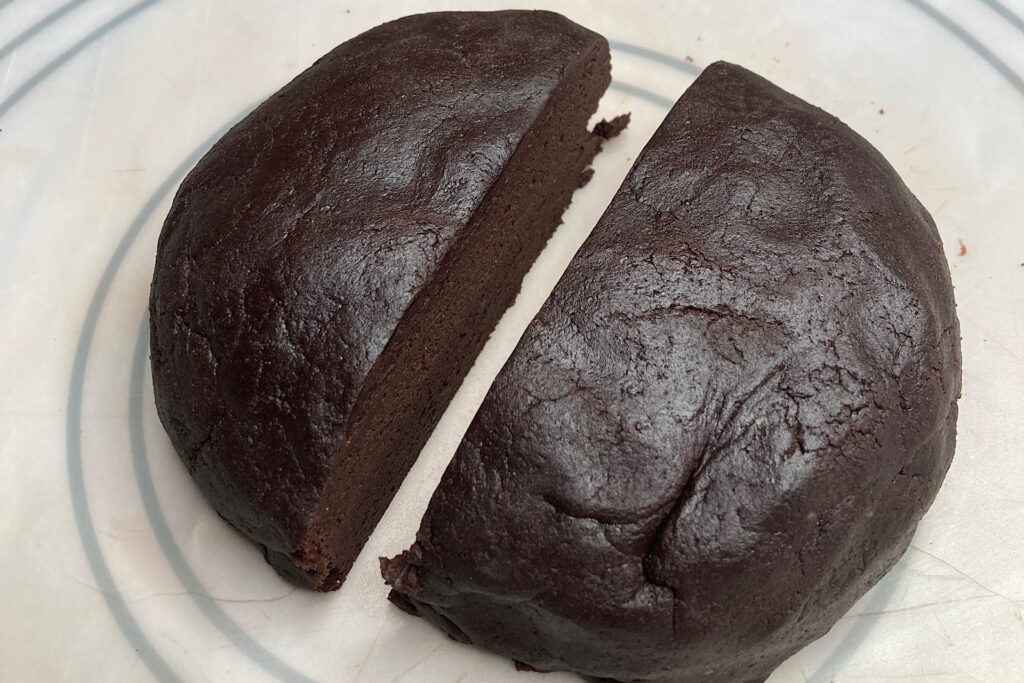
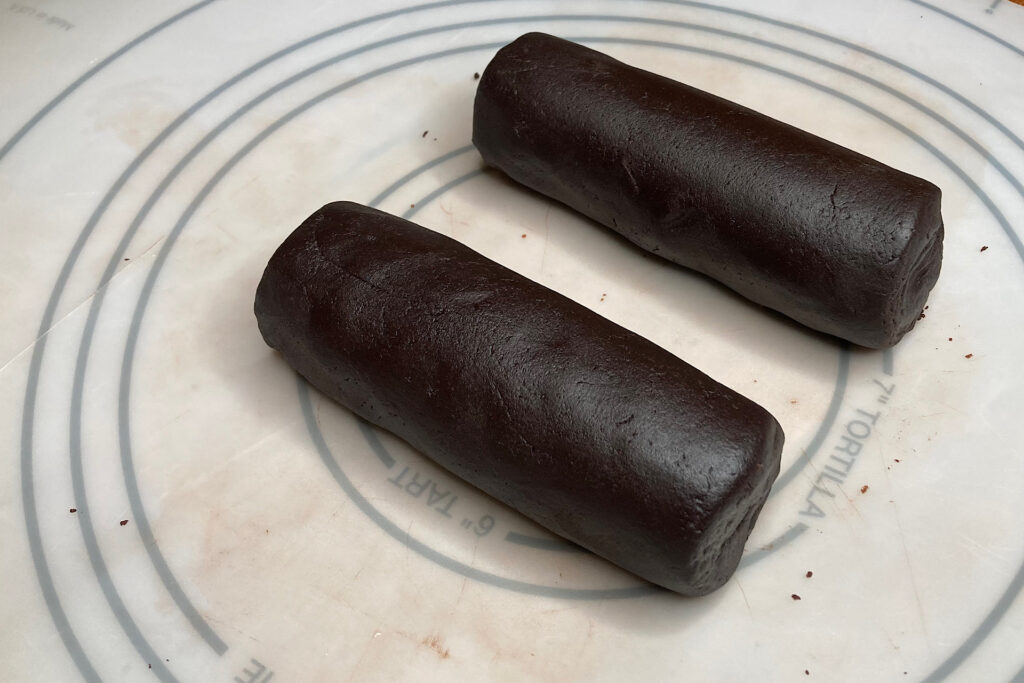
  • Form the finished dough into a ball and divide in half.
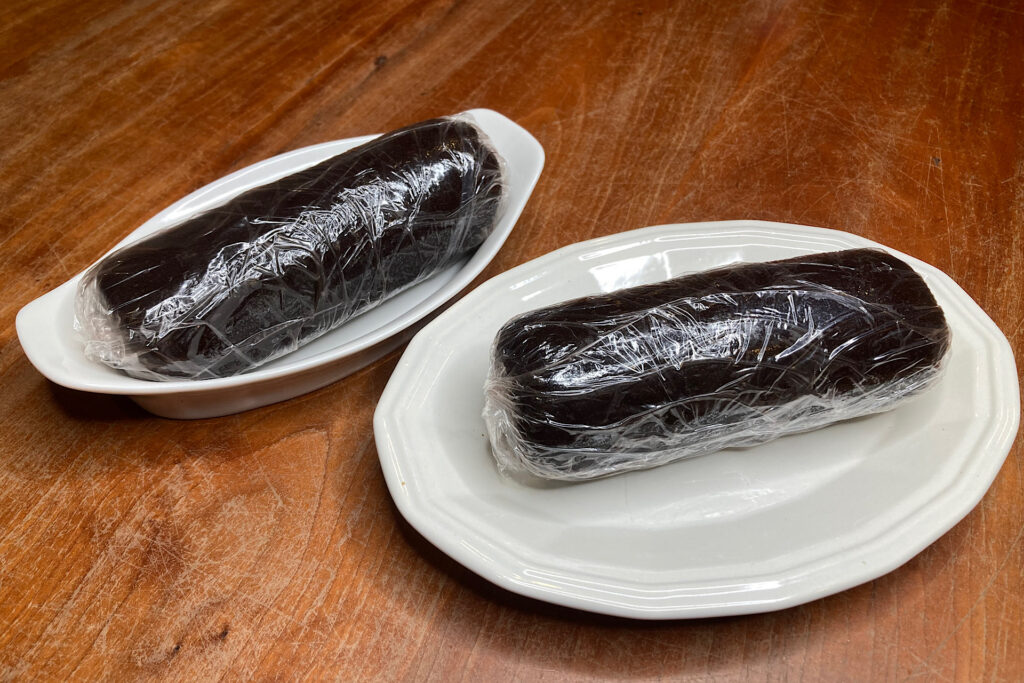
  • Using your hands, roll each half into a cylinder. Mine were approximately 1 3/4" diameter. Wrap them securely in plastic wrap and refrigerate at least 2 hours or overnight if you'd like.
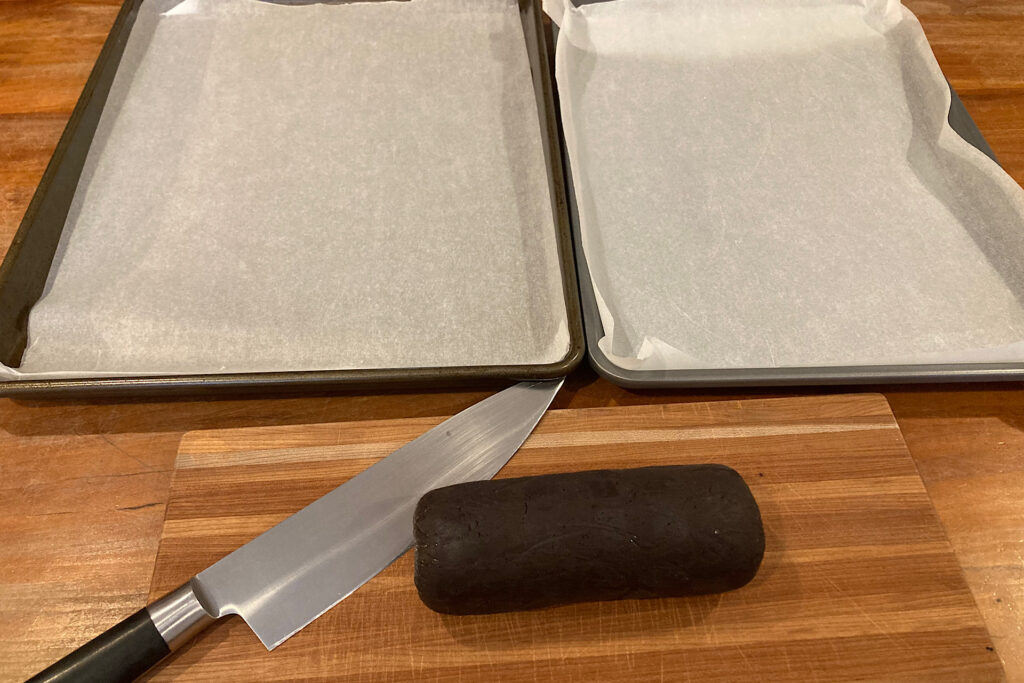
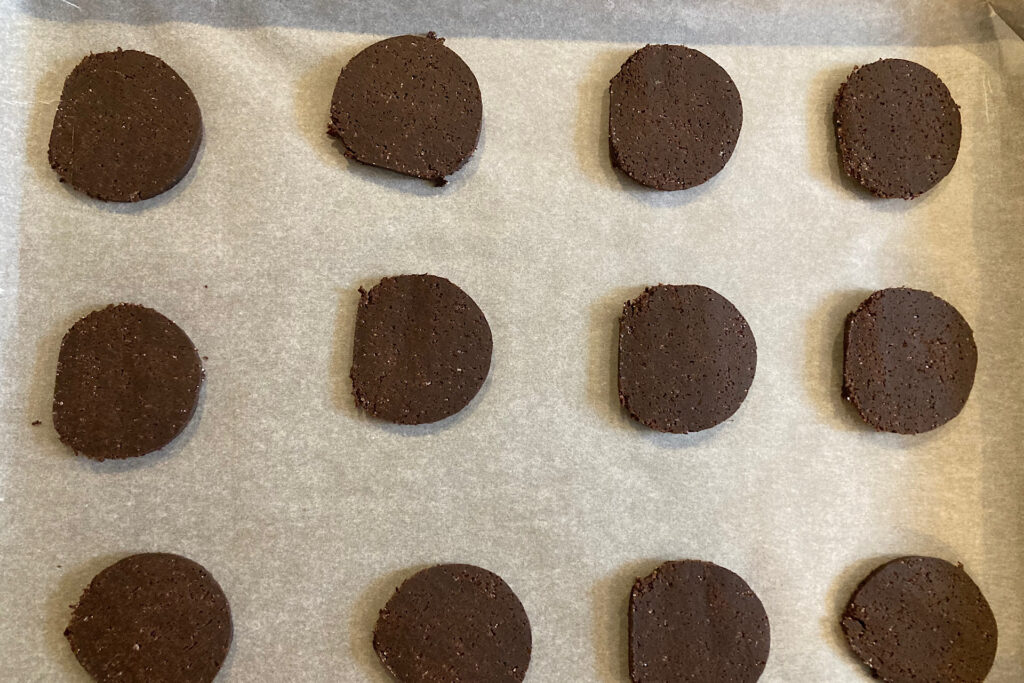
  • After refrigeration, remove the cylinders and slice each one into approximately 1/8" discs. The dough is very solid and slices easily with a sharp blade. Place the rounds on a baking sheet lined with parchment. My two cylinders made approx. 48 slices.
  • Place the baking sheets in a preheated 350 degree oven. Bake for 12 minutes. If you bake both sheets at the same time, rotate the sheets and switch racks half way through for even cooking. They are done when the discs are flat and there is no puffiness on the rounds.
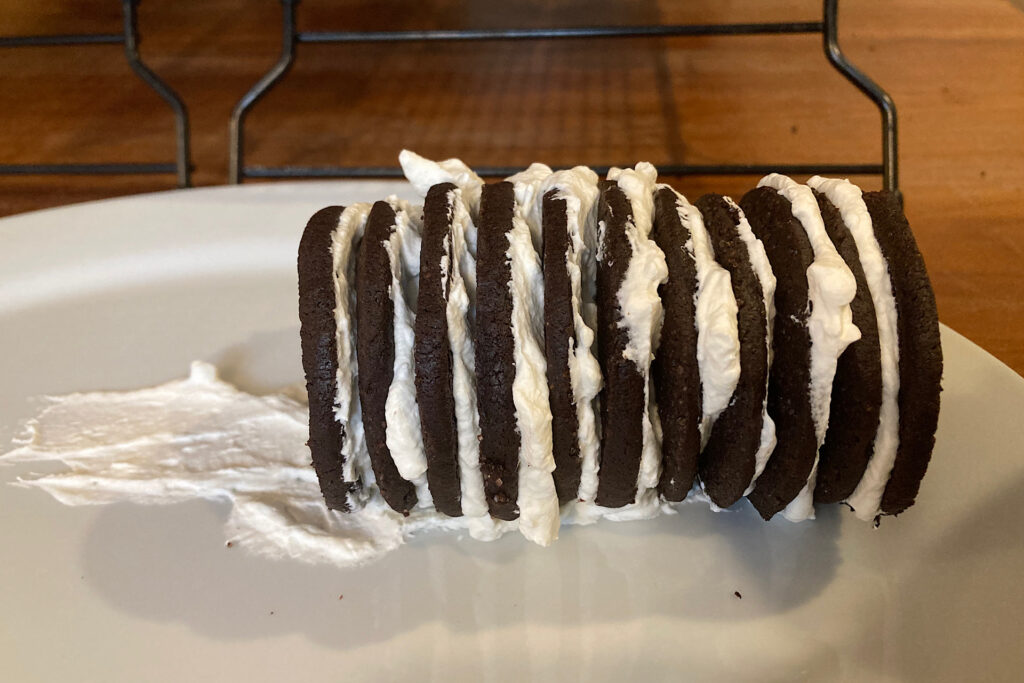
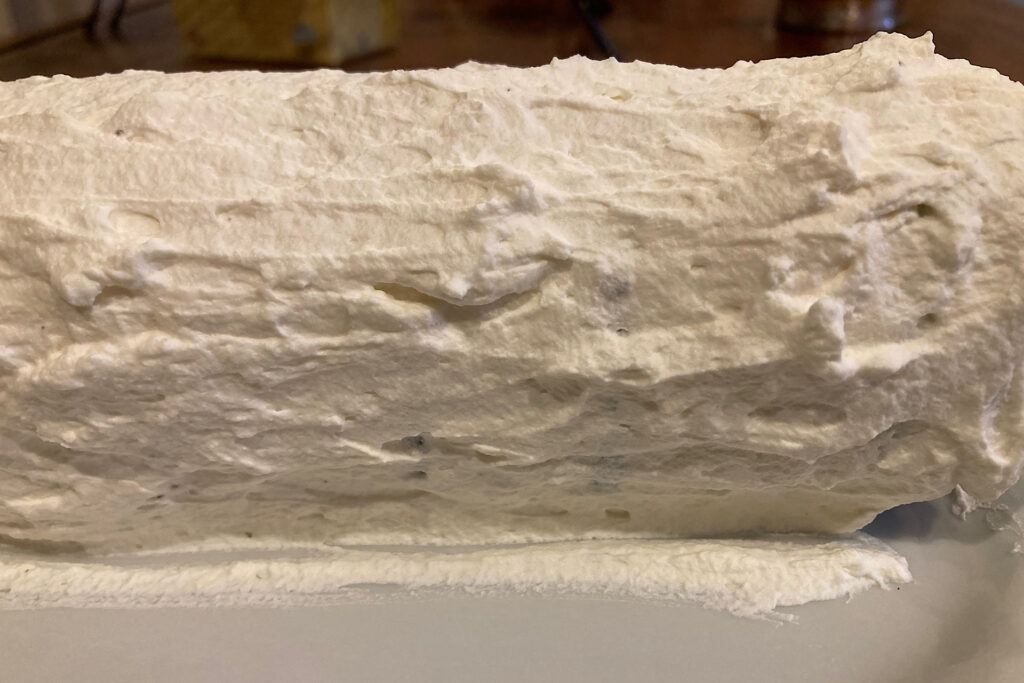
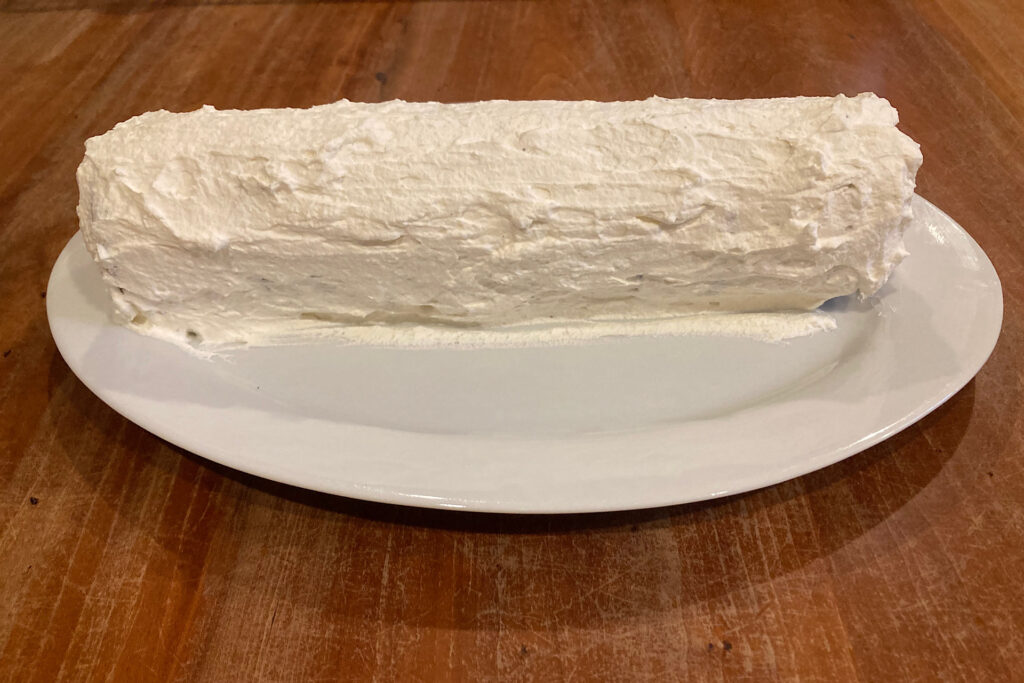
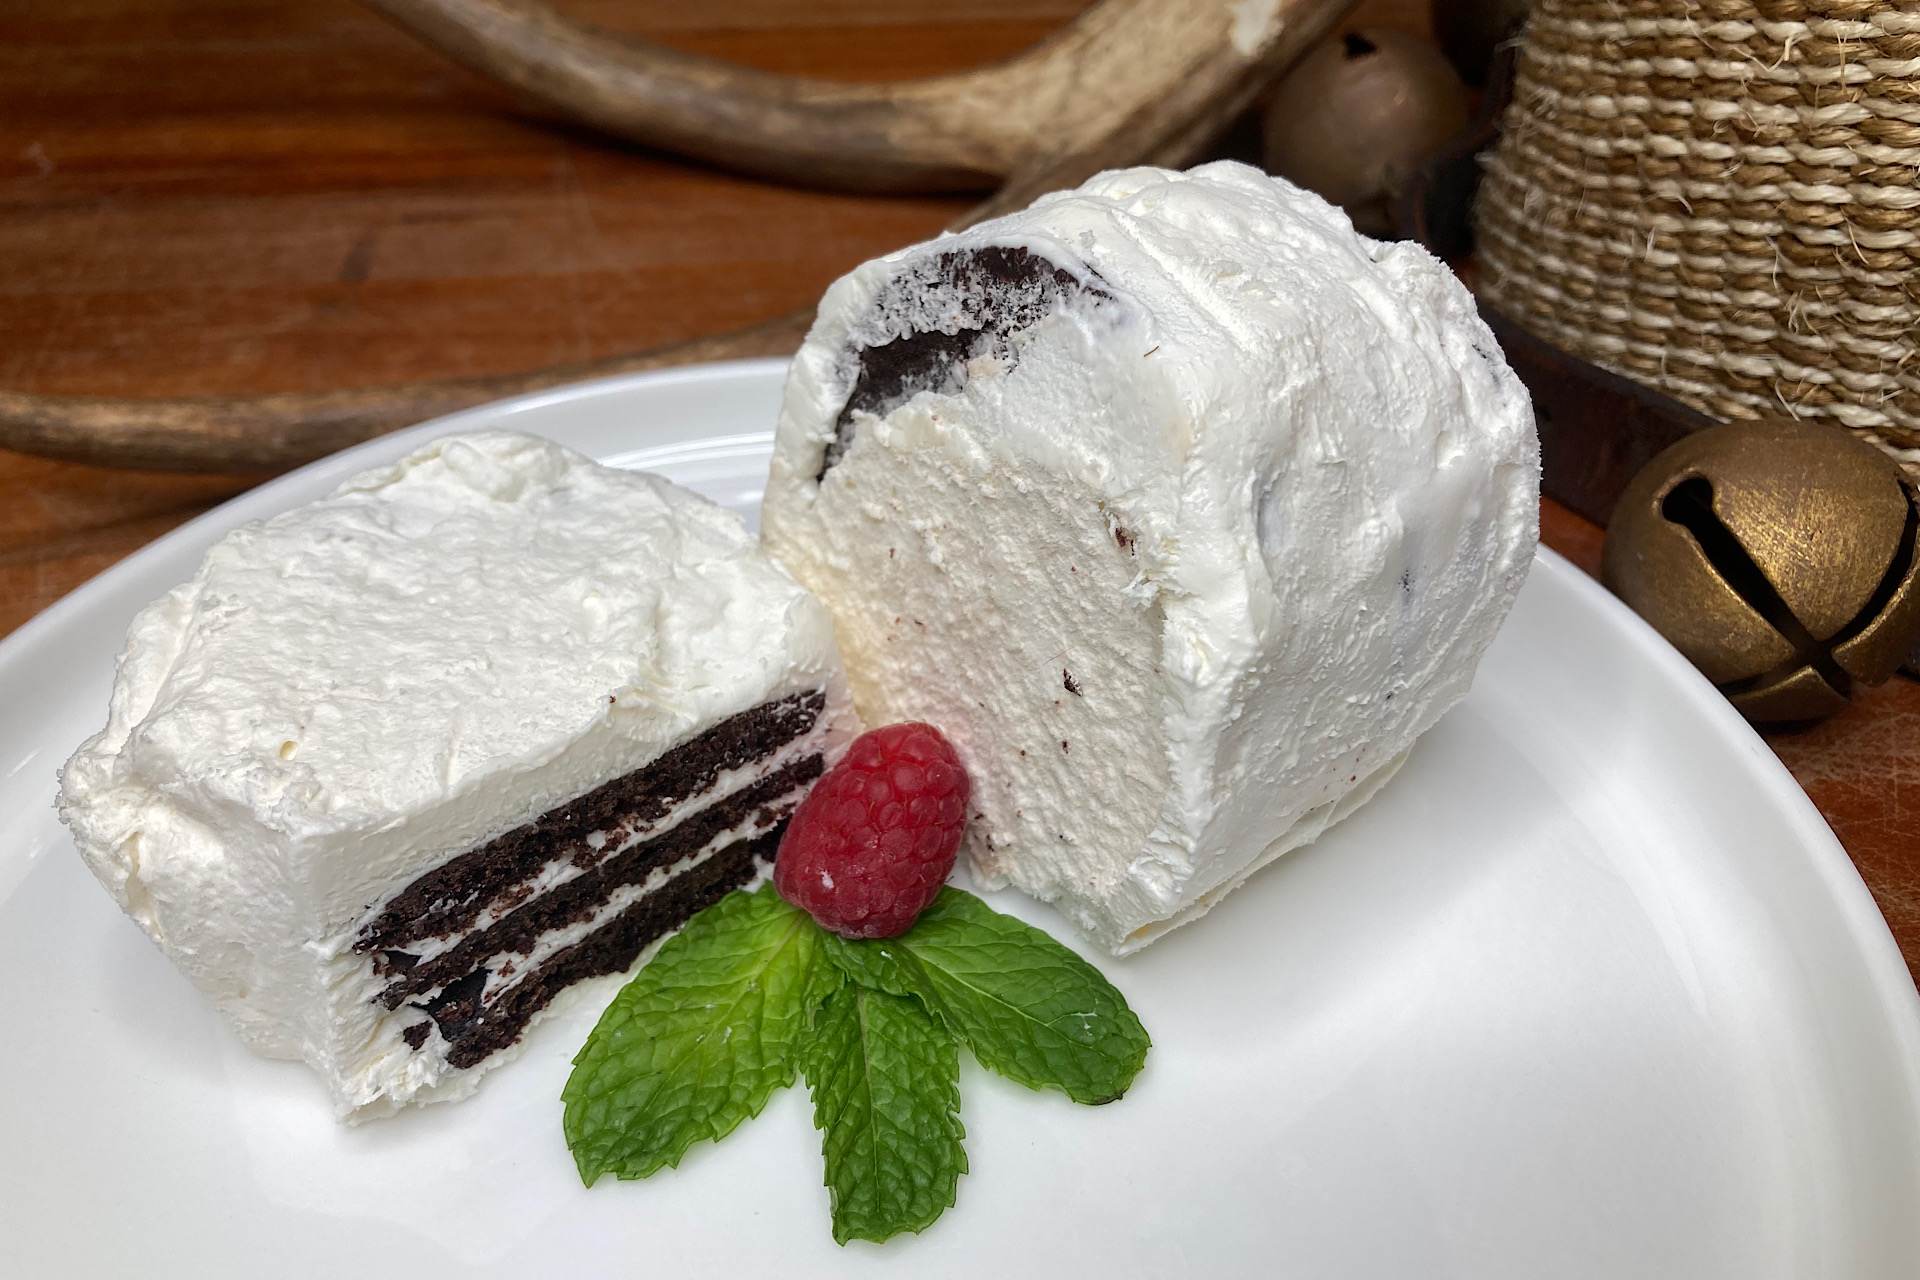
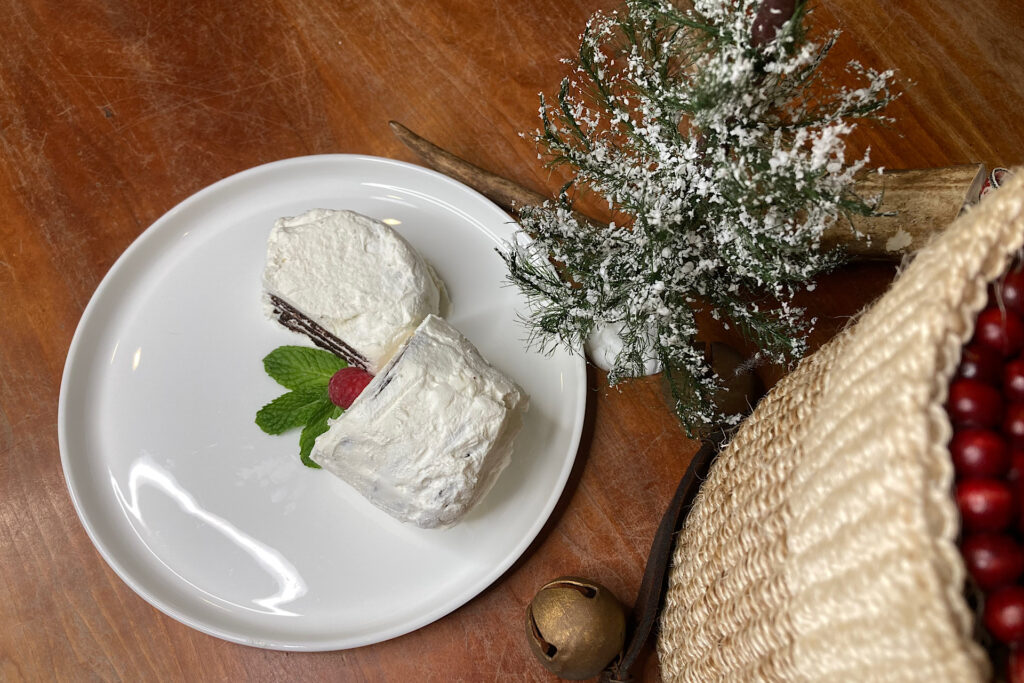
  • Place the baking sheets on a cooking rack for 5 minutes before removing the cookies with a spatula. This will firm them up and they will keep their shape. You may then remove the cookies from the baking pan and place them directly on the cooling rack. They will crisp up as they cool. Once cooled they are ready to be layered and covered with whipped cream.

Whipped Cream

  • This is a no-fuss, easy whipped cream recipe - and delicious! Place all the ingredients (heavy cream, confectioners sugar and vanilla) in the bowl of your mixer. I have a stand mixer - I used the wire whisk attachment and a high speed. Whip the cream until stiff peaks form and you are ready to layer and frost the wafers!

Assembly

  • Spread a bit of whipped cream on the serving tray's surface to line the cookies up on. Spread whipped cream between each cookie and sandwich them together in a line across the serving tray. Once you have formed a long cylinder, frost it with the remaining whipped cream. You can use a napkin or paper towel to clean up the tray surface to remove any cream around the edges to give it a clean line.

Freezing and Serving

  • Place the serving tray in the freezer, uncovered, until the whipped cream firms. then you can cover it with foil until ready to serve.
    Remove from the freezer approximately a half hour before serving so that the Chocolate Wafer Yule Log can soften.
Tags:

Leave a Reply

Your email address will not be published. Required fields are marked *

Recipe Rating