Skip to content
Home » DIY Vanilla Infusion/Extract

DIY Vanilla Infusion/Extract

There are three basic ingredients required to make DIY vanilla infusion/extract:  whole vanilla beans, liquor, and time.  Most resources recommend beginning with Madagascar vanilla beans and vodka.  There are a variety of beans and spirits to experiment with depending on your taste.

How to Choose a Vanilla Bean for Infusions & Extracts

The common species of commercial vanilla beans are as follows:   Planifolia, Tahitensis and Pompona.   Several varieties of beans fall within these families.  For instance, Madagascar beans belong to the Planifolia family.  Vanilla beans are typically grown in regions close to the equator.  Region-specific climate and soil conditions will affect their flavor profile.   Buttery, fruity or earthy are common terms associated with commercial beans.  Consider what you would prefer in your infusion.   The Madagascar bean, recommended for beginners, offers a classic vanilla extract taste.  Its flavor profile is buttery and creamy.

Vanilla Beans

Choosing a Grade of Vanilla Bean for Infusion/Extract

You will also choose a grade when selecting vanilla beans.  Grade A beans, also referred to as gourmet beans, will have a high moisture content (about 30%).  Additionally, Grade A beans are pliable, moist, and aromatic.  They are excellent for baking, as well as pastes and extracts.  Grade B beans are drier and more brittle than Grade A beans.  Their moisture content is approximately 20%.  They are, however, considered extract grade.

(Disclosure: Late Bloomer in Bakerville is a participant in the Amazon Services LLC Associates Program, an affiliate advertising program designed to provide a way for websites to earn advertising revenues by advertising and linking to Amazon.com )

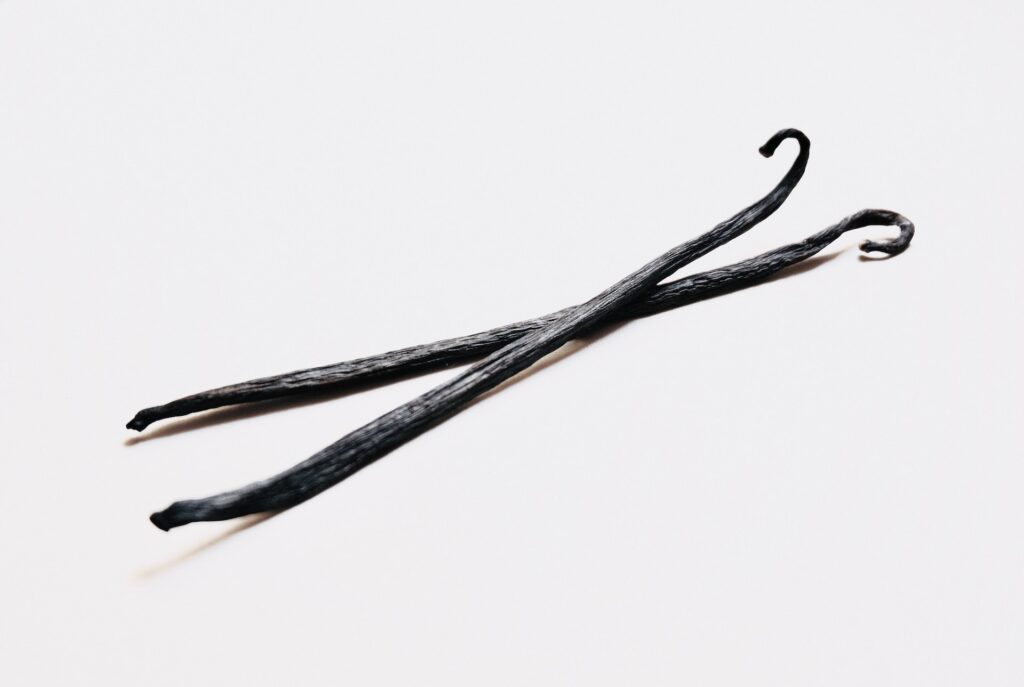
I chose Heart and Harvest Premium Madagascar Vanilla Beans for this DIY vanilla infusion/extract and was very pleased. This is a small business brand and a woman-owned company. They sustainably source their product and partner directly with women farmers in Madagascar whenever they can.

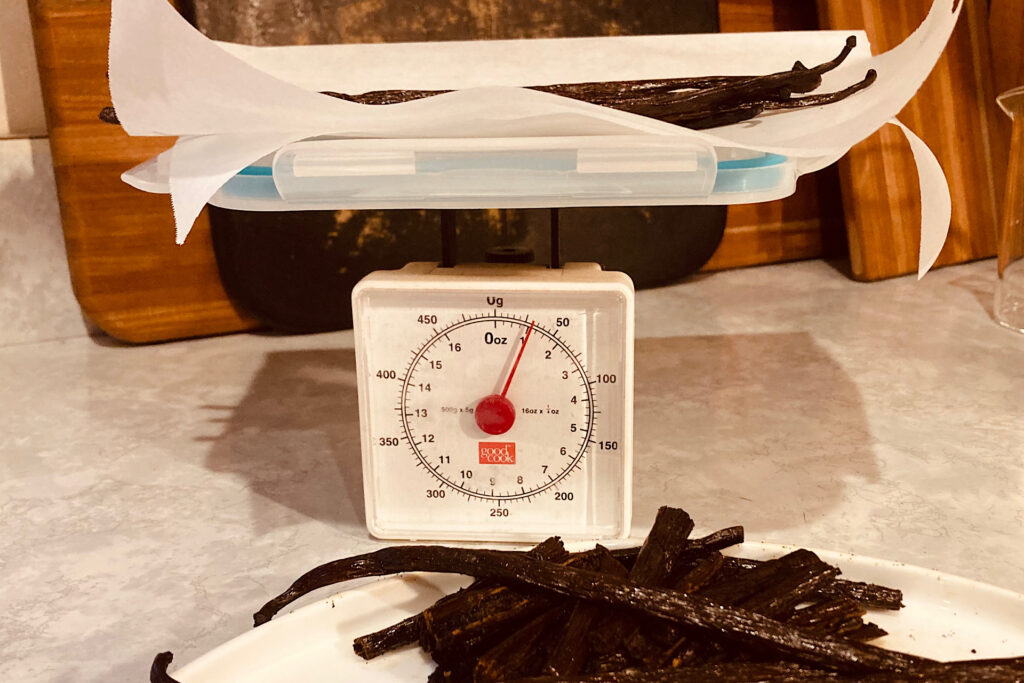
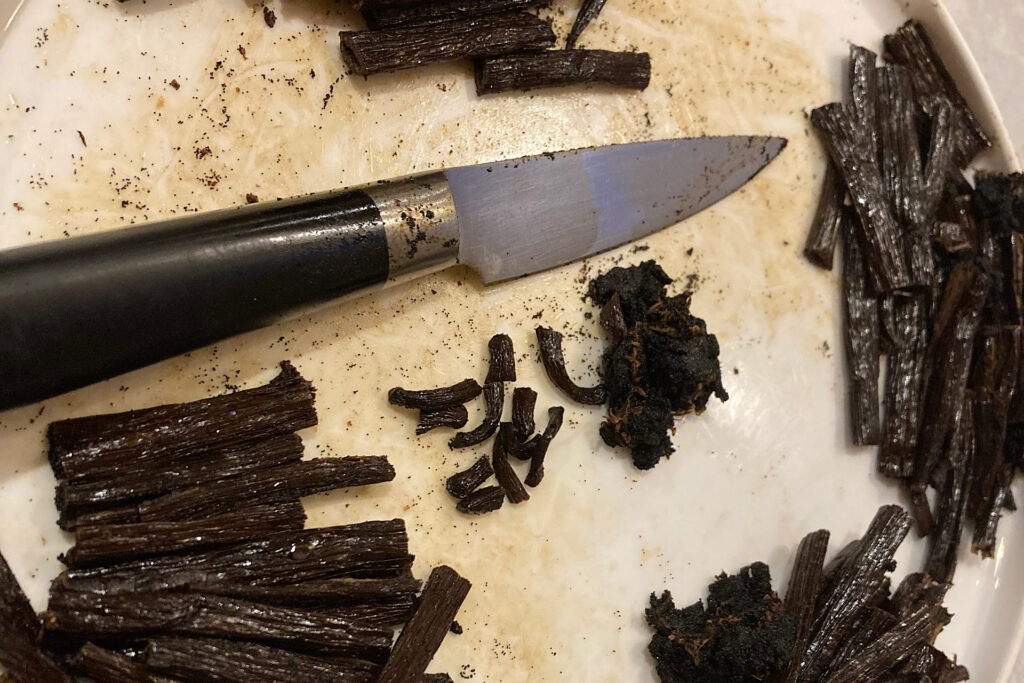
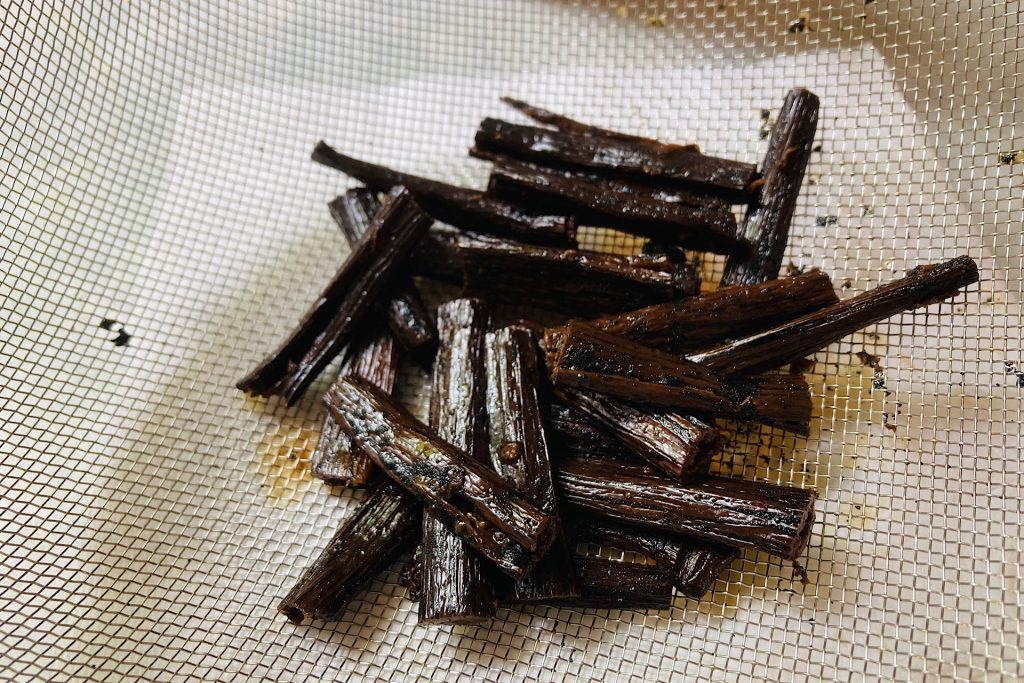
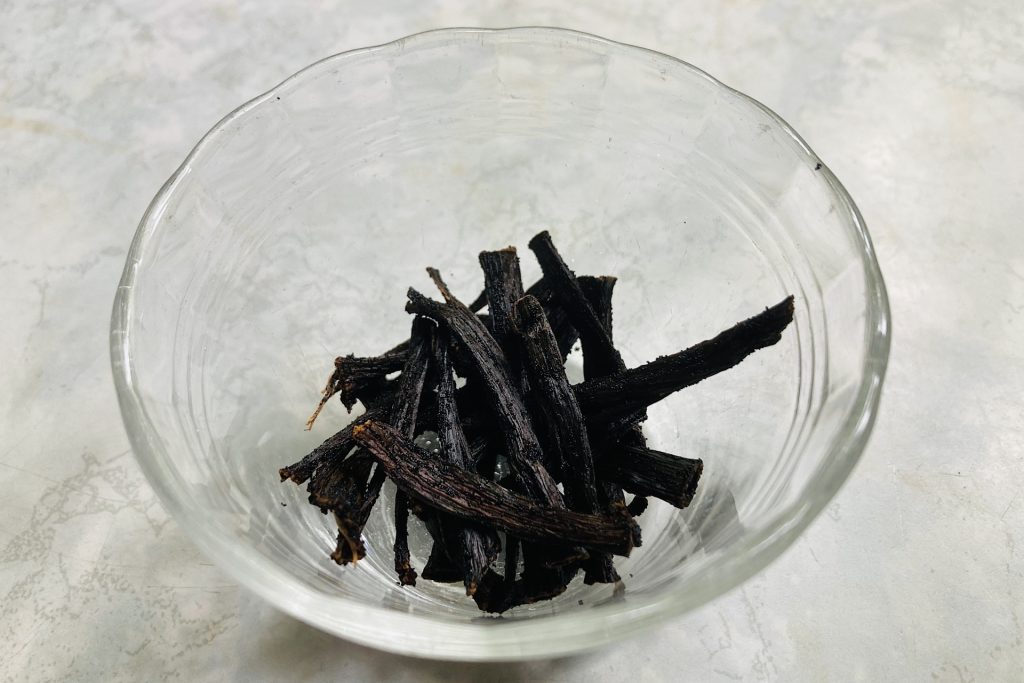
I ordered a 4 oz. package on Amazon and was curious to see if the packaging was included in the weight calculation.  I was pleasantly surprised to find that the beans themselves actually weighed more than the labeled 4 ounces.  The beans arrived in a resealable plastic-free pouch designed to keep light out and preserve freshness.  Moreover, they smelled amazing and were fresh and pliable.

Vanilla bean packaging closeup

Selecting a Spirit Base for DIY Vanilla Infusion/Extract

There are also several choices for the liquor used in extract.  Vodka is often recommended because it doesn’t overpower the taste of the vanilla bean.  Some recipes will advocate for rum (sweetness), bourbon (smokiness), or even grain alcohol.  If true vanilla flavor is your preference, vodka is an excellent choice.   It is as close to a tasteless base as you can get.  I selected Svedka vodka for this batch.  It is reasonably priced and received great reviews from my resources.

Vodka

Whatever your choice in liquor, the FDA recommends your base be at least 35% alcohol (70 proof).  Most extract resource material recommends 80 proof. The bean-to-alcohol ratio should be 1 ounce of vanilla bean to 8 ounces of alcohol.  This is an appropriate time to point out that the word “alcohol,” in this context, refers to drinkable liquor or spirits.  Isopropyl, rubbing, or denatured alcohol should never be an extract or infusion ingredient.

Equipment Needed for Making a DIY Vanilla Infusion/Extract

I’m happy to share the supply list with you for my extraction project:

I chose ingredients and equipment to yield four 8-ounce bottles of extract.  Any container you use should be glass with a tight-fitting lid.  You might choose a large-batch jar and divide it out into smaller portions later.  Adding beans to the liquor bottle itself is another option.  Regardless of the jar size, it is important to be mindful of the 8-oz. alcohol to 1-oz. bean ratio.  For example, if you use 16 ounces of alcohol, you will need to increase your bean weight to 2 ounces.

My container choice was:  Encheng 12 oz. Glass Bottles With Cork Lids.  After much research, I selected these as they came recommended by one of my resources.

Vodka bottle and equipment for DIY Vanilla Infusion/Extract

Additionally, you will need:

 
Equipment for DIY Vanilla Infusion/Extract

Cleaning / Sanitizing

It is difficult to find clear cleansing/sanitizing guidelines for jars and equipment.  Resources refer to “clean containers,” and recommend simply washing, rinsing, and drying before bottling.  I’ve read claims that the alcohol used in the extract process will act as a sanitizer.  Likewise, I’ve read information proving this untrue.

I felt more confident taking the cleansing process up a notch.  After washing the uncapped bottles with a bottle brush, I rinsed and set them in the rack of my water bath canner and boiled them for 10 minutes.  I removed them with a jar lifter and set them on a bottle rack to dry.  Meanwhile, I swished the corked caps for 30 seconds in 1Step No-Rinse Cleanser and set those to dry as well.  While the bottles cooled, I prepped the beans. 

Before filling the jars, I swirled a small amount of vodka around inside the bottle to coat the glass and corks.  I drained them and set them upright for filling.

Prepping Vanilla Beans for Infusion / Extraction

Vanillin flavor is not present in the exterior of the bean pod, but secreted in the lining and diffused in the oil that surrounds the seeds.  To expose that inner lining, I chose to cut the ends off each bean, slice it lengthwise, and cut it into smaller sections.

 A vanilla bean has two sides it can lay flat on.  If you slice down the middle of one of the long, flat sides, the bean will open, but eventually it will curl back in on itself.  If, instead, you slice along the thin fold on the edge of the bean, the flat sides will open like a book.  I used a sharp paring knife to do this with no problem. 

Sliced and chopped vanilla beans for DIY Vanilla Infusion/Extract

Once you have sliced the bean open, position your knife blade across the flayed bean at a 90-degree angle.  Scrape the caviar off the skin.  Save the end nibs, bean segments, and caviar.  If you throw any of these pieces away, you will have less than an ounce of bean.  If you add all pieces to the infusion, you will maintain the proper bean-to-alcohol ratio.

Some people prefer to leave the vanilla bean whole, cutting only the ends off.  This enables them to squeeze the caviar out of the beans later for use in baking or pastes.  I didn’t mind opening my beans and cutting them into pieces for better infusion.  I did leave one whole beam in each jar so I could experiment with squeezing the caviar out later.

Weighing vanilla beans for DIY Vanilla Infusion/Extract
Knife blade and vanilla bean
Vanilla bean caviar
Sliced vanilla beans and caviar

Bottling Vanilla Extract for Infusion

Drop pieces of vanilla into the glass bottle (include all end nibs and bits to maintain a full ounce of bean).  Place a funnel into the bottle neck and spoon the caviar scapings into the funnel.  Measure out 8 fluid ounces of vodka and pour it over the caviar.  I found this an easy way to wash the caviar into the jar without losing any of it.  It also keeps the capping area clean. 

Your vanilla beans should now be fully covered in alcohol.  If you kept the beans whole, they may be too tall to stay submerged.  They should be flexible enough to tie in a knot or bend them to fit.  It is equally important important that the beans stay covered in liquid for the entire extraction process.

After filling, wipe down the bottle neck and mouth.  You will want to ensure the corking area is clean and debris-free.  I used a clean paper towel soaked in vodka and then wiped them dry.  Insert the cork caps firmly.

Funnel and bottles for DIY Vanilla Infusion/Extraction
Freshly filled bottles for DIY Vanilla Infusion/Extract

Follow directions to adhere the shrink wrap covers.  I used a heat gun and it worked beautifully (but very quickly!). Let cool and give each bottle a shake to mix the contents.  Store bottles in a cool, dark location for the duration of the infusion process.

How Long Does it Take to Make a DIY Vanilla Infusion/Extract?

Here is where patience comes in.  A full infusion requires approximately 12 months to complete.  Depending on ingredient quality and the technique you use, extraction times are estimated anywhere from 90 days to a full year.  Your infusion will be richer the longer you wait. Also, the alcohol taste will also lessen over time allowing the vanilla flavor to come forward.  Once you have made your first batch, you can gauge how long it takes to finish, then schedule new batches accordingly.  

Vanilla extract bottles after filling

Once bottled, shake the containers daily for the first couple of weeks, and then once a week for the next month or so. 

Over the remainder of the infusion time, I give my bottles a shake as I pass by them in the cabinet. 

Shaken fresh bottles of DIY vanilla infusion/extraction

Some resources do not suggest shaking containers at all.  I believe it may be a matter of personal preference – it doesn’t appear you can mess it up.

Update:  Finished Infusion

I’m adding a quick update:  My bottles are finished after a 12-month infusion!  I’m looking forward to enjoying the rich, deep vanilla flavor.  I’ll share more as I experiment with different bean varieties!

Vanilla Extract - Finished Bottle

What Do You Do When the Extraction is Complete?

When complete, you may choose to leave the beans in the container if you’d like, just ensure that they remain covered with liquid.  If you prefer to remove the beans and sediment, you can strain the infusion through a coffee filter into a clean container.   (A pair of long tweezers will remove larger bean segments out of long neck bottles).  Once the vanilla beans are removed, however, understand that you are no longer extracting.  You may notice they have a somewhat slimy texture when taken out of the bottle; this is normal.   Some people recycle the beans and seeds by drying them for use in vanilla powders or sugars.  There are also extract “mother jars” that some people maintain indefinitely. 

I decided to remove the beans from my finished vanilla extract.  I started by making sure that the tools I was using were sanitary and fresh out of the dishwasher.  I used a mesh strainer, a funnel and a clean glass to empty the extract into.

Sieve

I started by opening the bottle and emptying the liquid through a sieve into a large-mouth glass.  Many of the beans stayed inside the bottle; but they were easy to shake out and remove.

vanilla beans in strainer
Funnel

Using a funnel, I then re-filled the original bottle.  I wasn’t concerned with leaving the fine debris, after removing all the vanilla bean pods.  Swirling the liquid in the bottle removed any debris clinging to the glass.  

vanilla beans in strainer

In the end, I saved the leftover vanilla beans to dry in the oven.  They can be ground up and combined with sugar for baking projects.

Resources:

Two resources I find very helpful for extract making are:

VanillaPura   

They have a store-front for purchasing supplies and a very helpful, supportive Facebook group devoted to making extracts. 

Vanilla bean and hot beverage

Clement Family Farms 

 Shane Clement bottles and sells his product.  He has a great informational youtube video on vanilla extract making.

Other Links:

If you would like other ideas for making natural products with spirits, you might enjoy this DIY:

Tags:

Leave a Reply

Your email address will not be published. Required fields are marked *